# Home
Welcome to the Let's Get Digital Knowledge Base
This is a resource designed to provide event organisers with information and support related to Let's Get Digital. The knowledge base contains a wide range of articles, tutorials, and other resources that can help you get the most out of our products.
Cover image
Get started
Start setting up your next successful event experience
{% columns %}
{% column %}
**Essentials**
* [Paid tickets](/adding-users-and-ticketing/paid-ticketing-with-stripe)
* [Branded apps](/in-person-event/application)
* [Registration forms](/adding-users-and-ticketing/registration-forms)
* [Exhibitor Portal](/event-contributor-portals/exhibitor-portal)
{% endcolumn %}
{% column %}
**Do things your way**
* [Custom badge design](/badge-printing/custom-badge)
* [Custom domain](/misc/virtual-platform/custom-domains)
* [API access](/adding-users-and-ticketing/integrations-and-api)
{% endcolumn %}
{% endcolumns %}
# App quick-start guide
Make real progress within 30 minutes! This page describes the quick steps you should take to launch a successful event app.
## 1. Log into your App
Even if your Branded App has not yet been published you can already log into your own app using the [**Let's Get Digital app**](https://lgd.events/639-letsgetdigital). Once you have downloaded the app you can login by clicking on the QR scanner found next to the login button and scanning the your personal QR code found on the Overview page of the Admin panel.
Changes made in the Admin panel will be directly reflected in the App.
## 2. Setup your Navigation Menu
We have pre-setup a navigation menu for your app according to our [best practices](https://knowledge-base.letsgetdigital.com/getting-started/pages/Xn52c7o7cU5hkzLbDgWy#id-1.-navigation-layout) so you shouldn't need to do much work.
You can make adjustments to your navigation menu using the following article: [The Navigation Menu (App)](/the-admin-panel/navigation/application/the-navigation-menu)
## 3. Import your Companies
Why not already create your Companies/Exhibitors/Sponsors/Partners? This is an easy starting point and can really help make the structure of your app feel complete.
If you use our [import tool](/the-admin-panel/settings/importer#how-to-import-data) alongwith our 'Exhibitor' Excel template you can quickly import this data into the app.
{% file src="/files/ltDcLifAU4OwKi9tFzml" %}
## 4. Import your Program
Do already know your program? Again here you can already make simple progress to your app and start exploring how your program can be utilised using the app. Use our 'Program' Excel template to get your program ready to import into the system.
{% file src="/files/ltDcLifAU4OwKi9tFzml" %}
## 5. Adjust the Branding of your app
Quickly make the app start to feel like it is meant for your event! Here are some simple but effective changes:
#### Adjust the Branding colours
Go to Settings -> Branding Colours -> Adjust the top 3 options:
* Starting colour of the gradient
* End colour of the gradient
* Base colour
#### Adjust the Branding images
Set all the default branding images to your event logo. This will ensure any unfilled conent will not be empty.
#### Design your Branded App design
Via the Admin Panel, go to Settings -> App design and you will be able to review and make changes to your Branded App design. Once you are happy with the design click on Approve design and we will take care of the rest!
## 6. Setup your mails
Get prepared to onboard your users into the app! You will invite users to the app using our mail system. This will allow you to provide your users with everything they need to get the most value out of your app.
Already create some draft emails that you can use to schedule your onboarding of users into the system.
**Wow! That's easy, right? And the best thing is that everything can be changed by you 24/7 whenever you want to!**
# Virtual Event quick-start guide
Get started, by yourself, in less than 30 minutes! This page describes the quick steps you should take to launch a successful virtual platform.
## 1. Get logged into your environment
Logging into your environment can be done in 2 ways; access the virtual event [via phone](https://knowledge-base.letsgetdigital.com/the-admin-panel/virtual-event/logging-in) or access the virtual event [via desktop ](https://knowledge-base.letsgetdigital.com/the-admin-panel/virtual-event/logging-in)in LGD.
## 2. Fill the navigation menu with the modules you want to use
Go to the navigation menu part of the Admin Panel and add all modules you want to use for the event. If you want to see the result; go to the virtual platform and reload the page. To give you some inspiration, use the[ best practices manual](https://app.gitbook.com/o/-Lnut9LElnJrFCEIBWvQ/s/-M5LNCGpK5lyymcFZU4V/~/changes/2138/lets-get-started/virtual-platform-30min-quickstart/virtual-platform-best-practices).
## 3. Complete the data using the Knowledge Base
For the rest of the knowledge base, you can simply search for each module how the settings can be altered, and what it can do.
To improve the speed of completing the data you can use bulk-importing for some of the data (attendees, companies, sessions, etc.) You can find more information in [this article](https://knowledge-base.letsgetdigital.com/the-admin-panel/settings/import-data).
After you have completed the virtual platform, and you like the result, contact support for a final event check!
**WOW! That's easy, right? And the best thing is that everything can be changed by you 24/7 whenever you want to!**
# Virtual event- Best Practices
Use the following best practices to get the most out of your event through the virtual platform!
### 1. Navigation Items
We advise structuring your navigation-items as follows:
* Virtual event (menu)
* My Profile
* Programme
* Attendees
* Speakers
* Companies
* Networking Tables
* Appointments
* Social Wall
* Toilet
* Virtual event (lobby tiles)
* Programme
* Connection Center
* Toilet
* Advertisements
{% hint style="info" %}
**Tip:** If you do not have any exhibitors/companies at your event, you can add the social wall to one of the lobby tiles instead.
{% endhint %}
### 2. Social Wall
First, enable the social wall on the top bar of the virtual platform. We advise placing an unpinned message from the organisation inviting the attendees to make their first post, and to schedule 2 to 3 posts from the organisation per day.
Example:
Dear **XXX-**attendee**,**
We are looking forward to the event! From where are you attending the event?
Let us know using this social feed & start connecting with others.
Regards,
Team **XXX**
{% hint style="success" %}
**Tip**: If you really want to speed-up the Social Feed; it's recommended that one of the collegues places the first reply with a picture!
*"Looking forward to the event from my home office in the Netherlands!"*
{% endhint %}
### 3. Scheduled E-mails
Make sure you have scheduled the following e-mails in your onboarding flow
| Receivers | Login state | When | Type mail |
| ------------------------------------- | ---------------------------- | ------------------------------------ | -------------------------------------- |
| Attendees | Everyone | 1 week before the event | Confirmation of event |
| Attendees | Everyone | 1 day before the event | Login details |
| Attendees | People who did not login yet | 60 minutes after start of the event | The event starts reminder (with stats) |
| Everyone | Everyone | 15 minutes before the start of event | The event starts |
| Everyone | People who did login | 2 hours after event stops | Sent an overview of all leads |
| Exhibitors/authors | Everyone | 2 weeks before the event start | Early access (exhibitors) |
| Exhibitors/authors | People who did not login yet | 3 days before the event start | Early access reminder (exhibitor) |
| Speakers and moderators Webinar Samba | Everyone | 2 weeks before the event start | Session host instructions |
| Speakers | People who did not login yet | 1 week before the event start | Early access (speakers) |
| Speakers | People who did not login yet | 3 days before the event starts | Early access reminder (speakers) |
### 4. Speaker Training
Ensure your speakers are well-acquainted with the LGD virtual platform by scheduling a speaker training or dry run session approximately two weeks prior to the event. Following the session, provide them with any necessary instructions, including details on how to log into their respective sessions, if applicable. This proactive approach will contribute to a smoother and more confident speaker experience during the event.
### 5. NPS/Feedback
* Set a moment to sent out the NPS push message about the event. (1 hour before the event stops)
* Ask 1 customize feedback question, for example about the virtual platform. (2 hours before the event stops)
* Enable session feedback push notifications of the sessions if more info is needed
### 6. Push Messages
Warm the audience, with some scheduled push messages.
| Moment | Content Example |
| ------------------------------------------------- | ---------------------------------------------------------------------------------------------------------------------------------------------------------------------------------------------------------------------------------------------------------------------------------------------------------------------- |
| 5 minutes before start of first session. | 🚀 Welcome to **\[Event Name]**! The stage is set, and we're about to kick off an incredible journey together. 🌟 Get ready for a dynamic lineup of speakers, engaging discussions, and networking opportunities. 🤝 Dive into the future of **\[event theme]** with us! Click in now and let the excitement begin. 🎉 |
| 5 minutes before the start of the second session. | 💬 Do not forget to ask your questions in the Q\&A of the session. Let’s make your questions part of the discussion. |
| Start of the break | ☕🥤 Enjoy your break, grab yourself a cup of coffee, visit one of the networking tables or the digital toilet. The next session will start in **XXX** minutes. |
| 5 minutes before the end of the break | ❗Attention! In approximately 5 minutes, we will continue with the program. |
| End of the event | Thank you for your presence at **\[EVENT NAME]** We hope you gained insights and found inspiration during this edition. 📢 Would you like to share that you attended on social media? Please do! Don’t forget to include **#EVENTNAME** in your post. Thank you in advance and have a pleasant rest of the day! |
### 7. WOW-Features
* Ensure the toilet feature is enabled.
* Set-up virtual influencers and load the preset messages for event join/leave and session join/leave, or write your own messages.
* Add your video for the shake up feature and test it before the event.
### 8. Lobby Content
Make sure your lobby content is set up.
{% hint style="success" %}
**Tip:** Most of our clients set up a live stream via Vimeo or Youtube and use this to welcome the attendees and play along with the shake up feature.
*"What is happening?" "WOW what happened? Well I am awake now."*
Other options are to add an image video or introduction video (possibly playing in a loop) to the lobby tile or set up a livestream without a host with virtual studio software (OBS), including several scenes (switching between pre-recorded videos and images during the day).
{% endhint %}
### 9. Matchmaking
* Set-up 5 to max 10 matchmaking tags
* Add 2 to 3 matchmaking rounds
* Set up the advanced network carousel
### 10. Appointments
In case there are exhibitors, use the generated timeslots for companies. Also, manually add your appointment slots for attendees to make appointments with each other.
### 11. Content
Make sure that all of your content (exhibitors, users, programme) is complete with the right data and filled images. We advise you to give exhibitors early access so that they can complete the company booths themselves in the virtual platform.
### 12. Managing users.
In the admin panel, you can add users to your virtual event in several ways: manually, through a registration form, or by importing user data. [This ](/the-admin-panel/users)article provides more information about users. If you need to deny someone access to the virtual event, you can delete their profile, ensuring they are no longer able to log in.
# Admin panel access
Grant colleagues access to the Admin Panel by adding them as organisers. Each organiser receives their own login, making it easy to collaborate securely on your event.
If different team members require different levels of access, we recommend creating **Admin roles** before adding new organisers. For example, you could create a role for your marketing team that allows access to branding and emails without giving access to users, registrations, the programme, or other areas of the Admin Panel.
Learn more in [**Admin roles**](/getting-started/admin-panel-access/admin-roles).
#### Add a new organiser
Follow these steps to add a colleague as an organiser:
1. Log in to the **Admin Panel**.
2. Go to **Users → Organisers**.
3. Click **+ New organiser**.
4. Enter the organiser's:
* First name
* Last name
* Email address
5. Click **Save changes**.
6. *(Optional)* If you have created **Admin roles**, open the organiser's profile, go to the **Settings** tab, select the appropriate [**Admin role**](/getting-started/admin-panel-access/admin-roles), and click **Save changes** again.
The organiser will automatically receive an email containing a link to log in to the Admin Panel.
{% hint style="info" %}
**Tip:** If you're using [Admin roles](/getting-started/admin-panel-access/admin-roles), we recommend creating them before adding new organisers so you can assign the correct permissions as soon as the organiser has been created.
{% endhint %}
# Admin roles
Admin roles allow you to control which parts of the Admin Panel organisers can access. Instead of giving every organiser full access, you can create roles with specific permissions and assign them to the appropriate team members.
For example, you could create a **Marketing** role that allows access to branding and emails while preventing access to users, registrations, or the programme.
{% hint style="info" %}
**Tip:** We recommend creating your Admin roles before adding new organisers. Once an organiser has been created, you can assign the appropriate role from the **Settings** tab of their profile. See [**Admin Panel access**](/getting-started/admin-panel-access) for more information.
{% endhint %}
### Create an Admin role
Follow these steps to create a new Admin role:
1. Log in to the **Admin Panel**.
2. Go to **Settings → Admin roles**.
3. Click **+ New role**.
4. Enter a name for the role.
5. Open the **Permissions** tab.
6. Configure the required permissions.
7. Click **Save changes**.
Your new Admin role is now available to assign to organisers.
### Configure permissions
Permissions are organised into categories such as **Users**, **Content**, **Communication**, and **Settings**.
For each category, you can choose one of the following access levels:
* **Full access** – The organiser can view and make changes.
* **View only** – The organiser can view information but cannot make changes.
* **No access** – The organiser cannot access that section of the Admin Panel.
Some categories contain individual permissions. Expand a category to override the default access level for specific features where required.
You can also use **Set all to full access** or **Set all to no access** to quickly configure a role before making individual adjustments.
### Assign an Admin role
Once an Admin role has been created:
1. Go to **Users → Organisers**.
2. Open the organiser's profile.
3. Select the **Settings** tab.
4. Choose the appropriate **Admin role**.
5. Click **Save changes**.
The organiser's permissions are applied immediately.
# Global login
A global admin account is the single login you use to reach the Let's Get Digital admin panel. You sign in once at the portal and get to all of your events from one place — and if you manage more than one, you switch between them from a single overview instead of logging in to each separately.
{% hint style="info" %}
### Note
The portal interface is currently available in English only.
{% endhint %}
## Sign in
Go to [**live.letsgetdigital.com**](https://live.letsgetdigital.com/). The sign-in page offers three ways to sign in — pick the one that suits you.
The Let's Get Digital login page with its 3 default login methods.
{% tabs %}
{% tab title="Email one-time code" %}
{% stepper %}
{% step %}
#### Enter your email
Type your email address, then click **"Sign in"**.
{% endstep %}
{% step %}
#### Open the login code email
We email you a message titled **"Your login code"** containing a **6-digit code**.
{% endstep %}
{% step %}
#### Enter the code
Type the code on the next screen to finish signing in. You can also click the one-click **"Sign in"** button in the email instead.
{% endstep %}
{% endstepper %}
{% hint style="warning" %}
### Warning
The one-click **"Sign in"** button in the email only works in the browser you started signing in from. If you opened the email on a different device, type the 6-digit code into the original browser instead. The code expires after 15 minutes.
{% endhint %}
{% endtab %}
{% tab title="Passkey" %}
If your browser and device support passkeys, the sign-in page shows a **"Continue with passkey"** button. Click it to sign in with your device's fingerprint, face, or PIN — no code needed.
You can set up a passkey at any time from your **Account** page. See [Your account page](#your-account-page) below.
{% endtab %}
{% tab title="Google" %}
Click **"Continue with Google"** to sign in with your Google account.
{% endtab %}
{% endtabs %}
I didn't get my one-time code
* Check your spam or junk folder for the email titled **"Your login code"**.
* Confirm you entered the right address. If not, use the **"Use a different email"** link on the code screen to start again.
* The code expires after 15 minutes — if it's older than that, start the sign-in again to get a fresh code.
* The one-click **"Sign in"** button in the email only works in the browser you began signing in from. If you opened the email elsewhere, type the 6-digit code into the original browser.
My browser doesn't support passkeys
The **"Continue with passkey"** button only appears when your browser and device support passkeys. If you don't see it, sign in with the email one-time code or with Google instead. You can register a passkey later from your **Account** page once you're using a supported browser.
## Keep your account secure
Your global admin account has several built-in protections:
* **Session timeout:** your session expires after 2 hours of inactivity.
* **Re-verification:** you're asked to verify your identity again after 24 hours.
* **Lockout protection:** after 5 failed sign-in attempts within 60 minutes, your account is locked. We email you an **"Unlock your account"** message with a link to unlock it.
* **Code binding:** each login code is tied to the browser session that started the sign-in, so a code can't be used elsewhere.
{% hint style="info" %}
### Note
After entering your email, you'll see a neutral message — we never reveal whether an account exists. This is intentional: it protects your privacy and stops anyone probing which email addresses are registered.
{% endhint %}
## The Environments overview
Right after you sign in, you land on the **Environments** overview. This lists every event you can manage.
Global Login event overview
**Find an environment**
* Use the **search box** to find an event by name.
* Use the filter chips **"All"**, **"Upcoming"**, and **"New"** to narrow the list.
**How environments are shown**
| Type | How it appears |
| -------------------- | --------------------------------------------------------------------------------------- |
| **Container event** | A parent card with a **"Master"** badge, with its child events **indented** beneath it. |
| **Standalone event** | A separate, flat card. |
| **Newly linked** | Marked with a red **"New"** badge. |
Each environment shows its ID, type (Hybrid, In-person, Online, etc.), and the event start date.
To enter an event, click the **"→ arrow"** on its card. This drops you straight into that event's normal admin panel.
If you see one of these messages, there's nothing to switch into yet:
* **"You are not linked to any environments yet."** — no events are linked to your account.
* **"No environments match your filters."** — adjust your search or filter selection.
## Switching to another environment
When you're already inside an event, you can jump to a different one without logging out.
{% stepper %}
{% step %}
#### Open the environment switcher
In the admin sidebar, click **"Switch environment"** to return to the **Environments** overview. A **red dot** appears next to this item when a new environment has been linked to your account.
Switching tool is found at bottom of menu.
{% endstep %}
{% step %}
#### Find the environment
Use the **search box** or the **"All"** / **"Upcoming"** / **"New"** filter chips to locate the event you want.
{% endstep %}
{% step %}
#### Open it
Click the **"→ arrow"** on the event's card to enter its admin panel.
{% endstep %}
{% step %}
#### Complete 2FA if prompted
If that environment has two-factor authentication (2FA) set up for your account, enter your 2FA code before you go in.
{% endstep %}
{% endstepper %}
{% hint style="warning" %}
### Important
Per-environment 2FA still applies — your global login does not replace it.
{% endhint %}
## Your account page
Open the **Account** page from the portal to view your details and manage passkeys.
**Profile** shows your **First name**, **Last name**, and **Email**. These are read-only and can't be edited here.
**Passkeys** let you sign in to Let's Get Digital without a password or OTP code using your device's fingerprint scanner, faceID (or equivalent), or PIN. Click **"Manage passkeys"** to register a new passkey or manage existing ones.
## How environments get linked to your account
You don't need to accept or request events — linking happens automatically:
* Existing admins were linked to their events by a one-time migration.
* Whenever you're added as an admin to any event, you're automatically linked to your global account by email, and that event appears in your **Environments** list with no manual accept step.
Newly linked environments are highlighted with the red **"New"** badge, and the red dot next to **"Switch environment"**, so you can spot them at a glance.
## Signing in from a single event's login page
If you open an individual event's admin login page, you'll see a "Go to global login" button that takes you to the portal to sign in. Admin events no longer use a separate per-environment password — global login has replaced it.
If your organisation has set up single sign-on (SSO) on that environment, you'll see your identity provider's sign-in button instead of — or alongside — the "Go to global login" button, depending on the environment's login mode. See [Single sign-on (SSO)](/accounts-and-security/single-sign-on-sso).
## Related
{% content-ref url="/pages/01fe1beeec92e407839c8f04fd9165312676d954" %}
[Single sign-on (SSO)](/accounts-and-security/single-sign-on-sso)
{% endcontent-ref %}
# Single sign-on (SSO)
Single sign-on (SSO) lets your team sign in to a Let's Get Digital admin environment using your own organisation's identity provider — **Microsoft Entra ID,** **SURFconext** or **Google** — instead of (or alongside) the normal Global login. This article explains what the admin sees on the login page, how SSO is set up, and how access is controlled per environment.
{% hint style="info" %}
### Note
This is **Phase 1**: SSO covers signing in to an individual admin environment. There is currently no SSO entry point at the Global login page itself — see [Where SSO does not apply yet](#where-sso-does-not-apply-yet).
{% endhint %}
## How SSO is organised
There are two levels to SSO, and it helps to keep them separate:
| Level | What lives here | Who manages it |
| -------------------------- | ---------------------------------------------------------------------------------------------------------------------------------------------------------------------- | ----------------------------------- |
| **Organisation (company)** | The SSO provider connection: which provider (Entra ID or Google), and its credentials. **One configuration is shared across all of that organisation's environments.** | Let's Get Digital staff (see below) |
| **Environment** | The *login mode* for each individual environment: Global login, Global login + SSO, or SSO only. | Let's Get Digital staff |
Because the provider configuration is held once at the organisation level and reused by every linked environment, one change affects every environment under that organisation at the same time.
{% hint style="warning" %}
### Important
**SSO configuration is currently set up by Let's Get Digital staff, not self-service.** As the organiser you hold your identity provider's details (Client ID, Client secret, Tenant/Directory ID). To enable SSO you provide these to Let's Get Digital, who enter them and link your environments. You cannot configure SSO yourself from the admin panel in Phase 1.
{% endhint %}
## What the admin sees on the login page
What appears on an environment's admin login page depends on that environment's login mode.
* **Global login + single sign-on** — the page shows a **"Sign in with Microsoft Entra ID"** and/or **"Sign in with Google"** button, an **"or"** divider, and a **"Go to global login"** button.
* **Single sign-on only** — the page shows only the SSO button(s) under the heading **"Sign In"** with the subtitle *"Sign in to continue to the admin panel."* There is no route to Global login from this page.
* **Global login** (no SSO) — the page shows only the **"Go to global login"** button.
{% hint style="info" %}
### Note
The admin login page never asks for a username and password directly. The **"Go to global login"** button takes you to the Global login page, where you sign in with your Global login method (one-time code, passkey, or Google). To learn more about Global login, [click here](/accounts-and-security/global-login).
{% endhint %}
### Signing in with SSO
1. On the environment's admin login page, click the appropriate button, e.g. **"Sign in with Microsoft Entra ID"** or **"Sign in with Google"**.
2. You are sent to your identity provider to authenticate (and approve, if prompted).
3. Your provider sends you back to the environment and you are signed in.
If sign-in fails, you are returned to the same admin login page with an error shown inline — you are not bounced around or left on a blank error page.
## How a user is matched
SSO does **not** create new accounts. Sign-in is matched on the **email address** your identity provider returns:
* The email must be **verified** by the provider. For Google this uses the provider's `email_verified` claim; for Entra ID a returned email is treated as verified.
* That email must already belong to an **admin user in that environment**. If the email is unknown, or the account is not an admin, sign-in is denied with: *"Your account is not authorised to access this environment."*
On a first successful sign-in, the user's **first and last name** are filled in from the provider **only if they are currently empty** — existing names are never overwritten.
{% hint style="info" %}
### Note
**Job title is not synced.** Only email and name are used. Job title is not part of the sign-in claims for either Microsoft or Google, so it cannot be carried across — even if it is set in Entra ID or Google.
{% endhint %}
## Setting up a provider
Your Let's Get Digital event consultant sets up the SSO connection for you. Your part is to\
create an app registration in your own identity provider (Entra ID or Google) and hand over\
its details — here's what's involved.
{% hint style="warning" %}
### Important
**Entra ID — claim setup matters.** For first and last name to come through cleanly on Entra ID, the app registration should expose `email`, `given_name` and `family_name` as optional claims (Token configuration). Without them, the user's name is guessed by splitting their Entra ID display name on first sign-in.
{% endhint %}
### Add providers
For each provider you're using, gather these details from your app registration and share\
them with your event consultant:
| Detail | Notes |
| -------------------------- | --------------------------------------------------------------------------------------------------------------------------------------------------------------- |
| **Provider** | Entra ID or Google (read-only once saved) |
| **Client ID** | From the app registration |
| **Client secret** | From your app registration. Treat it like a password — keep it secure. |
| **Directory (tenant) ID** | Entra ID only |
| **Allowed hosted domain** | Google only, optional. Restricts sign-in to one Google Workspace domain; must be a valid domain name |
| **SURFconext environment** | SURFconext only. Restricts sign-in to one particular SURFconext environmet. Institutions that are approved for login are managed from within SURFconext itself. |
{% hint style="danger" %}
### WARNING: Protect Your Client Secret
**Treat your Client Secret like a password**. Do not share it via email or chat (Slack, Teams, etc.), as message histories are insecure.
* **How to share:** Use a self-destructing one-time link (via a password manager) or a password-protected file. Ask your event consultant for their preferred secure channel.
* **Compromised?** If exposed, regenerate the secret immediately in your identity provider.
{% endhint %}
Your event consultant will also give you a redirect URI. Register this exact URI in your Entra ID or Google app registration — it tells your provider to send admins back to Let's Get Digital after they sign in.
{% hint style="info" %}
### Note
**One connection per provider type**. An organisation can have multiple SSO providers active at the same time — you just can't add two of the same type. The provider type is fixed once a connection is saved: to change a connection you update its credentials, you don't switch it to a different provider.
{% endhint %}
### Setting the login mode per environment
For each of your environments, you choose how admins sign in. Let's Get Digital applies the\
mode for you:
* **"Global login"** — Global login only; no SSO buttons.
* **"Global login + single sign-on"** — both Global login and SSO buttons.
* **"Single sign-on only"** — SSO buttons only; Global login (password) is turned off for that environment.
### Built-in safeguards
The system prevents the configurations that would lock everyone out:
* You cannot switch an environment to a mode that uses SSO unless an **enabled provider** is configured. Attempting it shows: *"An environment can only use single sign-on while an enabled provider is configured…"*
* You cannot **delete or disable the last enabled provider** while any environment is set to **Single sign-on only** — that environment would have no way in.
### When the secret expires
If the provider's client secret expires or is wrong, the admin sees a clear message rather than a cryptic error, for example: *"Single sign-on is configured incorrectly or the key has expired. Please provide Let's Get Digital with new credentials to proceed."* Provide Let's Get Digital with a fresh secret to restore access.
## Where SSO does not apply yet
* **Global login page** — the Global login offers one-time code, passkey, and Google as sign-in methods. An organisation using **Entra ID** can sign in to each environment via the SSO button, but there is no Entra ID path at the Global login page itself in Phase 1.
* **Self-service SSO setup** — entering and managing provider credentials is done by Let's Get Digital staff, not by organisers, in Phase 1.
# Registration forms
Allow your users to effortlessly register for your event with the use of the Let's Get Digital registration form.
{% hint style="info" %}
Available in the Advanced + Extensive packages
{% endhint %}
You can create a customised registration form that allows your users to register for your event and prevent the need to manually create a new user.
## How to create a registration form
You create a quick and easy registration form in the admin panel by completing the following steps:
1. Open the admin panel
2. Go to 'Users' --> 'Registration form'
3. Click '+New registration form'
4. Fill in the basic information at the top of the form\
Basic information
You can customise the registration form with the relevant information you require \
*(The table below shows what you can customise)*
## Types of data fields for the registration form elements
| Name | Description |
| ----------------------------- | --------------------------------------------------------------------------------------------------------------------------------------------------------------------------------------------------------------------------------------------------------------------------------------------------------------------------------------------------------------------------------------------------------------------- |
| Heading | A sub-title that can be used to divide the registration form into different sections |
| Text | A text box can be inserted, for example as a description below a (sub-)title |
| User input | Here you can choose from various data inputs (like name, email address, company) for the data that you would like to collect from the attendees. See the table below for further explanation. |
| Company input | Users can enter the name of the company they will be associated with as exhibitor crew\*; this will automatically create the company in the admin panel. Additionally, you can create the option to fill in further company information, such as tags, custom fields, and more. |
| Company select | Here the users can choose the company to which they will be connected as exhibitor crew\* |
| Language select | Here the users can choose the language in which they want the app (only when using the multi-language tool) |
| Privacy select |
This data field gives the user two privacy options for their profile. Visible: This will make sure the user profile is visible to see for other users in the app Hidden: This makes the user profile hidden for other users in the app
|
| Talk days | Possibility to select program items by day. The biggest advantage of this option is if you change the program of the day in the admin panel, this change will automatically be visible in the registration form. |
| Single session | Here users are able to choose one single session to add to their personal program in the list that you provide |
| Multi session | Here users are able to choose multiple sessions to add to their personal program in the list that you provide |
| Select matchmaking tags | Here users can choose and select matchmaking tags to encourage networking and promote connections between users based on their shared interests or user types |
| Custom Terms and Conditions | A checkbox inserted that is required to be checked off by the attendees that use the form. This can be used to refer to terms and conditions, for example. |
| Group Form Elements | Group form elements allow users to select from a list of options or make specific choices related to their registration. |
| User tag select | Here, a user can select the tag(s) that fits them the most during the event. |
| Additional Attendees |
To allow users to add additional users to a company during registration, use additional attendees and (de)select “Copy Over Form Values.” If selected, all form values (including exhibitor manager status) will be copied to the additional users, with the exception of custom (additional) data fields If not selected, only the name and email entered for the user will be copied.
|
| Session Spotlight | Here, users can select sessions from an overview. A certain number of random sessions can be displayed, or sessions can be shown based on least or most attendance. |
| Step | The form can be divided into multiple steps, with each step displayed as a separate page. A progress bar at the top show how far the user has advanced through the form completion process.\*\* |
| Registration code | Here, you can set up a registration code. Only users with this code can complete their registration. |
| Exhibitor Data Sharing Opt-in | Add the option for users to explicitly opt in/out from sharing data with Exhibitors. Users that opt out from sharing data will not appear in the Exhibitor Portal. |
| Ticket Selector | Used in conjunction with paid tickets. Select the desired tickets to appear for sale via this form. For more info, see [Paid Ticketing (with Stripe)](/adding-users-and-ticketing/paid-ticketing-with-stripe) |
{% hint style="info" %}
Is the field you want to include in your registration form not in here? Add User Input and choose under Data type --Add new-- and add your new field here.
{% endhint %}
*\*The exhibitor crew refers to the users who belong to the company stand and assist in managing the stand and interacting with visitors at an event. In the app, they have the ability to edit the details of the company page and can be tagged as exhibitors.*
*\*\** When a user completes several steps of the registration form but does not finish the process, the system automatically assigns them a "Pending Registration" tag. If the user later completes their registration, this tag will be removed. Users with a pending registration will receive one reminder email 12 hours later, and you can also email them manually by including the tag when sending an email from the user overview.
When choosing 'User input', you can fill in a title for this data field in the top left box. This will be the text within the text box in the final form, so the attendees can see what they have to fill in where:

More information about the different user input fields, can be found in [this article](/adding-users-and-ticketing/registration-forms/registration-form-user-input) in the knowledge base.
Optionally, you can also enter a 'Tooltip' text. Which will be below the text box and serves as an explanation to the field, if necessary. The following example shows a 'User input' field "Email" with "Email" with "Please fill in your Email address!" as tooltip text:


## Other options
Name
Function
Visibility depends on value of other field
This means that the option wit this box ticked will only become available if the criteria of another field is met
Required
Ensures that this field is filled in
Disabled on edit
Does not allow for the field to be edited
{% hint style="info" %}
The 'Visibility depends on value of other field' will only appear if the field it relates to is a Yes/No field. For example, if Yes is selected, the next field will appear.
{% endhint %}
## Group Form Elements
The group form elements allow you to group the different elements that you have added to the registration form. This will allow the fields to be visible next to each other (in groups) rather than below each other. You can set this up by:
1. Add a new element to your registration form by clicking .
2. Select 'Group Form Elements' from the dropdown.
3. Under 'Fill in a title for:' fill in the number of fields that you want to group, for example when you want to group first name, infix, last name, you fill in the number 3 here and these will be grouped.
4. First add the Group Form Elements field and then add the other registration form elements that you want to group below this field.
5. Now your registration form elements are grouped and rather than being shown beneath each other, these are now visible in groups.
# Registration form settings
Here you can view which settings are adjustable per registration form.
| Name | Definition |
| ------------------------------------------------------ | ------------------------------------------------------------------------------------------------------------------------------------------------------------------------------------------------------------------------------------------------------------------------------------------------------------------------------------------------------------------------------------------------------------------------------------------------------------------------------------------------------- |
| Registration form title | Here the registration form title can be filled in. |
| Form opens at: | Here you can specify the time when the registration form will open. |
| Form closes at: | Here you can specify the time when the registration form will closed. |
| Confirmatoin e-mail | Here you can choose which e-mail should be send when someone finishes their registration |
| Assigned user tags | The user tag entered here will be automatically assigned to all registrants who complete this form. |
| Limit maximum numbe registrations | Specify the maximum number of people that can register through this form. |
| Share through exhibitor portal | Enable this setting to allow exhibitors to share the registration form through the exhibitor portal. |
| Thank you page configuration |
Set what is shown once the registration form is completed: - Donothing: show a simple thank you message - Show share with friends/colleagues pop-up: Show a form to allow registrants to add contact information that is used to email an invitation to register to the event - Redirect to external thank you page: adds an additional field to specify a URL that the user is sent to upon completing the form.
|
| Show company logo if session is connected to a company | When enabled, a square logo appears adjacent to session checkboxes. |
# Registration Form - User Input
This article explains the different types of user input that can be selected in the registration forms.
### User input
The following table describes the various user inputs that you can collect with the 'user input' type:
| Name | Description |
| ---------------- | ----------------------------------------------------------------------------------------------------------------------------------------------------------------------------------------------------------------------------------------------------------------------------------------------------------- |
| First Name | First name of the user registering |
| Infix | Infix of the user registering |
| Last Name | Last name of the user registering |
| Title | Title of user (Mr., Miss, Mrs., Drs.) |
| Email | It is mandatory to fill in the email address, as the email address is necessary for all users on the platform and in the app |
| Profile image | Here the users can upload an image as their profile picture. |
| Company name | The name of the company that the user is working for |
| Company role | Here the user can fill in the role they're fulfilling in the company they're working for. |
| Phone number | Here the users can fill in their phone number so other users / connections can reach them |
| Description | Here the users can fill in a description |
| LinkedIn Profile | Here the users can fill in the URL to the LinkedIn profile. |
| Matchmaking tags | Here you can add matchmaking tags for the [matchmaking feature](https://knowledge-base.letsgetdigital.com/the-admin-panel/matchmaking/virtual-platform/match-making). Make sure to create the matchmaking tags already, so that the attendees can pick them while filling out the form. |
| Custom | Here you can add ['additional data fields' ](https://knowledge-base.letsgetdigital.com/the-admin-panel/settings/settings/additional-data-fields)of your choice that attendees can fill in. Make sure to first create the 'additional data field', then it will appear here as an option in the form editor. |
| User tag select | Users can select user tags pre-defined by you for selection. |
####
# Registration Form - Dropdown Personal Programme
This article explains how the dropdown personal programme element of the registration form works.
## Drop down - Personal Programme
It is possible to include the choice of personal programme to the registration form. This can be completed by using the following options.
1. Select the type Drop down --> Data type 'Personal programme'
2. Select the personal programme items that users can add to their personal programme.
{% hint style="warning" %}
If you want users to be able to add multiple items to their personal programme, you will need to create multiple downdown fields.
{% endhint %}
It is possible to let the attendees choose from certain prearranged options. For example, if you want to let attendees choose from which country they come. First, you have to create an extra data field in the Admin Panel (Settings - Advanced). Choose + select with multiple options. Here, you fill in the countries from which the attendees can choose. After that, go to the registration form and add country as input.
An advantage of using this registration form is that the users that submit the form get added immediately to your admin panel.

##
# Registration Form - Final Result
This article explains how to make the registration form accessible for attendees and the final result.
## How to make it accessible for attendees
1. In the admin panel, hover over 'Users' and choose 'Registration form'
2. Click on the button that says '\' next to your form
3. You will be forwarded to the live registration form.
4. You can copy that URL to your website or wherever you please to direct your potential attendees to sign up for the event.

### You can also add the registration form to the pre event page:
1. In the admin panel, hover over 'Settings' and choose 'General settings'
2. Choose 'Registration & pre-event page' on the left-hand side menu
3. Next to the header 'Registration form' you can search for the name of your registration form and select it
4. Remember to save your changes
## The final result


When a user registers via the registration form, the time of registration will appear in the user overview.
## Listing multiple registration forms (on pre-event page)
It is possible to list multiple registration forms on the pre-event page. This means once a user clicks the register button, they will be provided with the opportunity to open and complete multiple registration forms specific to their needs.
For example; Your event program runs across four separate days, you may wish to allow users to register for a specific day and therefore also receive the day-specific tag.
The user can then choose one of the four registration forms based on the day they wish to attend.
### **How to set up**
It is possible to place multiple registration forms on the pre-event page by completing the following steps:
1. Open the Admin panel
2. Go to Users -> Registration form
3. Create the required registration forms using the steps listed earlier in the article\
4. Click on the blue button ´Registration groups´
5. Click on the green button ´+ New registration group'
6. Use the table below to create a new registration group:
| Setting name | Explanation |
| --------------------------- | -------------------------------------------------------------------------------------------------------------- |
| Title | Name of the regitration group |
| Custom active date and time | Allows you to set when the registration forms should be visible on the pre-event page |
| Custom confirmation email | Allows you to send a specific email from your email templates to users once they complete a registration form. |
| Description | Provide a brief description of the registration forms. |
| Connected forms | Choose which forms should be added to the group |
# RSVP
This page describes how the RSVP function can be implemented
{% hint style="info" %}
Available for: online and in-person events; packages: extensive
{% endhint %}
This function can be used to find out how many attendees you can actually expect for your event. Someone that signed up for the event months ago might in the end not make it anymore, so you can send out a 'RSVP' email to your attendees shortly before the event to find out who exactly will attend and who won't.
## How to set it up
1. In the admin panel, hover over 'Settings' and choose 'General settings'
2. Choose 'Registration & pre-event page' on the left hand side menu
3. Enable the checkbox for 'Enable the RSVP module
4. Make sure a [registration form](https://knowledge-base.letsgetdigital.com/lgd-features/registration-form?q=reg) is active on your platform, as it won't work without one
You can then send out your RSVP email:
1. In the admin panel, navigate to 'Communications' and select 'Mails'
2. Check the knowledge base article about [email communication](https://knowledge-base.letsgetdigital.com/the-admin-panel/communication) to learn more about the email-options that you have in our platform.
3. You can either use the RSVP template that is provided or edit it to your liking and the nsend it out to the attendees
The attendees then click either on the 'attend' button or 'decline' button in the email. They will then get assigned a '[hidden tag](https://knowledge-base.letsgetdigital.com/the-admin-panel/users/application/untitled/user-tags#creating-a-tag-1)' according to their response, which you can check in the admin panel (the tags are called 'Accepted' and 'Declined').
Additionally, the attendees that click on the 'attend' button in the email will be forwarded to your registration form, where they can fill in their details for the event. This will save time for when they log in on the day of the event.
## The final result

# Social sharing
After filling in the registration form or through the exhibitor portal users can invite their network to the event and increase participation. Users can send a maximum of 5 invites at a time. To prevent spam, recipients can only receive an email every 48 hours.
It is possible to adjust this pop-up by completing the following steps:
1. From the admin panel --> Go to Settings → General settings → Social Sharing
2. Adjust how the Social sharing will be displayed for the user.
3. Save your changes to see the magic
Example social sharing
This share through setting can be turned off by completing the following steps:
1. From the admin panel → Go to Users → Registration form.
2. Click on the pencil icon at the registration form where you want to turn it off.
3. Click on Settings and de-activate the ”Share through Exhibitor portal” or/and “Share through pop-up after registration" settings.
\
# Combined User & Company Registration
Enable exhibitors to add their company during self-registration
It’s often useful to register a company at the same time as registering a user for an event. This allows exhibitors and sponsors to establish their presence without organisers having to collect and enter the data manually. By enabling this option, you let exhibitors set up their brand presence on their own terms while reducing admin work for your team.
### Add company fields to a form
Companies are added in exactly the same way as the fields used for registering a user. To add a company, create a new form element and select the option Company input. The first one will add the field Company name, which is essential for creating a company. To add more details, add another Company input. This time, the form element will contain new options to add different information about a company.
When registering a company, the user will be linked to the it and given the role Exhibitor Manager\*.
Exhibitor managers have access to the Exhibitor Portal, where they can manage their company details further, select a booth on the Interactive Map, invite colleagues to the Company, and more.
{% hint style="info" %}
For more information about the Exhibitor Portal, see [Exhibitor Portal](/event-contributor-portals/exhibitor-portal)
{% endhint %}
\*If the Exhibitor portal is not active, the role Exhibitor is given instead.
***
### Hidden companies
When a company is created through the Registration form, it is hidden by default on the Let’s Get Digital platform. This gives exhibitors time to complete their profiles before becoming visible to potential leads.
Event organisers can make a company visible once its profile meets the required standard for the Virtual Event/App.
Hidden companies can be located by filtering for the “Hidden” tag in the Company overview within the Admin Panel.
The option to show/hide a company will only become visible after a company has been made with the Registration Form.
***
### Company Tags
When setting up Registration forms, assign tags to distinguish between company types (e.g. exhibitor ticket tiers). These tags will automatically be applied when a company is created, allowing you to filter and manage them more easily in the Admin Panel.
Assign company tags in the Settings tab of the Registration Form editor. You can add one or more tags, which will be automatically applied when the form is submitted.
# Paid Ticketing (with Stripe)
Set up and directly manage paid ticketing by adding tickets to your registration forms.
### Jump right in
# Connecting to Stripe
Set up paid tickets and payment processing for your Registration Forms with Stripe
{% hint style="warning" %}
**Note**: Setting up a Stripe business account requires authorisation from an authorised representative of your organisation (e.g. director or owner). Stripe verifies key details to comply with legal and financial regulations.
{% endhint %}
{% stepper %}
{% step %}
### Connect to Stripe
To begin, open the tickets overview by going to Registration > Paid tickets. On this page, you can access everything needed to manage payment methods, settings, as well as creating tickets for your event.
To get started, click Connect on the Stripe payment method, which directs to Stripe. For first-time users, it is required to set up a Stripe account and share with Stripe details about your organisation.
{% endstep %}
{% step %}
### Link your business to Stripe
When Stripe opens, you will see the start of a wizard to set up your business in Stripe. Enter your email address to get started.
If you already use Stripe, you have the option to use your existing business, or set up a new business. For users new to Stripe, you are required to create a new business profile in Stripe.
{% hint style="info" %}
When creating a new business in Stripe (or setting up your first account), you are required to complete Stripe’s business verification process. This includes providing details such as your **legal and trading names**, **company registration information** (e.g. Chamber of Commerce numbers, depending on jurisdiction), **VAT number**, and **bank account information** for receiving payouts. In practice, this means all required fields must be completed before payments can be processed.
{% endhint %}
Once this step is complete, you are returned to the Tickets page in the Let's Get Digital Admin Panel.
The tickets overview shows all items that have been prepared for sale in your registration forms. Each registration form can be customised to show different tickets, so many different tickets for different purposes and target audiences can be made to get the most out of your sales process.
In the main overview you are able to see key details about each ticket and options to edit or delete them. Importantly:
* **Time**: This is the period where the product will be visible for sale in registration forms that it has been added to. Products with no time set are always visible when added to a registration form.
* **Available**: The number of units remaining for sale. Once this reaches 0, it is sold out and removed from sale. Any without a limit set have the value Not limited shown.
* **Price**: The cost per unit of each product. This includes listings where VAT is included and excluded from the list price.
{% endstep %}
{% step %}
### Set VAT rates
Before tickets can be made, VAT rates must be set. To do so, click 'VAT Rates' and then '+ Add VAT Rate'.
Set the desired rate and click Save Changes.
{% endstep %}
{% step %}
### Create tickets
Once your Rates are set, return to the Tickets overview and click + Add Ticket.
Fill in the fields for your ticket, setting pricing details and other relevant details.
#### Ticket Fields
{% hint style="warning" %}
Fields marked with an asterisk (\*) are required fields
{% endhint %}
| Name\* | Give your ticket a name. |
| ---------------- | ------------------------------------------------------------------------------------------------------------- |
| Description | Give a short explanation of what the ticket includes. Visible in the Registration Form. |
| User Tags | Add tag(s) that are given to the user upon buying this ticket. |
| Price | The unit price of the ticket. |
| VAT rate | Select a VAT rate and choose whether it is included in price (inclusive) or is added at checkout (exclusive). |
| Start time | The time when the ticket is visible for sale in Registration Forms where the ticket is listed for sale. |
| End time | The time when ticket sales end for a particular ticket. |
| Minimum quantity | The minimum number of tickets that may be purchased per transaction (default = 1). |
| Maximum quantity | The maximum number of tickets that may be sold per transaction (default = 1). |
| Total available | How many tickets are available for sale (empty = no limit). |
| {% endstep %} | |
{% step %}
### Add tickets to Registration Form
After adding paid tickets, in the Registration Form builder (Registration > Registration forms) , an additional option can be chosen called Ticket Selector.
{% hint style="info" %}
Haven't made a Registration form yet? Set one up now with our [quick-start guide](/adding-users-and-ticketing/registration-forms).
{% endhint %}
Choose the tickets that you wish to list on your registration form, and save changes.
{% endstep %}
{% endstepper %}
Great job, your Registration Form is ready for ticket sales!
### Buying tickets
In the registration flow the available tickets are now available to be purchased. Depending on the configuration of the tickets, you can see the purchasing limits are active, and the order summary will show the running total, including taxes where applicable.
On the payment display, the final costings are shown and the available payment options. Transactions can be [managed within Stripe](broken://pages/iyuU0TW5fEjZ8a53VDLk).
# Managing payments in Stripe Dashboard
Learn about how transactions are viewed and managed within the Stripe Dashboard
### At a glance
Any and all paid tickets bought using the Registration form are processed through Stripe. Stripe Dashboard allows you to view all completed payments, outstanding invoices, as well as refunded transactions.
Clicking on individual transactions reveals more details about the transaction, such as the payment breakdown including all SKUs and processing fee, as well as taxes, and the option to refund the transaction.
### Invoicing
In addition to immediate billing, it is also possible for customers to opt to receive an invoice and pay at a later date. This functionality can be set up in the Stripe integration's settings: Settings > API & Integrations > Integrations > Stripe
When Enable invoice as a payment method is checked, customers will see two options when checking out; Pay Now, and Pay with Invoice. Additionally, [additional relevant invoice details input fields](/adding-users-and-ticketing/paid-ticketing-with-stripe/stripe-configuration#invoicing) are added to facilitate invoicing.
Additionally, it is possible to always include these fields without enabling delayed payments by enabling the second checkbox Request invoice details (company name, tax ID) during checkout.
Sample invoice
#### Managing invoices
Invoices function similarly to regular payments and are managed in Stripe.
For each transaction a 1% fee is issued **per invoice**, with a minimum of €1 billed. This fee is shown presented in the same way as other transaction fees. Invoices can be managed inConnected accounts -> \[Account name] > Invoices.
{% hint style="info" %}
The same limitations currently apply for refunds as with direct payments: currently only full refunds are supported. Any and all user accounts linked to invoices which are fully refunded will be deleted and the attendees will receive an email to inform them of this.
{% endhint %}
### Refunds
We support refunds through stripe, but presently this is limited to full refunds. When a refund is issued, tickets linked to the user will be removed. Refunds are processed in the Stripe dashboard in the Transactions overview.
Support for partial refunds will be added at a later date.
### Discounts
In Stripe Dashboard it is possible to apply discounts in the form of Coupons.
{% stepper %}
{% step %}
#### Go to Coupons
To create a coupon, open the Coupons tab by going to Product Catalog > Coupons .
{% endstep %}
{% step %}
#### Create a new coupon
Next, click Create coupon or press N to open the new coupon flow.
On the Create Coupon page, give your coupon a suitable name. Next, choose whether you wish for the discount to be a percentage of the order, or a fixed amount that is always the same, e.g. €50.
{% hint style="danger" %}
Discounts at this time can only be applied to the whole order. Apply to specific products should remain disabled. If turned on and a specific product chosen, you may see undesirable results if the coupon is used, such as the entire order being discounted at that rate.
{% endhint %}
Lastly, turn on the option Use customer-facing coupon codes. This option is required to be able to generate codes that your customers can add during checkout to activate a coupon.
Coupons can be customised and conditions may be set for the use of a particular coupon. Multiple codes may be generated for a given coupon, which allows for flexibility and customisation of discounts as required.
{% hint style="info" %}
Discount codes can currently be only applied when a customer opts to pay directly. Customers paying by invoice will gain the ability to add discount codes to their purchases in a future update.
{% endhint %}
In the Product Catalog, it is possible to gain insight into each coupon, showing the number of redemptions, by whom, and how they paid for their purchase. Clicking on a coupon will load data specific to that coupon.
{% endstep %}
{% step %}
#### Apply a coupon
When you fill in the registration form, there is a field on the left to add a discount code.
Discounts that are applied to the order will be shown in Stripe Dashboard on both the transaction record as well as the invoice.
Invoice example
The invoice breakdown of the order shows the discount applied to the line items with adjusted unit prices. The amount paid remains the same.
{% endstep %}
{% endstepper %}
# Stripe configuration
A number of settings can be enabled or customised to tailor the ticketing experience to your particular event. These options can be manged in the Paid Tickets overview in the Admin Panel.
### Payment methods
Stripe supports a large number of various payment methods. Many are available out of the box, without any further work required. Others require specific set-up steps, such as PayPal, whilst others are region-specific. These methods can be enabled or disabled by clicking Settings and selecting the options you wish to offer.
If you encounter any issues relating to the availability of a particular payment method, check in Stripe that it is available and active. If it isn't, contact Stripe for support. If it is active but not working in Let's Get Digital, please contact Support.
{% hint style="info" %}
The following options can be changed in Payment settings
{% endhint %}
Active Stripe integrations have two modes: Test Mode and Live Mode:
* **Test mode:** the payment flow can be tested without being direct to Stripe payments. Instead, a popup appears asking for a key (visible at **Settings - Integrations - Stripe**) which confirms the completes the payment.
* **Live mode**: the full payment flow is active and anyone registering an account together after selecting products in the registration form are sent to Stripe to finalise their payment.
Additionally, in the Stripe settings, the person paying the transaction fee can be set:
* **Customer (added in checkout)**: A fee of 1 euro is added per ticket to the total due at checkout.
* **Event Organiser (deducted from payout)**: A fee of 1 euro per ticket is deducted from the payout in Stripe.
### Invoice Settings
#### Ticket reassignment
{% hint style="info" %}
For more info, see [Ticket Reassignment](/adding-users-and-ticketing/paid-ticketing-with-stripe/ticket-reassignment)
{% endhint %}
| Setting | Description |
| -------------------------------------------------------------------------- | -------------------------------------------------------------------------------------------------------------------------------------------------------- |
| Enable Reassign | Tickets can be reassigned from a user and given to a new user. |
| Last ticket can be reassigned | If the user has only one ticket, it can be assigned to someone else instead. |
| Only the first ticket can be downloaded, the other(s) should be reassigned | Allows the ticketholder to only download their own ticket and forces them to redistribute the rest so that they can be downloaded by the intended owner. |
### Invoice settings
In addition to immediate billing, it is also possible for customers to opt to receive an invoice and pay at a later date. This functionality can be set up in the Stripe integration's settings: Settings > API & Integrations > Integrations > Stripe
| Setting | Description |
| --------------------------------------- | ------------------------------------------------------------------------------------------------- |
| Invoice payment term (days) | Set the the number of days before an invoice is due (30 if left empty). |
| Minimum order value for invoice payment | Set a minimum value of an order before the option to select payment by invoice becomes available. |
When Enable invoice as a payment method is checked, customers will see two options when checking out; Pay Now, and Pay with Invoice. Additionally, additional relevant invoice details input fields are added to facilitate invoicing.
The following fields can be chosen to be added to the form and will be displayed on the invoice when filled in:
| Field name | Description |
| ---------------------------- | ------------------------------------------------------------------------------------------------------------------------------------------------ |
| Company details | Default: adds the fields *Company name* (required), *VAT number* (optional) |
| Address | Mandatory field to include address info |
| Country | Mandatory field for including the billing country |
| Invoice reference | Adds a reference field to be displayed on the invoice |
| Invoice reference field 1 | When *invoice reference* has been checked, this field allows you give the reference field a name e.g. *PO Number* to be displayed on the invoice |
| Additional invoice reference | The option to add and name a second invoice reference field |
Additionally, it is possible to always include these fields without enabling delayed payments by enabling the second checkbox Request invoice details (company name, tax ID) during checkout.
# Ticket Reassignment
Attendees are able to reassign tickets at any time, which helps e.g. when ticket have been purchased in bulk. Upon purchasing a ticket, users are sent an email which contains a link to the page where tickets can be downloaded.
In the case that a ticket needs to be transferred to a new owner, this is simple: click on the respective ticket and a small form appears where the details of a new owner can be sent. When Reassign ticket has been clicked, both the former owner and the new owner of the ticket will receive an email of this change.
In the case that users should update their profile, this can be achieved by a variety of means, such as an RSVP mail or a general mail with a link for users to update their personal data. Otherwise, the user can personalise their data in the app.
# Integrations
The following articles highlights the different integrations that can be made with Let's Get Digital and how they can be setup.
# Aanmelder.nl
This article will give guide you through the setup and integration of Aanmelder.nl with Let's Get Digital.
### Aanmelder.nl Integration
You can integrate your Aanmelder.nl registration form into Let's Get Digital.
This allows you to automatically sync users who have registered via the Aanmelder.nl form into your event environment. \
\
The user data that can be synced is as follows:
* Users Name
* Users Company name
* Users Company role
* User E-mail
* Users Phone number
* Users personal program
* Users personal QR-code
* Users login codes
### Setting up the integration
To integrate your Aanmelder.nl registration form into Let's Get Digital please follow the steps below carefully:
1. Inform your personal Event Consultant that you will use the integration.
2. Create and/or log in to your Aanmelder.nl account: [**Aanmelder.nl**](https://www.aanmelder.nl/nl/login)
**In Aanmelder:**
1. Go to 'API keys' in your Aanmelder account, under the blue circles
2. Click on 'API key aanmaken' to make a new API key
3. Name the new API key after the event + Aanmelder event number so you can easily find it back
4. In the field 'Strekking' choose 'Toegang beperken tot **Evenement'.** Otherwise, this key will be available for all events in your account.
5. If you click on 'show' you will then see the *ID* and *Key*
In the **Admin Panel**:
1. Go to settings -> integrations -> integrations
2. Click on '+ New Aanmelder' to make a new coupling
3. Fill in the name, ID and key that you've just generated in Aanmelder (like the example below)
4. If you press 'save changes' you can now map the fields from the Aanmelder registration form with the data fields from Let's Get Digital.
5. After you've saved the information, a *webhook URL* will be generated (like .) Copy your personal webhook URL.
6. Go to your profile in Aanmelder again and add this webhook URL to the API coupling.
If you have any questions about the part in Aanmelder, please contact Aanmelder. If you have any questions about the part in the Admin Panel, please contact your Let's Get Digital consultant.
{% hint style="danger" %}
**Beware** that the integration with Aanmelder syncs both ways. If users are created or deleted in the Admin panel they will also be added or removed in the Aanmelder form.
{% endhint %}
## What should I pay attention to when setting up an integration with Aanmelder.nl?
Please note that our system cannot make a distinction when it comes to two separate event days that the attendees can sign up for.
{% hint style="info" %}
The bulk of the connection with Aanmelder.nl is done by Let's Get Digital as it involves exchanging API tokens. ***However, we need you to inform Aanmelder.nl about your event so that they can upload it to their website.*** Once this is done, we can exchange the API tokens with them and sync the attendees.
{% endhint %}
{% hint style="danger" %}
**Please note:** To ensure no duplicates are created within the system any data included within the Aanmelder.nl integration mustn't be additionally created through an Excel import or manually via the admin panel.
{% endhint %}
Please note that the Aanmelder registration form includes a normal QR code and a secure QR code:

These QR codes are necessary for the API to work. Therefore, do not turn off the QR codes in your Aanmelder registration form.
**FAQs**\
\
*Personal programme* \
**Can the personal program be synced from Aanmelder.nl in our admin panel?** \
Answer: Yes, with Aanmelder the entire personal programme can be synced. This means that on the Aanmelder website of the event, the person is being asked during registration which programme items they would like to attend. In the settings in the admin panel after the coupling is made you can connect the programme items from the form with the program items in the admin panel.
*Events that take multiple days*\
**Is splitting the attendees from one registration form possible when this is a multi-day event?**\
Answer: No, this is not possible.
*A person registers for multiple attendees with the same email* \
**How can we prevent duplicate email addresses in our system?**\
Answer: You have to make sure that one person can only get one ticket through the form.
*Additional information to sync*\
**Can you transfer other data from their system besides name and email address?**\
Answer: Yes, you can transfer the following information: Users Name, Users Company name, Users Company role, User E-mail, Users Phone number, Users personal program and the Users personal QR-code \
\
**Do I only need to fill in the program in one system?** \
Answer: No, you have to fill in a program in our system as well as in the registration form.
# Eventbrite
This article will give guide you through the setup and integration of Eventbrite with Let's Get Digital.
## What data can be imported from Eventbrite?
It is possible to import the following fields from Eventbrite to Let's Get Digital: \
\
**Default Imported Fields**
When importing data from Eventbrite to Let's Get Digital, some fields are imported automatically. These include:
* **Name**
* **Email**
* **Eventbrite QR code**
**Custom questions:**\
To gather more detailed information, Eventbrite allows the setup of custom questions within the Order Form. These questions should be tailored to capture specific details relevant to your event. The custom fields that can be imported into Let's Get Digital include:
* **Company name**
* **Company position**
* **Description**
* **Phone number**
## **Setting Up Your Eventbrite Order Form**
To make the most of the integration, follow these steps to set up your Eventbrite order form :
1. **Create Your Event**: Begin by creating your event on Eventbrite, detailing all essential aspects such as date, time, and location.
2. **Add Ticket Types**: Define the different types of tickets you will be offering. This can include general admission, VIP passes, early bird specials, and more.
3. **Customize the Order Form**: This step is crucial for data collection. Navigate to the Order options -> Order options and add custom questions to gather the necessary information from attendees.\
\
**\*Remember** only Company Name, Company Position, Description, and Phone Number can automatically be imported into the Admin panel alongside the default Name & Email.
### Activate the Eventbrite Integration
Making the integration between Eventbrite and Let's Get Digital should take no longer than 2 minutes using the following steps:
1. Open the Admin panel
2. Navigation to Settings -> Integrations
3. Click on New integration -> Choose Eventbrite
4. Give integration a name
5. Click on Authenticate Eventbrite -> Click Allow access
6. Select the event you want to connect
7. Save changes
### Finalize the setup
Now you have connected Let's Get Digital to your Eventbrite event you can finalize the setup of your integration:
1. Open the integration from the Admin panel
2. Set the integration to Active
3. Go to the Map fields tab
4. Map your custom questions
5. Setup your [Ticket settings ](https://knowledge-base.letsgetdigital.com/the-admin-panel/settings/untitled/eventbrite#ticket-settings)
6. Click Install webhook to automatically import the data.
### Ticket settings
You can setup two different automations that will take place based on the ticket type. This can help send customised onboarding flows to users based on tags or by directing the user to a specific Let's Get Digital Registration Form to gather more specific information from the user.
#### Link Ticket to User Tag
You can link specific tickets to a specific user tags. This is useful for many reasons for example customising communications or showing content based on tags.
\*To set this up you first need to create your [users tags](/the-admin-panel/users/user-tags)
#### Link Ticket to Registration Form
Do you want more information from your users once they have registered for the event for example; matchmaking interests, profile picture, conection centre profile info etc. Then gather this data by linking the ticket to a specific registration form.
\*To use this feature you first need to have your registration forms setup.
# Weeztix (formerly known as Eventix)
This article will give guide you through the setup and integration of Weeztix with Let's Get Digital.
## What data can be imported from Weeztix?
It is possible to import the following fields from Weeztix to Let's Get Digital:
* **Name**
* **Email**
* **Weeztix** **QR code**
These fields will automatically be imported when a ticket is purchased and the Weeztix connection to Let's Get Digital has been made.
### Activate the Eventix Integration
Making the integration between Weeztix and Let's Get Digital should take no longer than 2 minutes using the following steps:
1. Open the Admin panel
2. Navigation to Settings > API & Integrations > Integrations
3. Click on New integration > New Weeztix
4. Give the integration a name
5. Click 'Save changes' > Close
6. Click on Authenticate Weeztix > Login to your Weeztix account
7. Click Give access to authorize the connection
8. Select the Weeztix event you want to integrate
9. Save changes
### Finalize the setup
Now you have connected Let's Get Digital to your Weeztix event you can finalize the setup of your integration:
1. Set the integration to Active
2. Save changes
3. Click Install webhook
4. Setup your [Ticket settings](https://app.gitbook.com/o/-Lnut9LElnJrFCEIBWvQ/s/-M5LNCGpK5lyymcFZU4V/~/changes/2212/the-admin-panel/settings/untitled/eventix#ticket-settings)
5. Save changes
### Ticket settings
You can setup two different automations that will take place based on the ticket type. This can help send customised onboarding flows to users based on tags or by directing the user to a specific Let's Get Digital Registration Form to gather more specific information from the user.
#### **Link Ticket to User Tag**
You can link specific tickets to a specific user tags. This is useful for many reasons for example customizing communications or showing content based on tags. You can do so by following the next steps:
1. Open the admin panel
2. Click on 'Settings' -> 'API & Integrations' -> Integrations
3. Click on the small gear icon at the specific integration
4. Click on the 'Ticket settings' tab
5. In this overview you can see all the different tickets, select at the dropdown menu's below every ticket 'Link Ticket to User Tag'.
6. Select the corresponding user tags and save changes.
{% hint style="info" %}
To set this up you first need to create your [users tags](https://knowledge-base.letsgetdigital.com/the-admin-panel/users/user-tags)
{% endhint %}
#### **Link Ticket to Registration Form**
Do you want more information from your users once they have registered for the event? For example: Matchmaking interests, profile picture, Connection Centre profile info, etc. Then gather this data by linking the ticket to a specific registration form. This can be done by following the next steps:
1. Open the admin panel
2. Click on 'Settings' -> 'API & Integrations' -> Integrations
3. Click on the small gear icon at the specific integration
4. Click on the 'Ticket settings' tab
5. In this overview, you can see all the different tickets. Below each ticket, use the dropdown menu labeled 'Link Ticket to Registration Form' to select the appropriate option.
6. Select the corresponding registration form in the dropdown menu next to it.
7. Save the changes
{% hint style="info" %}
To use this feature you first need to have your registration forms setup.
{% endhint %}
### Reassigning tickets
Weeztix allows users to purchase multiple tickets. In our system, we would like to keep email addresses unique. Users with multiple tickets can reassign individual tickets to someone else. To enable this feature, follow these steps in the admin panel:
1. Open the admin panel.
2. Hover over 'Navigation' and click on 'Navigation settings'.
3. Click on 'Add new item'.
4. Enter 'My tickets' as the name for the new navigation item.
5. In the 'Set link to related page' field\*, select 'Users'.
6. In the second dropdown menu, select 'My ticket'.
7. Save the changes.
After completing these steps, the navigation item will be visible in the app. If a user has purchased multiple tickets, they can reassign these tickets by following these steps:
1. Open the app.
2. Navigate to the 'My Tickets' section.
3. Select the ticket that needs to be reassigned.
4. Click on 'Reassign ticket'.
5. Enter the first name, last name, and email address of the recipient.
6. Save the changes by clicking the checkmark in the upper-right corner.
# HubSpot
This article will give guide you through the setup and integration of HubSpot with Let's Get Digital.
## What data can be imported from HubSpot?
It is possible to import the following fields from HubSpot to Let's Get Digital:
* **First name**
* **Last name**
* **Email**
* **Company name**
* **Company role**
* **Title**
* **Privacy**
* **Password**
* **Phone number**
* **Description**
* **LinkedIn Profile URL**
* **User tags**
### Activate the HubSpot Integration
1. Open the Admin panel
2. Navigation to Settings -> Integrations
3. Click on New integration -> Choose HubSpot
4. Give integration a name
5. Click on Authenticate HubSpot -> Login to your HubSpot account
6. Select the form you want to connect
7. Save changes
8. Map your data fields (email is the minimum requirement)
9. Select at is active -> Active
10. Click on Import -> Start import
{% hint style="danger" %}
The integration will automatically update upto 10 weeks before the event start date and until 1 week post event. Outside of this timeframe you will need to manually click on the Import button from the integration.
{% endhint %}
# Vivenu
This article will give guide you through the setup and integration of Vivenu with Let's Get Digital.
# Zapier
Zapier is a powerful and flexible integration option on the Let’s Get Digital platform. Unlike direct integrations such as Aanmelder or Eventbrite, Zapier acts as a bridge between Let’s Get Digital and thousands of external tools — including HubSpot, Salesforce, Google Sheets, and many more.
{% tabs %}
{% tab title="Key info" %}
### Important to Know
{% hint style="danger" %}
While Zapier unlocks greater flexibility, it also requires more setup effort and technical understanding:
* **User responsibility**: Zapier doesn’t know what data matters to your use case. You'll need to choose the right triggers, map fields between systems, and understand the structure of both Let’s Get Digital and the external tool (e.g. HubSpot, which may have hundreds of fields).
* **Learning curve**: The Zapier interface can be unintuitive at first. Expect some trial and error when setting up your first Zaps.
* **Limited support from LGD**: While we can help with general guidance, Zapier itself (and any external app you connect) is outside the scope of Let’s Get Digital’s development team. Most issues will need to be resolved via Zapier’s documentation or the external service’s support.
{% endhint %}
### Key Advantages
* **Two-way data sync**: You can both send data to *and* receive data from Let’s Get Digital.
* **Modular automations**: Zapier operates using “Zaps” — automated workflows that let you define specific triggers and actions for precise control.
* **Broad connectivity**: Zapier supports thousands of apps, enabling connections far beyond the few platforms supported by direct integrations.
### Triggers
Zapier works by sending data from one source to another when a particular trigger is fired. These vary massively across apps connected to Zapier, but Let's Get Digital currently has 4 triggers that occur based on actions that occur on the LGD platform:
Trigger Name
Function
User check-in or check out
Zap triggers when a user is checked in or out in the LGD platform
User Created
Zap triggers when a new user is created in the LGD platform (registration form, imports, admin panel, etc.)
User deleted
Zap triggers when a user is deleted from the LGD platform
User updated
Zap triggers when user data is altered (e.g. profile is edited) in the LGD platform
There are 3 more actions that can be used when a Zap is created based on a trigger from another app (e.g. HubSpot, Excel, Salesforce) that sends data to Let's Get Digital. These triggers are app-specific and must be configured independently.
Action name
Function
User Created
This zap will create a new user with the information sent from another linked app
User deleted
This zap will delete an existing user with the information sent from another linked app
User updated
This zap will update an existing user with the information sent from another linked app
###
{% endtab %}
{% tab title="Creating a Zap" %}
{% hint style="info" %}
### This guide explains the process of sending Data from Let's Get Digital to another application. This can be done in reverse by following the same steps by switching around which application is the trigger and which is the action, and setting the correct events in each step.
{% endhint %}
Whilst Zapier can be used to send data from one of thousands of different apps to another, we will use HubSpot as an example to be connected to. HubSpot has many tools and functions, such as registration forms, contact lists, and more.
### Basic Setup
#### 0. Create a Zapier Account
If you don’t have one yet, go to [zapier.com](https://zapier.com) and sign up for a free account.
#### 1. Create a new Zap
To begin, we need to create a new Zap. This can be done by clicking + Create → Zaps or by clicking “Zap” under the heading “Start from scratch" on the homepage.
#### 2. Understand How Zaps Work
A **Zap** is made of two (or more) parts:
* **Trigger**: An event that starts the automation (e.g. a new registration in Let’s Get Digital).
* **Action**: What you want to happen next (e.g. send the data to Google Sheets or HubSpot).
#### 3. Connect Let’s Get Digital to Zapier
Let’s Get Digital offers a Zapier integration using our public API. To set up a webhook based on on a Let's Get Digital trigger e.g. a user is created, on the trigger option, selected Let's Get Digital as the app.
Once selected, select the Trigger event that you wish to set up:
Connect to your Let's Get Digital event by clicking on the Select button under Account, and add a new account.
Fill in the required info to connect to your event and click Continue.
When the user(s) appear, click on the, to check the information that was passed to Zapier. If it’s correct, then we can continue. If something is missing or incorrect, first check the user user in the Admin Panel. In the case that something still look wrong, contact support.
Once complete, click Continue with selected record.
#### 4. Pick the Other Tool You Want to Connect
Choose your second app — for example:
* Google Sheets
* HubSpot
* Salesforce
Like with Let's Get Digital, repeat the steps to connect your new app's account and choose the action that should occur.
Zapier will guide you through connecting your account and choosing what data to send or receive.
#### 5. Map the Fields
You’ll now be asked to match fields between Let’s Get Digital and the other tool. For example, if you're sending a participant’s name and email to HubSpot, you need to match LGD’s name/email fields to HubSpot’s.
Take your time here — this is where most errors happen. Many apps contain hundreds of properties to link this can take some iteration to have all fields correctly mapped.
#### 6. Test and Turn On Your Zap
Zapier will offer to test the automation. If everything looks right, turn it on. If you get a success message that the data was sent to your app and the data has arrived in your app, then everything has worked.
Your automation is now live!
### Publication
Once you are happy with your zap, you can turn it on for use by clicking the publish button in the top-right corner of the editor.
***
### Tips for a Smooth Experience
* Start simple: Try a basic Zap first (like sending new registrations to a spreadsheet) before attempting more complex ones.
* Test often: Use Zapier’s built-in testing tools at each step.
* Check field names carefully: LGD uses a fixed set of fields, but tools like HubSpot can have hundreds — pick the ones you actually need.
### Need Help?
If something isn’t working, feel free to contact us for guidance on the Let’s Get Digital side. However, please note that:
* We can’t offer support for third-party tools like HubSpot or Salesforce.
* We recommend checking [Zapier’s Help Center](https://help.zapier.com) for general troubleshooting.
{% endtab %}
{% tab title="Users from an external source" %}
### Importing attendees from a HubSpot form into LGD
A common use case that event organisers have is that attendees are registered to an external service prior to beginning the event preparations on the LGD platform. Though there are some integrations that are already built into Let's Get Digital, they don't always transfer all of the user data that you might wish to add to a user's profile.
Zapier can be used to bridge this gap by giving the choice of which fields to map, including mapping to custom fields.
***
#### Set-up
Before setting up Zapier, make sure that you have set up your registration form, preferably with some (test) users already registered. For this example, I will use HubSpot Forms as the source from which I am importing attendees:
A basic registration form made using HubSpot Forms
Once this is ready, in Zapier create a new Zap. To simplify this process, I used the AI prompt to set up the basic flow. Provided it works, you can have Copilot set up the entire automation.
Copilot suggests the two events required to import users into LGD
Copilot sets up the Zap
{% hint style="info" %}
Zapier Copilot is still in beta and isn't perfect. Check everything before publishing. Manual set-up is always the most reliable option.
{% endhint %}
Once Copilot has set everything up, it will invite you to test the Zap. This will create a user in Let's Get Digital if successful. At this point, check that everything has been configured as expected.
#### Connect HubSpot
Choose the correct trigger event. In this case, ***New Form Submission*** is correct as it is triggered when someone fills in the registration form. Connect your desired HubSpot account (requires logging in) and select the form that you wish to pull your attendees from.
Next, test that you are getting the correct information from HubSpot. If the information pulled from Zapier looks good, you're readfy to continue to the next stage.
#### Connect to Let's Get Digital and map the incoming data to the LGD data types
As shown previously in [#creating-a-zap](#creating-a-zap "mention"), connect Let's Get Digital by entering your event ID and your API key. Set the action event to ***Create User***.
Now, the different data fields that make up an attendee myst be be mapped so that they are filled in with the information that has been sent from HubSpot. If you have used Copilot, some or all of these fields may have already been filleed in. Make sure that the ones that are filled in are ones that make sense and contain values from the test user that we saw during the HubSpot setup.
Once everything has map, it's time to test: run the test and wait for Zapier to say that a user had been created. Check in the User overview in Let's Get Digital; if the user is there, you're good to go!
{% endtab %}
{% tab title="More complex Zaps" %}
### More complex zaps
{% hint style="info" %}
Multi-stage zaps require an upgraded Zapier plan. They can be tried out on Zapier Free, however.
{% endhint %}
Some zaps cannot be completed in one single action. An example of this is if you wish to record the check-in/-out activity of a user in HubSpot. The most straightforward manner that I know of is after the trigger event, to find the user in HubSpot, and then create a note on their contact.
#### Example: Recording a User Check-In in HubSpot

The flow to create a check-in/-out note on a HubSpot contact.

**Step 1: Trigger — User Check-In/Check-Out**
First, set the *trigger event* to *User Check-In or Check-out.* Check that the action works and move to the next step, action event *1.*
**Step 2: Find the Contact in HubSpot**
The next step is to set the *action event* to *Find contact*. This allows is to match the user data from Let’s Get Digital with that of a user in the HubSpot contact list. Matching is achieved by setting *search priority names* and *values* that attempt to find unique users.
\- Choose **HubSpot → Find Contact** as the next action.
\- Match based on fields like **email address** or **user ID**. You can use more than one field to increase accuracy.
\- If the contact doesn't exist yet, Zapier can optionally create a new one — you'll be prompted to map the necessary fields again.
In this case, the attendees were found by matching based on the user IDs fetched from Let’s Get Digital, as well as their email addresses. This combined search ensures that the users returned are accurate and unique.
{% hint style="info" %}
If you have questions about the mapping process works in Zapier, the headers can be clicked to open Copilot chat, which will give an explanation. You can also ask further questions about the integration you are setting up and it will give context-specific help.
{% endhint %}
**Step 3: Create a Note in HubSpot**
Now that the contact has been found (or created), we want to log the check-in or check-out action.
\- Choose **HubSpot → Create Engagement** as the next action.
\- Select the type of engagement: **Note**
\- In the content field, add a message like:
\`User checked in via Let's Get Digital\`
You can also insert dynamic fields like timestamps (e.g. **Updated At**) to show when the event occurred. I have added the text ‘Check in action’ to make it clear that this relates to checking in and out, as well as “Updated at” which reflects the time that the HubSpot contact was at that moment updated to reflect the check-in status change.
Test this step and then review the contact record in HubSpot. The note should appear under the **Notes** section of the contact’s timeline (or wherever else the mapping has been linked to).
{% hint style="info" %}
💡 Tip: If you don’t see the Notes column in your HubSpot view, click **Edit Columns** and enable it.
{% endhint %}
If you run into trouble, Zapier's built-in help (via the **?** icon or **Copilot chat**) can guide you through each part of the setup.
{% endtab %}
{% endtabs %}
# Momice
This article will give guide you through the setup and integration of Momice with Let's Get Digital.
### Momice Integration: at a glance
You can integrate your Momice registration form into Let's Get Digital.
This allows you to automatically sync users who have registered via the Momice form into your event environment. \
\
The user data that can be synced is as follows:
* First name
* Infix
* Last name
* Company name
* Company role
* Email
* External QR-code
* Custom fields (text)
{% hint style="warning" %}
Note: other types of field such as multiple-choice questions can be imported into Let's Get Digital, but currently the choices will be added as a list in a text field. Checkboxes will return "true" or "false", etc.
{% endhint %}
### Setting up the integration
To integrate your Momice registration form into Let's Get Digital please follow the steps below carefully:
1. Inform your personal Event Consultant that you will use the integration.
2. Create and/or log in to your Momice account: [**Momice.com**](https://tool.momice.com/login)
**In Momice:**
1. Go to 'API access' in your Momice dashboard: Settings -> API Access)
2. Click on 'Add new API credentials' to make a new API key and name the new API key after the event for referenece.
3. On the next page are your API key (here known as **Client Secret**) and obtain your Client ID
In the **Admin Panel**:
1. Go to settings -> API & Integrations -> Integrations
2. Click on '+ New Momice' to make a new coupling
4. Fill in the name, ID and Secret that you've just generated in Momice (like the example below)
5. Click *Save changes*.
6. After you've saved the information, an option will appear to select the event that you want to import users from. Once this is selected, change the Active dropdown from **Inactive** to **Active**. Click *Save changes* again.
7. Now the importer is active and a webhook has been made in Momice which will send changes and new users to Let's Get Digital when they occur.
If you have any questions about the part in Momice, please contact Momice directly. If you have any questions about the part in the Admin Panel, please contact your Let's Get Digital consultant.
### What can the Momice integration do?
At its most basic level, the integration with Momice fetches users from a selected event in Momice, and sends them to Let's Get Digital.
Additionally, when users cancel their registrations, they are removed from Let's Get Digital to keep the list of attendees up to date. Likewise, when users are deleted, the same occurs.
Users that have been added but their registrations have not yet been confirmed will also not appear in Let's Get Digital. Only users which are fully paid-up and confirmed in Momice will be accepted, to prevent confusion and access being given to the wrong people.
Custom fields that are not already present in the Let's Get Digital are added to Let's Get Digital during the user import. As a precaution, all fields that are added are set to have the visibility *Organiser only*. They also are non-editable. Both of these can be easily changed in the Additional Data Fields overview.
### What can the Momice integration *not* do?
The Momice integration does not currently offer two-way sync: changes made in Let's Get Digital are not relayed back to Momice.
Additionally, certain custom field types are not currently fully supported: checkbox, (multiple) select, currently are not added to Let's Get Digital as their counterpart field types, rather they are for the moment, added as text.
Telephone numbers are currently added as a custom field rather than mapped to the main Telephone number field.
# RSS Feeds
Add posts from an RSS feed to the event Social Wall or give it a dedicated home in your event's app
### What are RSS Feeds?
An RSS feed can be used to transmit news and information related to your event, as well as other relevant topics that visitors may find interesting or useful before, during, and after their trip.
### Why add an RSS Feed to your event?
Rather than needing to post all communications from the event team manually to the social wall, using an RSS feed enables dynamic content integration, such as posting news posts from your website to the social wall, which can be read in the app, whilst also linking back to the website to see additional content.
### Basic considerations
Any standard RSS feed that abides by the RSS 2.0 standard, with the following required fields, are accepted: ``, `<description>`, `<pubDate>`, `<guid>`
Additionally, when a \<link> is provided, tapping on the post in the app will open the link in an exernal browser.
Images that are inside the post content `<media:content>`, `<enclosure>`, or inline `<img>` are attached to the post. Only one image per post will be displayed.
### Setting up the RSS Feed
To begin, in the Admin panel, go to <kbd>Settings</kbd> → <kbd>API & Integrations</kbd> → <kbd>Integrations</kbd> → <kbd>New Integration</kbd> → <kbd>New RSS Feed</kbd> .
<figure><img src="https://772941315-files.gitbook.io/~/files/v0/b/gitbook-x-prod.appspot.com/o/spaces%2F-M5LNCGpK5lyymcFZU4V%2Fuploads%2F2CAy6GP7l6URioh8O3PB%2Fimage.png?alt=media&token=7180e232-585d-46dd-b23b-8c459e43e91d" alt=""><figcaption></figcaption></figure>
Give the integration a name for easy reference and add the URL that links to the feed that is being added to the platform. Click <kbd>Save Changes</kbd> .
Once this done, an additional option appears which can be set to enable or disable the feed. When the feed is active, new posts will be added hourly. Additionally, new posts can be fetched manually at any time by clicking the [<kbd>Import</kbd>](#user-content-fn-1)[^1] button.
<figure><img src="https://772941315-files.gitbook.io/~/files/v0/b/gitbook-x-prod.appspot.com/o/spaces%2F-M5LNCGpK5lyymcFZU4V%2Fuploads%2FI8pjt4tvGvMqMajMI5Be%2FScreenshot%202025-11-20%20at%2011.50.51.png?alt=media&token=356a615d-e208-4d02-a081-7ce62c012ebc" alt=""><figcaption></figcaption></figure>
The RSS feeds can be used in two ways:
* A dedicated navigation item
* Included in the Social Wall
#### RSS Feed dedicated navigation item
* Once an RSS feed has been added, an addition option wil appear in the menu when creating a new navigation item. Under <kbd>Modules</kbd> , a new item, <kbd>News items (via RSS)</kbd> will appear. This page will show posts and articles from all active RSS feeds.
<figure><img src="https://772941315-files.gitbook.io/~/files/v0/b/gitbook-x-prod.appspot.com/o/spaces%2F-M5LNCGpK5lyymcFZU4V%2Fuploads%2Fn0gNG492ARZWycSgXIdb%2Fimage.png?alt=media&token=6916ced0-0b46-4ec0-a4f9-325f1a7ba367" alt=""><figcaption></figcaption></figure>
In the app, the news feed looks similar to the social wall but instead of tapping on the post to expand it, tapping it will take users to the main page of the post, i.e. the full news article or blog page.
<figure><img src="https://772941315-files.gitbook.io/~/files/v0/b/gitbook-x-prod.appspot.com/o/spaces%2F-M5LNCGpK5lyymcFZU4V%2Fuploads%2FF0EahYCj0Ef90tmxCBtx%2FScreenshot%202025-11-20%20at%2012.54.33.png?alt=media&token=fc5a0360-1eea-4bcc-894d-248d524dff30" alt="" width="188"><figcaption></figcaption></figure>
#### On the Social Wall
In addition to the dedicated feed, there is a setting in General Settings -> Integration settings, which when enabled, will also weave these posts into the Social Wall between other comments. Like in the dedicated navigation page, tapping these posts takes the reader to the linked article.
<figure><img src="https://772941315-files.gitbook.io/~/files/v0/b/gitbook-x-prod.appspot.com/o/spaces%2F-M5LNCGpK5lyymcFZU4V%2Fuploads%2FMQPyMDhCapLdPwHKD8MT%2Fimage.png?alt=media&token=333acbb7-319c-492b-974d-1e0ea9b54f69" alt=""><figcaption></figcaption></figure>
[^1]:
# Procurios
### Overview
The Procurios integration connects your Procurios CRM and meeting registration system directly to the platform. Attendee data from Procurios is automatically brought in and kept up to date — so you don't have to manually manage your attendee list in two places.
Data flows from Procurios into the platform. One exception: when an attendee checks in on-site at your event, that check-in is sent back to Procurios so their attendance is recorded there too.
### What Data Is Synced
The following attendee details are imported from Procurios:
* Email address
* First name
* Name infix (middle name)
* Last name
* Company name
* Job title / role
* Mobile phone number
* Any custom fields you configure in the field mapping
If you enable the **Sync personal programme** setting, the sessions each attendee has signed up for in Procurios are also imported and reflected in their personal schedule on the platform.
### Setup
Setup happens in the admin panel under **Integrations / Couplings**. You'll work through the following steps in order — the platform guides you through each one.
{% stepper %}
{% step %}
### Enter your Procurios details
You'll need the following credentials from your Procurios environment:
* **Procurios base URL** — the web address of your Procurios environment
* **Client ID** — provided by Procurios
* **Client Secret** — provided by Procurios
Once saved, the platform connects to Procurios and verifies the credentials automatically.
{% endstep %}
{% step %}
### Select a CRM collection
Choose which CRM collection in Procurios holds the contact records for your attendees. Once selected, the platform fetches the available data fields from that collection.
{% endstep %}
{% step %}
### Map your fields
The platform automatically maps the most common fields (name, email, company, etc.). You can adjust the mapping to match your specific Procurios setup.
{% hint style="warning" %}
#### Warning
An email field must be mapped before the integration can be activated. Attendees without a valid email address will be skipped during import.
{% endhint %}
{% endstep %}
{% step %}
### Select your meeting
Pick the specific Procurios meeting you want to import attendees from. Only one meeting can be linked per event.
{% endstep %}
{% step %}
### Activate
Once all the above steps are complete, the platform will confirm you're ready to activate the integration.
{% endstep %}
{% endstepper %}
### How the Automatic Sync Works
Once active, the integration runs automatically — every 20 minutes — without any manual action needed.
The sync is active from 14 weeks before your event until 1 week after your event ends. Outside of that window, syncs only run once per night.
During each automatic sync, the platform will:
* Add new attendees who have registered in Procurios
* Remove attendees whose registration has been cancelled in Procurios
* Sync personal programme selections (if that setting is enabled)
{% hint style="warning" %}
#### Warning
The automatic sync does not update existing attendee details (such as a name or company change made in Procurios after the initial import). To pick up those changes, you need to run a Full Import manually — see below.
{% endhint %}
### Running a Full Import (Manual)
The **Reset import** button in the admin panel triggers a full re-import of all attendee data from Procurios. Unlike the regular sync, this overwrites existing account data with the latest information from Procurios for every attendee.
Use this when:
* An attendee's details have changed in Procurios and you need those changes reflected on the platform
* You want to make sure all records are fully up to date before your event goes live
{% hint style="info" %}
#### Tip
Run a Full Import shortly before your event opens to make sure all last-minute data changes from Procurios are captured.
{% endhint %}
### Extra Settings
After activation, three additional settings become available under **Extra settings**:
<details>
<summary>Send cancellation email</summary>
**Default:** off
When turned on, attendees will automatically receive a cancellation email if their registration is removed in Procurios during a sync.
</details>
<details>
<summary>Auto-create event tag</summary>
**Default:** off
When turned on, all imported attendees are automatically tagged with a hidden tag based on the event name. This makes it easy to target emails specifically at attendees of a particular event.
</details>
<details open>
<summary>Sync personal programme</summary>
{% hint style="warning" %}
#### Warning
If Sync personal programme is on, you should disable the setting <kbd>Are attendees allowed to change their personal programme?</kbd> If both are active at the same time, changes made by the attendee will be overwritten on the next sync.
{% endhint %}
**Default:** on
When turned on, the platform imports each attendee's selected sessions from Procurios and builds their personal schedule automatically. This runs on every sync (both automatic and manual).
{% hint style="info" %}
#### Info
All plenary sessions are automatically added to every attendee's personal schedule when this setting is on — even if the attendee didn't explicitly select them in Procurios.
{% endhint %}
</details>
### Check-In Sync
When an attendee checks in on-site at your event (using the app or a scanner), that check-in is automatically sent back to Procurios and recorded as "present" on their registration.
{% hint style="info" %}
#### Info
Only physical, on-site check-ins are synced back to Procurios. Online or hybrid check-ins are not sent back.
{% endhint %}
If the sync to Procurios fails, the platform retries once automatically. If it fails again, the check-in on the platform is still recorded — only the Procurios update is missed.
### Things to Keep in Mind
* **Unique email restriction:** If your registration settings are set to only allow unique email addresses, this can conflict with how Procurios handles duplicates. The platform will warn you about this in the admin panel — it is recommended to turn that restriction off when using the Procurios integration.
* **One meeting per event:** Only one Procurios meeting can be linked to each event on the platform.
* **Attendees without email:** Any attendee in Procurios who does not have a valid email address will be skipped and not imported.
* **Field changes after go-live:** You can adjust the field mapping at any time, but changes only affect attendees imported after the update.
* **Large attendee lists:** Attendees are processed in batches, so a very large import may take a little longer than usual to complete fully.
### Summary
| Feature | Detail |
| ------------------------------- | ---------------------------------------------------------- |
| Sync direction | Procurios → Platform (check-ins also go back to Procurios) |
| Automatic sync frequency | Every 20 minutes |
| Active sync window | 14 weeks before event to 1 week after event |
| Full import | Available manually via "Reset import" button |
| Fields synced | Name, email, company, job title, phone, custom fields |
| Personal programme sync | Optional setting (on by default) |
| Check-in sync back to Procurios | Yes — on-site only |
# API access
{% hint style="info" %}
If you are looking for **information on our existing integrations/optional couplings**, please visit [this article](https://knowledge-base.letsgetdigital.com/the-admin-panel/settings/untitled)!
{% endhint %}
## What is an API?
API stands for Application Programming Interface. With the use of an API a connection between two applications can be established, so that they can 'talk to each other'. In other words, an API is a messenger that delivers your request to the provider that you’re requesting it from and then delivers the re~~s~~ponse back to you. APIs are an accessible way to extract and share data within and across organizations.
## What can I do with an API?
A common reason to use an API within Let's Get Digital is to connect your Let's Get Digital Admin Panel with registration software (for which there is not yet an [existing integration](https://knowledge-base.letsgetdigital.com/the-admin-panel/settings/untitled) within LGD). This way user data can be synched with Let's Get Digital, without the necessity for you to import any data manually.
## How do I build an API with Let's Get Digital?
**Please have a look at our** [**API documentation**](https://docs.letsgetdigital.com/)**.** Here you should find all information that you would need to build an API with Let's Get Digital. If this looks unfamiliar and strange to you, please pass this info on to your tech or development department! They will know what to do!
For webhook information, click here: [Webhooks](https://knowledge-base.letsgetdigital.com/faq/faq-about-the-application-app/integrations-and-api/webhooks)
{% hint style="info" %}
You can add a new API token in the Admin Panel under **Settings - API tokens**
{% endhint %}
# Webhooks
We provide a way to get notifications from our system when a user or company gets changed. For this, we use a concept called webhooks. If you enable a webhook in our system will open a specific page given by you so you can update your system accordingly. In the webhook, we provide the type of operation and the identifier and the type of object.
This example POST request:
```
{ "entity_id": 1, "entity_type": "user", "action_type": "new", "result": { "id": 1, "external_id": "1815", "code": "CODE", "external_qr_identifier": "thebarcode", "checkin": "2019-11-05 07:56:15", "name_first": "Guan", "name_infix": null, "name_last": "the Man", "gender": "man", "company_name": "Let's Get Digital", "company_role": "Awesome person", "normal_qr_code": "thebarcode", "secure_qr_code": "https:\/\/evins.nl\/1\/bd0494941c\/tyiuW2S1OUv5c3ASL1qv%2E", "aanmelder_survey_id": "93627", "qr_link": "v2d5iy6g0m60tc", "custom_fields": [], "companies": [ 5 ] }}
```
`entity_id` is our internal identifier for this entry
`entity_type` is the type of entity, currently we support `user` and `company`
`action_type` is the type of operation that was executed, the options are `new`, `update` and `delete`.
`result` is the new value of the record, the fields are the same as in our [API ](https://docs.letsgetdigital.com/)(this data is not provided on a `delete` action.
## Install <a href="#install" id="install"></a>
1. Login in the admin panel.
2. Go to Settings -> Integrations -> Couplings
3. Press on `New Webhook` button
4. Fill in a name, this is only used as a description, please fill in the name of the service you are coupling.
5. Set the Is active to Active to enable the webhook
6. Fill in the URL of the endpoint
7. And enable all the triggers you like to receive
## Select events <a href="#select-events" id="select-events"></a>
On the settings page, you can select which events are sent to your endpoint.
## Debug webhooks <a href="#debug-webhooks" id="debug-webhooks"></a>
We provide two functions to debug a webhook. The first is a test webhook button. If you press this a request will be fired to the given URL with a `action_type: test`. This request sends the data of your user account.
The other debug tool is the log overview in this view you can see the past 10 webhook requests to see if they function properly.
You can also use a site like <https://webhook.site/> to test requests coming from our system.
# Bulk Import tool
Users (as well as many types of content) can be imported in bulk using CSV or spreadsheet files.
This page redirects to the main Importer article.
{% content-ref url="/pages/h1Dl5jum8yhl6ofOWjGf" %}
[Importer](/the-admin-panel/settings/importer)
{% endcontent-ref %}
# Branded App
This article describes everything you need to know about publishing your Branded App.
There are a few important steps that need to take place in order to publish your Branded App to the Google Playstore and App Store.
{% hint style="danger" %}
It is important to start this process as soon as possible as some steps require contact with Apple.
{% endhint %}
Please follow the steps listed below and the related article:
<table data-view="cards"><thead><tr><th></th><th data-hidden data-card-cover data-type="files"></th><th data-hidden data-card-target data-type="content-ref"></th></tr></thead><tbody><tr><td><strong>Step 1: Create Apple Developer Account</strong></td><td><a href="https://772941315-files.gitbook.io/~/files/v0/b/gitbook-x-prod.appspot.com/o/spaces%2F-M5LNCGpK5lyymcFZU4V%2Fuploads%2FkMHleSKKFWZ09nGcQIPu%2Fapple-developer-og.png?alt=media&token=30a2cf20-05f8-4d4c-a28f-71bd68c4ab24">apple-developer-og.png</a></td><td><a href="/in-person-event/application/apple-developers-account">Create an Apple Developers Account</a></td></tr><tr><td><strong>Step 2: Grant Access to Apple Developer Account</strong></td><td><a href="https://772941315-files.gitbook.io/~/files/v0/b/gitbook-x-prod.appspot.com/o/spaces%2F-M5LNCGpK5lyymcFZU4V%2Fuploads%2FBWMvrbd9ZJp8Mx6f7VaV%2FScreenshot%202022-11-03%20150732.png?alt=media&token=d5906148-2dfc-476a-8909-c07a64fb9a70">Screenshot 2022-11-03 150732.png</a></td><td></td></tr><tr><td><strong>Step 3: Design of Branded App</strong></td><td><a href="https://772941315-files.gitbook.io/~/files/v0/b/gitbook-x-prod.appspot.com/o/spaces%2F-M5LNCGpK5lyymcFZU4V%2Fuploads%2FULmAGfsOmosUrcfIkY99%2FScreenshot%202022-11-03%20133158.png?alt=media&token=82a4c4ec-88e6-4ef0-9d73-7d5167d407ed">Screenshot 2022-11-03 133158.png</a></td><td><a href="/the-admin-panel/settings/settings">App design</a></td></tr><tr><td><strong>Step 4: App is reviewed</strong></td><td><a href="https://772941315-files.gitbook.io/~/files/v0/b/gitbook-x-prod.appspot.com/o/spaces%2F-M5LNCGpK5lyymcFZU4V%2Fuploads%2FCgLqHRbeisry0IyYB7TA%2Fasc-og.png?alt=media&token=426ee9da-7f64-477e-b0f3-742f903a9ce9">asc-og.png</a></td><td></td></tr><tr><td><strong>Step 5: Branded App is published</strong></td><td><a href="https://772941315-files.gitbook.io/~/files/v0/b/gitbook-x-prod.appspot.com/o/spaces%2F-M5LNCGpK5lyymcFZU4V%2Fuploads%2FehtFGFBHPWCapnmGlIVG%2FUntitled%20design%20(17).png?alt=media&token=bbe7f5f4-63a1-4265-8ee6-7e74a3b6149f">Untitled design (17).png</a></td><td></td></tr></tbody></table>
# Create an Apple Developers Account
Creating an Apple Developer Account is a pre-requisite for publishing Branded Apps. See how you can create an account in the following article:
{% hint style="danger" %}
**WARNING:** Please follow the steps listed in this article carefully! Completing this correctly the first time will save you time in the future. If you have any concerns please contact your Event Consultant directly.
{% endhint %}
## How to create an account <a href="#instructions" id="instructions"></a>
{% hint style="danger" %}
**WARNING:** Please ensure the Apple Developer Account is an **ORGANISATION** account and **not** an individual one (if you have any doubts give us a call).
You will also need an Apple device to be able to complete this process.
{% endhint %}
1. Create your Apple ID: [**Create Apple ID**](https://appleid.apple.com/account)\
(Once you have submitted the form you will be asked to verify your account by email & phone code)
<figure><img src="https://772941315-files.gitbook.io/~/files/v0/b/gitbook-x-prod.appspot.com/o/spaces%2F-M5LNCGpK5lyymcFZU4V%2Fuploads%2F6Ranff4CidfECWFbAET9%2FUntitled%20design%20(23).png?alt=media&token=a8775ec5-1ad0-4218-b3f2-adbfaa0a5d9a" alt=""><figcaption><p>New Apple ID Created<br></p></figcaption></figure>
2. Switch on two-factor authentication on your Apple device (iphone, ipad or ipod touch).\
[(How to setup two-factor authentication)](https://support.apple.com/en-gb/HT204915)\
\
\ <br>
<figure><img src="https://772941315-files.gitbook.io/~/files/v0/b/gitbook-x-prod.appspot.com/o/spaces%2F-M5LNCGpK5lyymcFZU4V%2Fuploads%2FBPNkrGT70pVHGzTdmkuc%2FWarning%20(1).png?alt=media&token=e59f8ec2-9bda-4401-a1e3-f203399f3104" alt=""><figcaption></figcaption></figure>
\ <mark style="color:red;">**WARNING**</mark>**: You must enroll as an ORGANISATION** **and not an Individual this cannot be reversed easily and may result in your Branded app not being published.**\
\
\ <br>
3. Enroll to Apple Developer Program as an Organisation: [**Enroll here**](https://developer.apple.com/programs/enroll/)\
(Please read all the information listed on the Apple Developer Program enrollment page)<br>
<figure><img src="https://772941315-files.gitbook.io/~/files/v0/b/gitbook-x-prod.appspot.com/o/spaces%2F-M5LNCGpK5lyymcFZU4V%2Fuploads%2FepHE1DLavRf5XTQ8jNHd%2Fimage.png?alt=media&token=8269f008-80e0-4312-a4e6-6a4c4c6526de" alt=""><figcaption></figcaption></figure>
Once you have read the information click <img src="https://772941315-files.gitbook.io/~/files/v0/b/gitbook-x-prod.appspot.com/o/spaces%2F-M5LNCGpK5lyymcFZU4V%2Fuploads%2FlyAHDDB0uWcYCcQV7fnh%2Fimage.png?alt=media&token=c6b04462-868a-46f2-8f9b-f831a68ab60e" alt="https://developer.apple.com/enroll/" data-size="line">at the bottom of the page and follow the steps promted by Apple.\
\
**Important:** When selecting your **'Entity type'** choose **Company / Organisation**\
(If this type is not selected we cannot develop the app)\
\ <img src="https://772941315-files.gitbook.io/~/files/v0/b/gitbook-x-prod.appspot.com/o/spaces%2F-M5LNCGpK5lyymcFZU4V%2Fuploads%2FinY8AvcZ3IvpGBKh8GSm%2Fimage.png?alt=media&token=ad787d30-5d20-45a4-85fd-1f065e00c23e" alt="" data-size="original"><br>
4\. Continue and complete the steps as prompted (You'll need your Apple ID and D-U-N-S number. If you don't know your D-U-N-S number, request it [here](https://developer.apple.com/enroll/duns-lookup/#!/search)).
5\. Payment of Apple Developer Account membership: Once you have completed the Apple Steps and you have paid the memberhip fee you should recieve the message '**Your enrollment is being processed**' your account will now be reviewed by Apple (potentially taking a few days).<br>
<figure><img src="https://772941315-files.gitbook.io/~/files/v0/b/gitbook-x-prod.appspot.com/o/spaces%2F-M5LNCGpK5lyymcFZU4V%2Fuploads%2FSyT4VldUZEMNPesNgyES%2Fimage.png?alt=media&token=90afe3bd-6ff8-40c8-83f1-f2aa071db64d" alt=""><figcaption></figcaption></figure>
6\. Once your Apple developer account has been review you will recieve email confirmation.
<figure><img src="https://772941315-files.gitbook.io/~/files/v0/b/gitbook-x-prod.appspot.com/o/spaces%2F-M5LNCGpK5lyymcFZU4V%2Fuploads%2Fx2Z7iCTcS7JoeLjYEArc%2FrtaImage.jpg?alt=media&token=827bea5f-1ed2-4a1e-af8f-a1744ee53a34" alt=""><figcaption></figcaption></figure>
{% hint style="success" %}
As soon as your account has been approved, we need to be provided with access so that we can publish the app on your companies behalf. Granting access only takes 5 minutes and you can read how to grant us access [here](/in-person-event/application/granting-account-access).
{% endhint %}
<table data-view="cards"><thead><tr><th></th><th data-hidden data-card-cover data-type="files"></th><th data-hidden data-card-target data-type="content-ref"></th></tr></thead><tbody><tr><td><strong>Step 3: Grant Access to Apple Developer Account</strong></td><td><a href="https://772941315-files.gitbook.io/~/files/v0/b/gitbook-x-prod.appspot.com/o/spaces%2F-M5LNCGpK5lyymcFZU4V%2Fuploads%2FU4fL6HSNWTWb1sOStKH3%2FScreenshot%202022-11-03%20150732.png?alt=media&token=d10608c2-3d11-45a5-8b31-fca68fe67bd9">Screenshot 2022-11-03 150732.png</a></td><td><a href="/in-person-event/application/granting-account-access">Grant Access to Apple Developer Account</a></td></tr></tbody></table>
# Grant Access to Apple Developer Account
Invite us to your Apple Developer Account so that we can build & publish your Branded App under your organisations name.
## How to invite us to your Account <a href="#granting-account-access" id="granting-account-access"></a>
1. Go to <https://appstoreconnect.apple.com/>
2. Sign in (using your Apple Developer Account credentials)
3. Go to 'Users and Access'.
4. Click on the plus icon to add a user.
5. Fill in the new user information as shown below:
{% hint style="info" %}
**Please note:** We need access to the account as an **administrator.**
{% endhint %}
| **First name** | Bas |
| ----------------------- | ---------------------------------------------- |
| **Last name** | Krijgsman |
| **E-mail** | <publishapp@letsgetdigital.com> |
| **Roles** | Admin |
| **Developer resources** | Access to Certificates, Identifiers & Profiles |
<figure><img src="https://772941315-files.gitbook.io/~/files/v0/b/gitbook-x-prod.appspot.com/o/spaces%2F-M5LNCGpK5lyymcFZU4V%2Fuploads%2FkjP7IxMLbn9889XFJxD7%2Fpublish%20app%20ss.jpg?alt=media&token=db9e1463-cf23-4f77-80f7-eaa3d8e7a53c" alt=""><figcaption></figcaption></figure>
# Contacting Apple Support
This article will describe how you can contact Apple.
## Overview <a href="#overview" id="overview"></a>
We have done our best to guide you through the necessary steps as required by Apple to be able to publish the app in their app store, however, ***if you encounter any difficulties then we strongly suggest contacting Apple directly as it is their services and processes.*** However, because it isn't easy contacting Apple over the phone, we have broken down the process here for you. There are some problems that you should always refer to Apple and contact them which you can find explained below.
{% hint style="info" %}
**Note:** The below process only helps with problems with registering for an Apple Developer Account, not registering for a regular Apple ID.
{% endhint %}
## Problems that will always require Apple's support <a href="#problems-that-will-always-require-apples-support" id="problems-that-will-always-require-apples-support"></a>
{% tabs %}
{% tab title="Legal Entity Name incorrect" %}
This is when the name of your association doesn't match the D-U-N-S number. This often is because Apple does not allow special characters in the association's name, such as: ‘-/%$#. This for certain associations however is part of their name (For example: K.S.V. “Sint Franciscus Xaverius”). For help with this, you need to speak to Apple.
{% endtab %}
{% tab title="No Apple device for registration" %}
To register with an Apple ID and enable two-step authentication, you need to have access to an Apple Device (Iphone, Ipad, Macbook etc) where you can activate this account. If you don't have one (Or you have more than three accounts registered on that device), you won't be able to activate that account. For help with this problem, you will need to speak to Apple.
{% endtab %}
{% endtabs %}
## Contacting Apple Support
1. Go to developer.apple.com/support/ and click on 'Contact us'.

2\. If needed, log in with your Apple account.

3\. Select 'Membership and Account'.

4\. Select the topic that best describes your problem. This is likely to be 'Programme Enrolment'.

5\. Choose 'Phone'.

6\. Select +31 for The Netherlands, +44 for the UK, or the relevant area code for your location, and enter your phone number before clicking on 'Call me'. \
7\. Apple should then call you back within approximately 1 minute. Explain the problem to Apple when they do call and follow their instructions.

# How to Complete Your Trader Status in App Store Connect
How to Complete Your Trader Status in App Store Connect
### Why This Is Important
Due to a recent update from Apple, all clients must provide updated information regarding their Trader Status before publishing a new app. If this step is not completed, Apple will not allow us to publish your branded app.
You can check your Trader Status by looking for a red warning banner in App Store Connect. If you see this banner, action is required. If you do not see the banner, your Trader Status is likely already set up—but we strongly recommend double-checking to ensure everything is correct.
### Steps to Complete Your Trader Status
**1. Log in to App Store Connect**
• Go to [App Store Connect](https://appstoreconnect.apple.com/) and log in with your Apple Developer credentials.
**2. Navigate to the ‘Apps’ Tab**
• Click on the Apps section to see an overview of your apps.
**3. Look for the Red Warning Banner**
• If your Trader Status is not properly configured, you will see a red warning banner at the top of the screen.
<figure><img src="https://772941315-files.gitbook.io/~/files/v0/b/gitbook-x-prod.appspot.com/o/spaces%2F-M5LNCGpK5lyymcFZU4V%2Fuploads%2FrBLzGZtQRGBnJIDwlG4D%2F32a08502-2b73-470e-b22d-703fbebab79b.png?alt=media&token=ee22672e-afa9-45cd-a98b-878aabe5e221" alt=""><figcaption></figcaption></figure>
**4. Follow the Instructions in the Banner**
• Click on the link in the warning banner.
• Complete the required steps as instructed by Apple.
**5. Confirm the Update**
• Once you have submitted your Trader Status information, please let us know so we can proceed with publishing your app.
#### Troubleshooting & FAQ
**Q: I don’t see a red warning banner. Does that mean I’m all set?**
A: Most likely, yes! However, we recommend double-checking your settings in App Store Connect to ensure your Trader Status is fully configured.
**Q: What happens if I don’t complete this step?**
A: If your Trader Status is not updated, Apple will not allow us to publish your app. This could delay your launch.
**Q: I’m having trouble completing the steps. What should I do?**
A: If you need assistance, feel free to contact our support team, and we’ll be happy to help!<br>
<br>
<br>
# App - Best Practices
Use the following best practises to make sure the app work's automatically for you!
{% stepper %}
{% step %}
### Navigation setup
**Tab 1: Home (Combined Start page)**
* My ticket
* Swipe-2-match
* Programme
* Companies
**Tab 2: Chat**
**Tab3: Connection Centre**
**Tab 4: Notifications**
**Tab 5: Menu**
* Floor plan
* Appointments
* My Contacts
* More\
\- Activities\
\- Leave a review\
\- Settings
* About the App
{% hint style="info" %}
**Tip:** Use all 5 available tabs to minimize the number of clicks for users. On the Home page, only assign 4 sub-menu tabs to ensure the social wall content remains visible and prominent.
{% endhint %}
{% endstep %}
{% step %}
### **Social wall encouragment**
Place a non-pinned message (as the organisation) promoting your attendees to make their first social wall post.
{% hint style="success" %}
*\*Here is an example social wall post with a proven track record to boost social wall engagment:*\
\
*Final preparations are underway for the event and we are very excited to welcome you! Let us know if you are excited as we are by posting on this social wall.*
*See you soon!*
{% endhint %}
<figure><img src="https://772941315-files.gitbook.io/~/files/v0/b/gitbook-x-prod.appspot.com/o/spaces%2F-M5LNCGpK5lyymcFZU4V%2Fuploads%2FLBHX6r2r4Fks7teoQOCy%2FUntitled%20design%20(52).png?alt=media&token=f69ef4f4-7888-43ba-9b77-90abee81836c" alt=""><figcaption></figcaption></figure>
{% hint style="success" %}
\*Extra booster: Get at least one colleage to reply or post on the social wall.
{% endhint %}
{% endstep %}
{% step %}
### Scheduled e-mails
{% hint style="info" %}
**Note:** During the **Content Ready** meeting, we'll add the recommended email templates to your LaunchAssist project together. You'll then have time to review and edit the content before the **Onboarding** meeting, where we'll schedule all emails together and make any final adjustments.
{% endhint %}
#### **Exhibitor emails to schedule**
| Name of mail | When to schedule | Send emails to users who have | Tags | Recipient state |
| ---------------------------------------- | --------------------------------- | --------------------------------- | ----------------- | ------------------------------------------------------------------------------------- |
| Exhibitor portal invite | 30 days prior to event start date | At least one of the selected tags | Exhibitor manager | Send to everyone |
| Exhibitor portal reminder | 14 days prior to event start date | At least one of the selected tags | Exhibitor manager | Only send to exhibitor managers who have not yet logged into the Exhibitor portal yet |
| Exhibitor invite to app | 17 days prior to the event | At least one of the selected tags | Exhibitor | Send to everyone |
| Exhibitor reminder to ap | 7 days prior to the event | At least one of the selected tags | Exhibitor | Only send to users who didn't login yet |
| Exhibitor final reminder to login to app | 1 day prior to the event | At least one of the selected tags | Exhibitor | Only send to users who didn't login yet |
#### **General event emails to schedule**
| Name of mail | When to schedule | Send emails to users who have | Tags | Recipient state |
| --------------------------------------- | ---------------------------------------------------------------- | ----------------------------------------------------------------- | --------- | --------------------------------------- |
| Attendee invite to app | 14 or 7 days prior to event start date | Exclude with the selected tags | Exhibitor | Send to everyone |
| Attendees invite reminder to app | 5 days after first invite | Exclude with the selected tags | Exhibitor | Only send to users who didn't login yet |
| Attendee final reminder to login to app | 1 day prior to event start date (only for 14 day prior invitees) | Exclude with the selected tags | Exhibitor | Only send to users who didn't login yet |
| Export Contacts | 1 day after event end date | Only send to users who logged in and have at least one connection | | Send to everyone |
{% endstep %}
{% step %}
### Feedback / Net promoter score (NPS)
Enable automatic session feedback pop-ups at the end of each session
<figure><img src="https://772941315-files.gitbook.io/~/files/v0/b/gitbook-x-prod.appspot.com/o/spaces%2F-M5LNCGpK5lyymcFZU4V%2Fuploads%2FplPLmiUY7pxzDl8rtspQ%2FThis%20is%20an%20automaticlly%20generated%20appointment%20company%20slot%20(2).png?alt=media&token=42bd94b8-bf3b-4e40-9667-3ae2350206e9" alt=""><figcaption></figcaption></figure>
* Enable automatic session feedback pop-ups at the end of each session
* Schedule an NPS push notification (this gives your event a general score)\
(1 hour before the event stops)
* Schedule 1 general feedback question about the app. (2 hours before the event stops)
{% endstep %}
{% step %}
### Warm-up push messages
Warm the audience, with some scheduled push messages.
| Moment | Content example |
| ------------------------ | ------------------------------------------------------------------------------------------------------------------------------------------------------------------------------------------------------------------------------------------------------------------------------------------------------------------------------------------------------------ |
| 2 days before the event | Get connected with the other attendees. Have a look in the connection centre to see what brings them to the event, or use the swipe-2-match module. |
| Evening before the event | Tomorrow the event starts! We are looking forward to it. You as well? Let us know in the Social Feed |
| Moment check-in opens | The check-ins is just opened. We are looking forward to see you soon! |
| After each day | Day **XXX** is closed. We hope to see you tomorrow |
| After final day | <p>The event is over. Hopefully you've made very great connections and get inspired with new knowlegde. If you've made connections using this application you will automatically receive an e-mail with a link to your contacts.<br><br>Use this application to connect to the people you've missed or as a contact book for all your relevant contacts.</p> |
| {% endstep %} | |
{% step %}
### Matchmaking
* Create 10 to 15 relevant matchmaking tags.
* Encourage users who have not yet highlighted their personal interest to set them by placing an action button on the social wall \
App settings -> Netoworking bubble -> '**Encourage users to set their matchmaking tags on the social wall if not yet filled**'\

* Set-up automatic matchmaking rounds with 2 connections made each round. \
(1 time 1 day before the event + 1 time 30 min before the events opens)
<figure><img src="https://772941315-files.gitbook.io/~/files/v0/b/gitbook-x-prod.appspot.com/o/spaces%2F-M5LNCGpK5lyymcFZU4V%2Fuploads%2Ft8O6BYRvu5gyYZAiwgBJ%2FThis%20is%20an%20automaticlly%20generated%20appointment%20company%20slot%20(1).png?alt=media&token=ea677264-ecb8-406e-aec9-9598f2c3932f" alt=""><figcaption></figcaption></figure>
{% endstep %}
{% step %}
### Appointments
Make it easier for your attendees to schedule appointments with your Exhibitors by choosing to automatically generate appointment slots for companies.
Enable in 'Settings' -> 'App settings' -> 'Networking bubble' -> '**Generate Automatic Appointment Slots for Companies**'
<figure><img src="https://772941315-files.gitbook.io/~/files/v0/b/gitbook-x-prod.appspot.com/o/spaces%2F-M5LNCGpK5lyymcFZU4V%2Fuploads%2Fei7a5hu15vEtEz2XQ4BJ%2FThis%20is%20an%20automaticlly%20generated%20appointment%20company%20slot.png?alt=media&token=bb6cf679-3cc7-4ce9-b300-55a086c1a649" alt=""><figcaption></figcaption></figure>
{% endstep %}
{% step %}
### Make sure all 'App content' is filled
Before attendees are onboarded to the App make sure everything is filled and looking good!
Areas too watch out for:
* **Companies profiles** - has the company filled their company information and set a nice logo?
* **Speaker and Exhibitor profiles** - Have these users got a description, relevant contact information and a profile picture?
* **The programme** - Does every programme have a image, description, location and relevant speakers/ exhibitors connected to it?
<figure><img src="https://772941315-files.gitbook.io/~/files/v0/b/gitbook-x-prod.appspot.com/o/spaces%2F-M5LNCGpK5lyymcFZU4V%2Fuploads%2FZ15lqDDJwJOGrxGLWYgx%2FUntitled%20design%20(53).png?alt=media&token=e16d4b0b-4987-4b3d-8121-f7fab4bc6ae1" alt=""><figcaption></figcaption></figure>
{% endstep %}
{% endstepper %}
# App = Entry ticket
This is a proven best practice
## Why use the app as the official entry ticket?
It’s proven that event apps work best when attendees log in early and start using the app before the event has begun. Higher login rates lead to better engagement, smoother communication and fewer questions on the day of the event.
That’s why many events now use the app as the official entrance ticket. By making app access a requirement for entry, attendees naturally download and log in ahead of time long before they arrive at the venue.
Using the event app as the official entry ticket has proven effective for many events. Event managers who have used this method experience:
* Higher app login rates before the event, leading to stronger ongoing engagement
* Faster check-in at the entrance, with reduced queues and fewer questions
* Clearer communication for both attendees and staff on where and how to access tickets
### Proven case studies
{% tabs %}
{% tab title="Educational Conference (1500 visitors)" %}
An annual educational conference introduced app only entry to encourage attendees to engage with the programme and event information ahead of time.
This helped the organiser with session registrations prior to the event, to allocate the capacity of each session room.
| Type | Before | After |
| ------------------ | -------------------------------------------------------------- | ----------------------------------------- |
| **App login rate** | <p>1395 logins / 1418 visitors<br>(<strong>98.3%</strong>)</p> | 1563 logins / 1477 visitors (**105.82%**) |
*\*105.82% = Users who didn't visit the event, still had a small interaction with the app and logged in.*\
\
*\*Overall app hit increase of 19.3%*
{% endtab %}
{% tab title="Large Tech Trade show (5000 visitors)" %}
A large European technology trade show has worked with the event app over multiple years. For their latest edition of the event, the organisers introduced the app as the official entrance ticket and saw a significant increase in early app adoption and attendee engagement.
Tickets were made available via a prominent “My Ticket(s)” button on the app home screen, supported by staged attendee communication and an event day QR fallback email.
The organisers were able to clearly measure the impact through app usage statistics, including higher login rates and increased interaction in the days leading up to the event.
| Type | Before | After |
| ------------------ | ----------------------------------------------------------------- | ------------------------------------------------------------------ |
| **App login rate** | <p>4044 logins / 5197 visitors</p><p>(<strong>77.8%</strong>)</p> | <p>4871 logins / 5396 visitors</p><p>(<strong>90.27%</strong>)</p> |
*\*Overall app hit increase of* 61.52%
{% endtab %}
{% tab title="Congress (500 visitors)" %}
An annual knowledge congress focused at local govenment members, professionals and students. Using the app = entry ticket the organiser has been able to not only increase the login rate to the event app, but additionally promote the in-app registration of workshops in advance of the event.
| Type | Figure |
| ------------------ | -------------------------------------------------------------- |
| **App login rate** | <p>502 logins / 478 visitors <br>(105.2<strong>%</strong>)</p> |
*105.2% = Users who didn't visit the event, still had a small interaction with the app and logged in.*
*\*Overall app hits 81349*
{% endtab %}
{% endtabs %}
### How app-only entry works (in practice)
The most successful app-only entrance setups follow a clear, structured flow from registration through event-day entry:
{% stepper %}
{% step %}
### **Registration & confirmation email**
After registering, attendees receive a confirmation email. The content depends on whether the app is already live:
* **If the app is live:** attendees are informed they can access their entry ticket immediately inside the app.
* **If the app is not live yet:** attendees are told their ticket will become available in the app once it launches.
{% endstep %}
{% step %}
### **Ticket access in the app**
Once logged in, attendees find their ticket directly on the app homepage via a clear **“My Ticket(s)”** button.\
\
This provides a permanent, easy-to-locate entry point for their QR code.
<div align="left"><figure><img src="https://772941315-files.gitbook.io/~/files/v0/b/gitbook-x-prod.appspot.com/o/spaces%2F-M5LNCGpK5lyymcFZU4V%2Fuploads%2F1IIFmtc102nowQwSuxWv%2FUntitled%20design%20(8).png?alt=media&token=305abf60-0447-4811-a7af-58eea3d06be5" alt=""><figcaption></figcaption></figure></div>
{% endstep %}
{% step %}
### **Reminder communications**
In the lead-up to the event, reminder emails are scheduled and sent to attendees who have not yet logged into the app. [*Click here to see communication flow example*](/in-person-event/app-best-practices/app-entry-ticket/communication-flow-app-entry-ticket)
{% hint style="warning" %}
Our default onboarding mail flow promotes App = Entry ticket
{% endhint %}
{% endstep %}
{% step %}
### **Event-day mail with QR code fallback**
On the morning of the event, many organisers send a final fallback email containing the attendee’s QR code.
This ensures smooth entry even for attendees who have not downloaded or logged into the app yet.
{% endstep %}
{% endstepper %}
### Entrance experience on-site
At the entrance, staff follow a simple process:
* Attendees are asked to open the app and show their QR code via **My Ticket(s)**
* If an attendee does not have the app available, they can show the QR code from the event-day fallback email
This keeps check-in fast, reduces queues, and prevents ticket access issues at the door.
<table data-card-size="large" data-view="cards" data-full-width="true"><thead><tr><th align="center"></th><th align="center"></th><th data-hidden data-card-cover data-type="image">Cover image</th><th data-hidden data-card-target data-type="content-ref"></th></tr></thead><tbody><tr><td align="center"><strong>Communication flow</strong> </td><td align="center">App = Entry Ticket</td><td><a href="https://images.unsplash.com/photo-1584438784894-089d6a62b8fa?crop=entropy&cs=srgb&fm=jpg&ixid=M3wxOTcwMjR8MHwxfHNlYXJjaHw1fHxlbWFpbHxlbnwwfHx8fDE3NzAzODc1MzZ8MA&ixlib=rb-4.1.0&q=85">https://images.unsplash.com/photo-1584438784894-089d6a62b8fa?crop=entropy&cs=srgb&fm=jpg&ixid=M3wxOTcwMjR8MHwxfHNlYXJjaHw1fHxlbWFpbHxlbnwwfHx8fDE3NzAzODc1MzZ8MA&ixlib=rb-4.1.0&q=85</a></td><td><a href="/in-person-event/app-best-practices/app-entry-ticket/communication-flow-app-entry-ticket">Communication flow: App = Entry ticket</a></td></tr></tbody></table>
# Communication flow: App = Entry ticket
To support this communication flow, we provide ready to use best practice email templates. These can be found in your Admin panel under **Communication** and then **Mail scheduler**, and can be scheduled to ensure attendees receive the right message at the right time.
Below is a short overview of the key communications attendees will receive, from registration confirmation through event day entry.
{% hint style="info" %}
Our default onboarding mail flow promotes App = Entry tick
{% endhint %}
#### Registration confirmation A (app not live yet)
**Name of mail template:** Registration confirmation (app not yet live)
Sent immediately after registration if the app is not yet available. Sets expectations by informing attendees that their ticket will become accessible inside the app once it launches.
#### Registration confirmation B (app already live)
**Name of mail template:** Registation confirmation (app is live)
Sent immediately after registration if the app is already available. Informs attendees they can download the app right away and access their entry ticket directly via the “My Ticket(s)” button.
#### Registration confirmation C (app already live + Ticket re-assignment)
**Name of mail template:** Registation confirmation (live + ticket reassign)
Sent immediately after registration if the app is already available. Informs attendees they can download the app right away and access their entry ticket directly via the “My Ticket(s)” button. They are also informed that they can re-assign their ticket under the My ticket(s) button.
#### App launch announcement (7 days before event)
**Name of mail template:** Attendees - Invite app (7days before)
Sent when the app becomes available. Directs attendees to download the app, log in, and access their QR ticket from the app home screen.
#### Reminder emails before the event (Day before event)
**Name of mail template:** Attendees - reminder mail app (day before)
Scheduled reminders for attendees who have not yet logged into the app. Encourages early access and reduces last minute ticket questions.
#### Event day mail (2 hours before event opens)
**Name of mail template:** Event Day App
Sent on the morning of the event. Provides all attendee’s a final push to download the app and access to their QR code within the email as a backup, ensuring smooth entry even if they have not logged into the app yet.
# Pre-event page (App)
It is possible to set up a pre event page for in-person events. This pages describes how to do that that.
{% hint style="info" %}
Available for: in-person events; packages: extensive
{% endhint %}
A pre-event page can be used to display information about your event and to make the registration for your event available. The integrated [registration form function](https://knowledge-base.letsgetdigital.com/lgd-features/registration-form?q=regis) of Let's Get Digital can be used to make registering for your event easy and convenient.
## How to set it up
1. In the admin panel, hover over 'Settings' and choose 'General settings'.
2. Click on 'Registration & pre-event page' on the left-hand side menu.
3. Select the registration form that you would like to use (you will first need to create one before you can link one to the pre-event page).
For information about the settings of the pre-event page, please navigate to the [pre-event settings article](https://knowledge-base.letsgetdigital.com/the-admin-panel/settings/virtual-event-settings-vp/pre-event-settings-vp) in our knowledge base.
{% hint style="info" %}
**Note:** Once the timer finishes the countdown, the register button will disappear, so it won't be possible to register anymore once your event has started.
{% endhint %}
## Branding of the pre-event page
### Images
To set up the images of your pre-event page:
1. Hover over settings and select 'General Settings'.
2. Click on 'Branding' on the left-hand side menu.
3. Select your 'Background image' for the pre-event page.
4. Scroll further down to 'Virtual event images' and select your 'Event Logo'. This logo will be visible in the left corners of your pre-event page.
### Colours
To set up the colours of your pre-event page:
1. Hover over settings and select 'General Settings'.
2. Click on 'Branding' on the left-hand side menu.
3. Scroll down to 'Virtual event & Pre-event page colours'.
4. Fill in the colours that you want to use for the pre-event page. (to see which colours will become visible where use the LGD ColourGuide).
{% file src="/files/c1tluIaN1p2SUCXzCxli" %}
## The final result
To check out your pre-event page and retrieve the URL that can be shared, please follow these steps:
1. In the admin panel, hover over 'Settings' and choose 'General settings'
2. Click on 'Registration & pre-event page' on the left-hand side menu.
3. Click on 'Click here' next to 'Go to pre-event page'

# Self check-in service
This article describes the self check-in service.
{% hint style="info" %}
Available for: In-person events, package: advanced and extensive
{% endhint %}
The self check-in service can be used to replace the need for people manually checking in attendees at the entrance to your event venue. The attendees can check themselves in by scanning a QR code with the app and also retrieve their badge as well.
For information about how to set it up and the settings, please refer to [Self check-in settings page](https://knowledge-base.letsgetdigital.com/the-admin-panel/settings/app-settings-app/self-check-in-service-settings-app).
# Location self check-in QR code (App)
This page describes how the location self check-in function works.
For In-person & Hybrid events each individual location is assigned a QR code which can be displayed at each [location](https://knowledge-base.letsgetdigital.com/the-admin-panel/content/application-1/locations). Using the mobile app, attendees can use the [shake to connect](https://knowledge-base.letsgetdigital.com/faq/faq-about-the-application-app/untitled-8) feature to scan the location QR code to check into the next program item of the specific location.
After the event, it is possible in the [App Stats](https://knowledge-base.letsgetdigital.com/the-admin-panel/statistics/app-stats-app?q=app+sta) to download an overview of who checked in to each location.
### How to set-up
{% hint style="warning" %}
**This feature must first be enabled by completing the following steps:**
1. In the Admin panel click 'Settings' --> 'App settings' --> 'Self check-in service'
2. At the option 'Do you want to have self-check-in service enabled?' choose 'Yes'
3. At the option 'The number of minutes users can check-in in advance' set the time in minutes
{% endhint %}
#### Export all location QR codes
1. In the Admin panel navigate to 'Content' --> 'Locations'
2. Click the blue button <img src="https://772941315-files.gitbook.io/~/files/v0/b/gitbook-x-prod.appspot.com/o/spaces%2F-M5LNCGpK5lyymcFZU4V%2Fuploads%2FK10UO9ebG2EHbLNUsFtl%2Fimageedit_10_4799311134.png?alt=media&token=7561c82c-1f65-4121-be7d-772c443845ca" alt="" data-size="line">
3. A new page will open in your browser containing all of the location QR codes (which can be downloaded or printed).
#### Export individual Location QR code
1. In the Admin panel navigate to 'Content' --> 'Locations'
2. Next to the location name you want to generate a QR code for click the QR code symbol <img src="https://772941315-files.gitbook.io/~/files/v0/b/gitbook-x-prod.appspot.com/o/spaces%2F-M5LNCGpK5lyymcFZU4V%2Fuploads%2FyuN9eOmpDZ4utoF12FSg%2Fimage.png?alt=media&token=ef162481-378f-4d8c-bba2-02e0a11a77ec" alt="" data-size="line">
### The end result

# Networking table self check-in (App)
This page describes how the networking tables self check-in function works.
## How to set it up
At your in-person or hybrid event, you can hang up QR codes at the '[physical networking tables](https://knowledge-base.letsgetdigital.com/the-admin-panel/communication/application/round-tables)' so that attendees can scan them with the app to check in to the networking table they are visiting.
In the admin panel, navigate to 'Communication' and choose 'Networking tables'. Under the 'export' column, you can find a QR-code button that you can click for all physical networking tables. You will then be forwarded to a QR code with the name of the networking table and the active times above it. You can print out and display this QR code at the physical networking tables at your event venue for users to scan with their QR-code scanner built within the Let's Get Digital app.
After the event, you can download the statistics to see how many and which attendees checked in for which physical networking tables.
## The end result

# Treasure hunt
Overview of the Treasure Hunt feature for event apps
The Treasure Hunt feature turns your event into an interactive adventure — driving engagement and encouraging attendees to explore every corner of your event. From scanning QR codes to answering location-based questions, it's a fun and flexible way to spotlight the people, places, and moments that matter most at your event.
{% hint style="info" %}
*For full setup instructions, see* *the main* [*Treasure Hunt*](/the-admin-panel/networking/treasure-hunt) *guide.*
{% endhint %}
<figure><img src="https://772941315-files.gitbook.io/~/files/v0/b/gitbook-x-prod.appspot.com/o/spaces%2F-M5LNCGpK5lyymcFZU4V%2Fuploads%2FGMszbrVxjgNWd0zPclnA%2Fimage.png?alt=media&token=a8b78a21-0bb6-4b1a-b27c-e56813a2bbb4" alt=""><figcaption></figcaption></figure>
# The Lobby
The lobby forms the basis of the virtual event platform. Welcome attendees using a live stream or video and navigate to the programme, company stands and attendee overview.
The lobby consists of several parts explained in more detail below.
### Lobby content
Add a live stream, video or image to the lobby; the perfect way to welcome the attendees and to get them excited for the sessions. Several platforms can be used to host your live stream or video:
* [YouTube](https://knowledge-base.letsgetdigital.com/the-admin-panel/settings/virtual-event-settings-vp/live-stream-settings-vp/youtube-stream-vp)
* [Twitch](https://knowledge-base.letsgetdigital.com/the-admin-panel/settings/virtual-event-settings-vp/live-stream-settings-vp/twitch-stream-vp)
* [Vimeo](https://knowledge-base.letsgetdigital.com/the-admin-panel/settings/virtual-event-settings-vp/live-stream-settings-vp/vimeo-stream-vp)
* [iframe](https://knowledge-base.letsgetdigital.com/the-admin-panel/settings/virtual-event-settings-vp/live-stream-settings-vp/embed-webpage-iframe-vp)
* [Jet-Stream](https://knowledge-base.letsgetdigital.com/the-admin-panel/settings/virtual-event-settings-vp/live-stream-settings-vp/jet-stream-vp)
At the bottom of this articles, the [scaling](https://knowledge-base.letsgetdigital.com/platform-features/the-lobby-vp#scaling) of the lobby content is explained in more detail.

### Programme
The lobby displays the current live session as well as the session(s) that are up next. The session can be accessed from the lobby by selecting the current session displayed in the tab or by navigating to the full [programme](https://knowledge-base.letsgetdigital.com/the-admin-panel/content/virtual-platform/programme).

### Lobby tiles
The tiles displayed at the bottom of the lobby can be linked to a certain[ navigation item](https://knowledge-base.letsgetdigital.com/the-admin-panel/navigation/virtual-platform/tiles-customization), like advertisements, the program, the attendee overview and companies, and can be customized to fit the needs of your event.

### Virtual Lobby Chat
The chat is located on the right side of the lobby. Post information, comments or stories and share pictures during the event. It can also be used for polls and Q\&As. In order to activate that functionality, hover over 'Settings' in the admin panel, choose 'Virtual event settings' and then 'Lobby content'. Here, you can enable the polls and Q\&As for the lobby.
{% hint style="info" %}
**Note:** Administrators and hosts can manage the poll and Q\&A function in the chat.
{% endhint %}

### Navigation bar
The navigation bar in the top-right corner provides quick access to several features:
* [Helpdesk](https://knowledge-base.letsgetdigital.com/the-admin-panel/settings/settings/managers#helpdesk)
* [Interactive map](https://knowledge-base.letsgetdigital.com/the-admin-panel/settings/virtual-event-settings-vp/general-settings-vp#interactive-map)
* [Notifications](https://knowledge-base.letsgetdigital.com/the-admin-panel/communication/virtual-platform/push-notifications)
* [Chat ](https://knowledge-base.letsgetdigital.com/platform-features/chat)
* Fullscreen
* [Menu](https://knowledge-base.letsgetdigital.com/the-admin-panel/navigation/virtual-platform/menu)
* [Technical check system](https://knowledge-base.letsgetdigital.com/platform-features/technical-check-system)

### Scaling
The virtual platform is usable with a device with a display that is at least 1024 pixels wide. Though you may be able to open the platform on a mobile or tablet display, at the moment, the virtual platform has been designed with desktops and laptops in mind. As a result, using another device may result in unexpected behaviour.
In order to accommodate a wide range of displays, the lobby interface resizes elements so that they won't be too large for some displays, as well as not being tiny on others. An important element that this affects is the[ lobby content](https://knowledge-base.letsgetdigital.com/platform-features/the-lobby-vp#lobby-content).
Content that is officially supported (YouTube, Twitch, Vimeo, Jet-Stream) is displayed in an embedded video player that is responsive to the changing dimensions of the page. This means that if the content box changes size, the player will still fit inside the box, but it may get black bars on the top or sides of the player. However, if you decide to use custom content or a non-supported player through the use of the iframe option, it is the responsibility of the organiser that this content works as expected and not Let's Get Digital.

# CO₂ Calculator
Users can calculate their individual effective CO₂ savings based on attending the event remotely rather than at the physical location it would have otherwise taken place.
### How to setup the CO₂ Calculator (Event location)
Set up the CO₂ calculator using these simple steps:
1. Open the Admin panel
2. Go to Settings -> General settings -> Event Information
3. Enter the Event location
4. Save changes
### Users experience
When first logging into the virtual event users will be prompted to provide their current location, and the platform will calculate the CO₂ savings based on the distance they would have travelled to the event if it was in-person.

### How are CO₂ savings calculated?
The calculation of distance is based on Google and in case Google can't calculate it well (so with flight distance) we make our own calculations based on [this formula](https://en.wikipedia.org/wiki/Vincenty%27s_formulae).
### How to disable the CO₂ Calculator
You can disable the CO₂ Calculator by completing these simple steps:
1. Open the Admin panel
2. Go to Settings -> Virtual event settings
3. Click on Show extra settings
4. Go to General -> Search for the option 'Add location tab to the popup for the co2 calculator'
5. Disable this setting
# Switch User View (Virtual event)
This article explains how admins can prior to the events start preview how the virtual event will look through the account of a different user type.
During the setup phase of the virtual event (up until the event starts) admins have the ability to see how the event will appear through the account of a different user type (for example; speakers, attendees or moderators).
### How does it work?
Up until the start of an event admins can login to the virtual event platform and switch user view using the following steps:
1. From the admin panel click Virtual event --> Go to Virtual event
2. Once the virtual platform appears click 'Yes, continue'
3. In the upper navigation click Switch view
4. Choose the desired user type
5. When ready click 'switch user type'
### The result
<figure><img src="https://772941315-files.gitbook.io/~/files/v0/b/gitbook-x-prod.appspot.com/o/spaces%2F-M5LNCGpK5lyymcFZU4V%2Fuploads%2FUfdy0Qgi6cz6DHUvGLOt%2Fswitchview.gif?alt=media&token=2d31720b-cb81-4718-8f98-468838f58764" alt=""><figcaption></figcaption></figure>
# Accreditation
This page describes the accreditation system in Let's Get Digital.
{% hint style="info" %}
Available for: online events, packages: extensive
{% endhint %}
The accreditation system can be used to check which users should receive certain certificates by checking which users attended the programme items, and for how long.
## How to set it up
In the admin panel, hover over 'Settings' and choose 'Virtual event settings'. Choose 'Program' on the left-hand side menu. Scroll down to find 'Enable accreditation points' and enable it with the checkbox.
Below this data field, you can find the field '**Percentage of time spent in talk to receive accreditation points**'. If the percentage is set to 80, then attendees will have to stay for at least 8 minutes inside a 10-minute programme session in order to receive the 'Accreditation points'.
'**Accreditation points**' can be attributed by the organisers to each individual programme session: In the admin panel, hover over 'Content' and choose 'Program'. By clicking on the editing button next to the programme item, you can field the data field 'Accreditation points' and enter how many points attendees can receive when attending it. After the event, you can export all the relevant data to see exactly how many 'Accreditation points' were collected by each attendee.
{% hint style="info" %}
**Notes:** The accreditation points are only received when attendees reach the 'Percentage of time spent in talk to receive accreditation points'.
The accreditation settings for the programme items can also be entered in the [programme import Excel file](https://knowledge-base.letsgetdigital.com/lets-get-started/getting-started/virtual-platform/start-up-process/set-up-meeting/excel-import).
{% endhint %}
## The final result
After the event, you can export an Excel file with all the relevant data, which you can then use to distribute certificates accordingly:

# Helpdesk
The helpdesk function is a place for users to ask an event manager a question via live chat for a quick answer. To enable this function, tick the 'Is this user a chat help desk?' option when creating or editing a [manager](https://knowledge-base.letsgetdigital.com/the-admin-panel/settings/settings/managers).

## Help desk in the virtual platform
To make the event experience as smooth as possible, we have added a 'HELP' button in the virtual environment lobby as well as on the pre-event page. Add [Managers](https://knowledge-base.letsgetdigital.com/the-admin-panel/settings/settings/managers) to the help desk in the virtual environment. It is advised to have some managers on stand-by during the event to help out users who require support.
Users can click on 'HELP' in the top-right corner of the lobby.
A screen will pop up where users can either read the [FAQs ](https://eventinsight-consultants.gitbook.io/let-s-get-digital/the-admin-panel/content/faqs)or write the question in a text field which will open a chat with the help desk manager.


{% hint style="info" %}
**Note:** Users assigned to the helpdesk will receive a browser notification pop-up when receiving new questions (if permission is given).
{% endhint %}
## Help desk in the app <a href="#turning-a-user-into-managers" id="turning-a-user-into-managers"></a>
The help desk function can also be used in the app. To set it up, make sure at least one manager is set to be a help desk agent, as described above. You can then add the navigation item to your app navigation menu by adding the 'Contact' under 'Extra content':
<figure><img src="https://772941315-files.gitbook.io/~/files/v0/b/gitbook-x-prod.appspot.com/o/spaces%2F-M5LNCGpK5lyymcFZU4V%2Fuploads%2FrjBhMRmPzQVKwlNibzYJ%2Fhelp%20desk%20in%20app.gif?alt=media&token=0e7b0196-15ba-4fd8-a081-7b5baed64423" alt=""><figcaption></figcaption></figure>
The attendees will then be able to ask questions in the app during your event:
<figure><img src="https://772941315-files.gitbook.io/~/files/v0/b/gitbook-x-prod.appspot.com/o/spaces%2F-M5LNCGpK5lyymcFZU4V%2Fuploads%2FaI27IjhIRVh00V74J3E5%2Fhelp%20desk%20in%20app%202.gif?alt=media&token=4af81421-25b5-4160-a85a-c310e4775060" alt=""><figcaption></figcaption></figure>
## Monitor all help desk chats <a href="#turning-a-user-into-managers" id="turning-a-user-into-managers"></a>
In the admin panel, you can monitor all help desk chats by navigating to 'Communications' -> 'Help desk'. Here, you can see all the conversions between the users and the help desk. Furthermore, you can reassign conversations to other help desk agents. This can be useful when certain questions are more suitable for a specific help desk agent.

You can also send text messages to users through this menu, so you can reach out to users before they contacted the help desk:

# LGD Testing suite (Virtual event)
In order to make sure everything will work properly during the event, it is recommended to check if the platform and session services work in advance.
## Platform check
[This ](https://live.letsgetdigital.com/tools/check)website provides insight into some common issues and helps users to find quick solutions.
The Let's Get Digital Testing Suite includes:
* Platform services check.
* Video tests.
* Session services check, including a browser and webcam check.
* Frequently asked questions concerning common issues.
* Contact support button

{% hint style="danger" %}
Please share [this page](https://live.eventinsight.io/check.html#faq) with users who experience issues before contacting the Let's Get Digital Helpdesk.
{% endhint %}
## List of common errors
Consult the following document to solve common errors before contacting the support team.
{% file src="/files/0mLifJnArr04tg9MIqk1" %}
{% file src="/files/mFNECDIrYzfBu1WmNPJP" %}
{% file src="/files/HjOCEp2RBvz1cUsRnuGP" %}
In case these steps do not solve the problem, make sure to fill the following form as detailed as possible. Please include screenshots or a video showing the steps you take when the problem occurs.
[Bug Report Form](https://3mi5oy0pbxh.typeform.com/to/qZ1r6tk4)
We will file a bug report once we receive the require information to solve the problem as soon as possible.
# Interactive map (Virtual event)
The interactive map displays an overview of the attendance in each session and the movements from one location to another.
{% hint style="info" %}
Available for: online and in-person events; packages: core, advanced and extensive
{% endhint %}
## How to set it up
1. In the admin panel, hover over 'Settings' and choose 'Virtual event settings'
2. On the left-hand side menu, choose 'General'
3. Scroll down to the 'Modules' section
4. Make sure 'Enable interactive map' is enabled
## Functionality
In the upper navigation bar in the lobby, you can find the 'Map' button to enter the interactive map. In this interactive map, you can:
* View the profile of users by clicking on their avatar.
* Sessions and different areas of the platform (for example the [toilet feature](https://knowledge-base.letsgetdigital.com/the-admin-panel/virtual-event/virtual-platform/wow-effects/toilet-feature)) can be accessed from the map by clicking on the area.
* See where all the attendees of the event are currently 'located'.
## The end result

# Instruction videos (Virtual event)
The following pages includes instruction videos explaining how to use and setup several features.
## Excel sheets
### Excel NL
{% tabs %}
{% tab title="YouTube video" %}
{% embed url="<https://youtu.be/NvkTZmhEX_M>" %}
{% endtab %}
{% endtabs %}
### Excel EN
{% tabs %}
{% tab title="YouTube video" %}
{% embed url="<https://youtu.be/Zj8rwuuqQ1U>" %}
{% endtab %}
{% endtabs %}
### Excel DE
{% tabs %}
{% tab title="YouTube video" %}
{% embed url="<https://youtu.be/W4QBwJdxVQM>" %}
{% endtab %}
{% endtabs %}
## Appointments
### Appointments NL
{% tabs %}
{% tab title="YouTube video" %}
{% embed url="<https://youtu.be/2MwREF6EN5c>" %}
{% endtab %}
{% endtabs %}
### Appointments EN
{% tabs %}
{% tab title="YouTube video" %}
{% embed url="<https://youtu.be/G9kTlkM2uPg>" %}
{% endtab %}
{% endtabs %}
### Appointments DE
{% tabs %}
{% tab title="YouTube video" %}
{% embed url="<https://youtu.be/eL4Iy531rzw>" %}
{% endtab %}
{% endtabs %}
## Onboarding process
### Onboarding NL
{% tabs %}
{% tab title="YouTube video" %}
{% embed url="<https://youtu.be/Y0PdrduMzsI>" %}
{% endtab %}
{% endtabs %}
### Onboarding EN
{% tabs %}
{% tab title="YouTube video" %}
{% embed url="<https://youtu.be/rAcgYlsvVSA>" %}
{% endtab %}
{% endtabs %}
### Onboarding DE
{% tabs %}
{% tab title="YouTube video" %}
{% embed url="<https://youtu.be/jHOGQJMOkIE>" %}
{% endtab %}
{% endtabs %}
## Speaker instruction video
### Speaker instruction NL
{% tabs %}
{% tab title="Vimeo video" %}
{% embed url="<https://vimeo.com/651975741>" %}
{% endtab %}
{% tab title="YouTube video" %}
{% embed url="<https://www.youtube.com/watch?v=hH8nAqgZ27c>" %}
{% endtab %}
{% endtabs %}
### Speaker instruction EN
{% tabs %}
{% tab title="Vimeo video" %}
{% embed url="<https://vimeo.com/643870545>" %}
{% endtab %}
{% tab title="YouTube video" %}
{% embed url="<https://www.youtube.com/watch?v=aDMDqC9NDPU>" %}
{% endtab %}
{% endtabs %}
### Speaker instruction DE
{% tabs %}
{% tab title="Vimeo video" %}
{% embed url="<https://vimeo.com/646043103>" %}
{% endtab %}
{% tab title="YouTube video" %}
{% embed url="<https://www.youtube.com/watch?v=xUXUVb7hCh8>" %}
{% endtab %}
{% endtabs %}
# Badge printing with Let's Get Digital
The following article provides more information on our badge printing service.
{% hint style="info" %}
Are you actually looking for **badge settings**? [Then please have a look here!](https://knowledge-base.letsgetdigital.com/pricing-and-packaging/badge-printing/badge-printing-settings)
{% endhint %}
The first impression counts. Impress attendees with professionally branded badges and no waiting lines with our live badge printing.
{% embed url="<https://youtu.be/kjSyA2PHFTY>" %}
{% file src="/files/0qJkn8DpT3aDnRAH0OBX" %}
# Onsite printing requirements
### Power requirments
For each Badge Printing station, we have the following power requirements:
* \- 220-volt power supply
* \- 30W for the printer
* \- 80W for the laptop
### Internet requirments
The system requires a stable internet connection with the following speed requirements:
* A minimum of 1 MB/s per printer (if caching is enabled)
* A minimum of 5 MB/s per printer (if caching is disabled)
*<mark style="color:blue;">The stations can operate on both cable and Wi-Fi connections.</mark>*
### Latency Requirements:
* Unloaded latency should be under 100 ms
* Loaded latency should not exceed 200 ms
{% hint style="success" %}
The internet requirments can be tested at [fast.com](http://fast.com/).
{% endhint %}
{% file src="/files/0qJkn8DpT3aDnRAH0OBX" %}
# Badge settings
This article explains how to set up the badge printing for your event.
{% hint style="info" %}
When you make use of a [custom badge design](/badge-printing/custom-badge), you only have to select the correct badge type and set up the tags.
{% endhint %}
## Where to find the badge printing settings
1. Hover over settings and click on 'General settings'.
2. Select 'Badge printing' from the left-side handed menu. (if not visible, contact your event consultant to enable the badge printing module)
### Badge printing
| Setting | Description |
| ------------------------------------------------------------------------------------------ | ------------------------------------------------------------------------------------------------------------------------- |
| Get your badge | Click here to see a preview of your own badge. |
| Badge Type | Select the correct badge type here. (your custom badge will become visible here once it has been added by our developers) |
| Do you want the badge to be generated before, so you don't have to generate it on the fly? | When enabled, last minute changes will not be visible immediately. |
| Organisation logo | The image that will be visible on the badge. |
| Primary color | The colour of the top bar, first name, company name, company role and QR-code on the badge. |
| Secondary color | The colour of the last name on the badge. |
| Show powered by Let's Get Digital on the badge? | When enabled, powered by Let's Get Digital will be shown on the badge. |
| Show the user qr code on the badge | When this is disabled, a second logo can be added to replace the QR-code on the badge. |
{% hint style="info" %}
Showing the QR code on the badge makes it easier for attendees to make connections and it is easier to check out your attendees.
{% endhint %}
### User tags
| Setting | Description |
| ---------------------------- | ----------------------------------------------------------------------------------------------- |
| Default Title | This title will be put on the badge if the user does not have any tags linked to their profile. |
| Default tag title color | The color of the text that is shown on the badge. |
| Default tag background color | The color of the background of the tag that is shown on the badge. |
#### How to set up your tags
1. Go to 'Tags' under the badge printing settings.
2. Add the tags that you want to show on the badge.
3. Fill in how you want the tag to be visible on the badge by filling in the name, background colour, and text colour of the tag.
4. It is possible to set up as many tags as you need. Please note that if a user has multiple tags linked to their profile, the tag listed highest in your setup will appear on their badge. For example, if a user has both the "Speaker" and "Exhibitor" tags, but "Exhibitor" is ranked higher in the list, then "Exhibitor" will be displayed on their badge.
<figure><img src="https://772941315-files.gitbook.io/~/files/v0/b/gitbook-x-prod.appspot.com/o/spaces%2F-M5LNCGpK5lyymcFZU4V%2Fuploads%2FpHWw35hUXneGZa428djA%2FScreenshot%202023-08-09%20114453.png?alt=media&token=30fc86f9-1e10-47f3-9140-6f8b6f12dbfe" alt=""><figcaption></figcaption></figure>
{% hint style="warning" %}
**Please note:** If user tags (with respective colours) are not set in the badge printing settings, the tags and colours are fetched from the user [tag overview](https://knowledge-base.letsgetdigital.com/the-admin-panel/users/user-tags/creating-user-tags).
{% endhint %}
### Generate badges for all users
To generate the badges for all registered users in the admin panel, follow these steps:
* Go to **admin panel > users > all users**
* Then, click *actions* and select the option *user badges.*
* Then, select the option *generate new badges*
* Select your preferences and click *generate badges*
<figure><img src="https://772941315-files.gitbook.io/~/files/v0/b/gitbook-x-prod.appspot.com/o/spaces%2F-M5LNCGpK5lyymcFZU4V%2Fuploads%2FYKIyNhk7movtubpkRc77%2Fimage.png?alt=media&token=fa9f7320-5a8f-4913-ae3b-dda4a6ed5ce6" alt=""><figcaption></figcaption></figure>
# Custom Badge
Do you want a custom badge implemented for your event? The article below details what is required.
{% hint style="danger" %}
**Important notice:**
* The **final badge design** and all required files must be submitted **at least 5 working days before the event**.
* If this deadline is not met, a **rush fee of €100 per day late** will apply.
* Once the badge has been submitted for development, **no further design changes** can be made.
{% endhint %}
{% stepper %}
{% step %}
### Select Your Badge Type
Before designing your badge, you need to know which badge type you are using as each has different dimensions. Your Let's Get Digital consultant will confirm your badge type. If you are unsure, contact us at [**support@letsgetdigital.com**](mailto:support@letsgetdigital.com).
👉 [View badge types and dimensions](/badge-printing/custom-badge/badge-types-and-dimensions)
{% endstep %}
{% step %}
### Design the badge
Once you know your badge type, you can start designing. Follow our design guidelines carefully to make sure your badge prints correctly. If this is your first custom badge, we recommend starting with one of our design templates.
👉 [Read the badge design guidelines](/badge-printing/custom-badge/badge-design-guidelines)
{% endstep %}
{% step %}
### Submit Your Badge Design
Once your design is complete and all files are ready, send an email to: [**support@letsgetdigital.com**](mailto:support@letsgetdigital.com) using our email template. Remember: once submitted, your design is final and cannot be changed.
👉 [Find out how to submit your badge design](/badge-printing/custom-badge/submitting-your-badge-design)
{% endstep %}
{% step %}
### Approval Process
Once your badge has been developed, you will receive an email with your badge previews **at least 48 hours before your event** (unless a late submission was made).
Please review your badge previews as soon as you receive them and respond promptly. If anything is incorrect, click the 'Decline' button in the email you received and contact the Let's Get Digital team immediately at <support@letsgetdigital.com>
{% hint style="danger" %}
The approval process is to verify that the badge has been built correctly based on your submission. It is not an opportunity to make changes to the badge design.
{% endhint %}
{% endstep %}
{% endstepper %}
***
# Badge Types and Dimensions
Before designing your custom badge, it is important to know which badge type you are using. Each badge type has different dimensions and your design must match these exactly to ensure it prints correctly.
Your Let's Get Digital consultant will confirm your badge type. If you are unsure which badge type applies to your event, contact us at [**support@letsgetdigital.com**](mailto:support@letsgetdigital.com) before starting your design.
<table><thead><tr><th width="146.3046875">Type</th><th width="191">Design size (width x height)</th><th>Printed badge size (width x height)</th><th>Information</th></tr></thead><tbody><tr><td>T180</td><td>96.0 x 267.8 mm</td><td>96.5 x 134.0 mm</td><td>A paper badge designed to fold in half and worn with a keycord, with small white edges around the sides.</td></tr><tr><td>T180S</td><td>96.0 x 163.8 mm</td><td>96.5 x 82.0 mm</td><td>A paper badge designed to fold in half and worn with a keycord, with small white edges around the sides.</td></tr><tr><td>260T</td><td>101.0 x 277.0 mm</td><td>96.5 x 134.0 mm</td><td>A plastic badge designed to fold in half and stick together, worn with a keycord.</td></tr><tr><td>260TS</td><td>101.0 x 172.0 mm</td><td>96.5 x 82.0 mm</td><td>A plastic badge designed to fold in half and stick together, worn with a keycord.</td></tr><tr><td>Sticker 102x51</td><td>102.0 x 51.0 mm</td><td>102.0 x 51.0 mm</td><td>Peel-and-stick design for quick application.</td></tr><tr><td>Sticker 76x51</td><td>76.0 x 51.0 mm</td><td>76.0 x 51.0 mm</td><td>Peel-and-stick design for quick application.</td></tr></tbody></table>
*(Last updated as of 13/11/205)*
**Ready to Start Designing?**
Once you know your badge type, you can move on to creating your design.
👉 [Read the badge design guidelines](/badge-printing/custom-badge/badge-design-guidelines)
# Badge Design Guidelines
Once you know your badge type and dimensions, you can start designing. Follow the guidelines below:
We always recommend using our design templates as a starting point. The templates are already set up with the correct dimensions and layout and can be found and downloaded at the bottom of this page.
{% hint style="warning" %}
**Important Requirements**
* Save your design in **PNG** format.
* Use the **RGB colour space** to ensure accurate colour replication when printing.
* Do not include crop marks, trim lines, or any other layout markings in final submited design.
{% endhint %}
#### **Layout and Design Guidelines**
**Folded badges (T180, T180S, 260T, 260TS)** The badge folds in the centre, so your design must cover both halves as a mirrored layout. See the example images at the bottom of this page for guidance.
**Sticker badges** Sticker badges do not fold. Your design covers the full sticker area as a single flat layout.
**Ink coverage** Full ink coverage across the entire badge can cause visible streaking during printing and slows down drying time, increasing the risk of ink spots. Where possible, avoid solid colour across the full badge area.
**Thin lines** Lines under 2 pixels may not be picked up during printing. Use thicker lines where needed.
**Edges** Keep all important elements away from the edges of your design. Anything placed too close to the edge risks being cut off during production.
**Font files** We will need the **.TTF (TrueType Font)** files when submitting the badge design. \
*(Also include bold/italic TTF files if used in the design.)*
### Prepare Two Versions of Your Design
You must submit two versions of your badge designs:
**Version 1 with Variables** This version shows where attendee information will be printed. Include clearly labelled placeholders e.g.
* *First name*
* *Last name*
* *Company name*
* *Company role*
* *QR code (if applicable)*
* *Tags (if applicable)*<br>
**Version 2 Background only (without variables)** This is the fixed background design where all variable elements are removed. e.g. no names, company name, company role or QR codes.
<figure><img src="https://772941315-files.gitbook.io/~/files/v0/b/gitbook-x-prod.appspot.com/o/spaces%2F-M5LNCGpK5lyymcFZU4V%2Fuploads%2Fh7lqBbM6tjC1eeXIakXo%2FUntitled%20design%20-%202026-06-04T141048.599.png?alt=media&token=0db8f18d-360c-428b-ba06-6d2b1ce45990" alt=""><figcaption><p>Badge versions with and without variables</p></figcaption></figure>
#### **Downloadable Design Templates**
{% tabs %}
{% tab title="T180" %}
{% file src="/files/iRWMJdOJ3dTNgJsGvY0i" %}
{% file src="/files/NlqVVwHEG7Nyq3Q0aE7h" %}
{% endtab %}
{% tab title="T180S" %}
{% file src="/files/LO3fNBQIMke6HLL5LMRy" %}
{% file src="/files/CUh99nanFeJ7UszAmWJr" %}
{% endtab %}
{% tab title="260T" %}
{% file src="/files/sSsNeftFDwZYRFFve05E" %}
{% file src="/files/8kvNj57CYVAk14aGdPNB" %}
{% endtab %}
{% tab title="260TS" %}
{% file src="/files/ojN0Y8Q9zBs72S2dUWus" %}
{% file src="/files/m7BRRioofNf4oic85fO4" %}
{% endtab %}
{% endtabs %}
#### **Ready to Submit?**
Once your design is complete and both versions are ready, head over to the submission page.
👉 [Submit your badge design](/badge-printing/custom-badge/submitting-your-badge-design)
# Submitting Your Badge Design
Once your badge design is complete and all required files are ready, you can submit everything to our team by emailing [**support@letsgetdigital.com**](mailto:support@letsgetdigital.com). You can use the email template below to make sure your submission includes everything we need. Simply copy, fill in the details, add all attachments (fonts and badge designs) and send
{% hint style="info" icon="envelope" %}
**Subject:** Custom Badge Submission - {Fill event name}
\
Dear support,
Please find attached our custom badge submission for the following event: {**Fill event name**} which starts on {Fill start date of event}.
**Badge type:** \[e.g. T180 / T180S / 260T / 260TS / Sticker 102×51 / Sticker 76×51]
**Variable elements on badge:** \[e.g; First name, Last name, Company name, Company role, QR code]
**Tag-based background logic:** (remove this section if not applicable)
* \[Background file name] → Tag: \[Tag name]
* \[Background file name] → Tag: \[Tag name]
**Attached files:** I confirm that i've included in the attachments the following files:
* A version of the badge background(s) without variables
* A version of the badge background(s) with variables
* The relevant TTF (Font files) for the badge
**Additional comments to Let's Get Digital:**\
\
Many thanks in advance.
{% endhint %}
{% hint style="warning" %}
**Important to check**
* Save your design in **PNG** format.
* Use the **RGB colour space** to ensure accurate colour replication when printing.
* Do not include crop marks, trim lines, or any other layout markings in final submited design.
{% endhint %}
# Branded Check-in Stations
This article describes how to submit the desings for customised branding around the check-in stations
### Benefits
<figure><img src="https://772941315-files.gitbook.io/~/files/v0/b/gitbook-x-prod.appspot.com/o/spaces%2F-M5LNCGpK5lyymcFZU4V%2Fuploads%2FqQVBCsuRw7MW4w2OI8in%2FScreenshot%202025-01-30%20at%2015.48.10.png?alt=media&token=d0e85798-c256-4717-b43a-2d012bb54e0f" alt=""><figcaption><p>Custom design cases used at CloudExpo</p></figcaption></figure>
Custom branding for your check-in stations offers two major benefits:
**1. Great first impression**\
A well-branded check-in station enhances the overall look of your event. First impressions matter, and a professionally designed station ensures your brand is clearly represented from the moment attendees arrive.
**2. Increased Sponsorship Visibility**\
If you have event sponsors looking for more exposure, custom branding offers an excellent opportunity. By featuring their logo, message, or even a QR code on the station, sponsors gain additional visibility and engagement.
### More information
* Setup Cost (€250 per check-in station)
* We handle everything: from preparing the design to implementation.
* If used for sponsors. Our client usually sell this branding for 300 euro per station to Exhibitors. This means happy exhibitors without costs and an (even) better check-in!
* QR Code Integration
* You can add a QR code to your design, allowing attendees to scan for more information, downloads, or engagement.
* Design Assistance (€65)
* If you need help with the design, we can create a Look & View version for you. No design skills are needed
<figure><img src="https://772941315-files.gitbook.io/~/files/v0/b/gitbook-x-prod.appspot.com/o/spaces%2F-M5LNCGpK5lyymcFZU4V%2Fuploads%2FQyTIGQ8h5KlsGgDJ07QM%2FScreenshot%202025-01-30%20at%2015.56.13.png?alt=media&token=272b5edb-173b-4e12-b2dc-61766a6cea71" alt=""><figcaption><p>Example of the LGD Design</p></figcaption></figure>
### Design Specifications
Each check-in station consists of four separate branded panels:
<table><thead><tr><th width="179">Name</th><th width="201">Size</th><th>Holes</th></tr></thead><tbody><tr><td>Large Side A</td><td>75cm x 28cm</td><td>Holes for the door</td></tr><tr><td>Large Side B</td><td>75cm x 28cm</td><td></td></tr><tr><td>Top Side</td><td>75cm x 34cm</td><td>A 20mm hole will be placed in the middle of the shortest side (50%) and at 25% of the longest side.</td></tr><tr><td>Small Side </td><td>34cm x 28cm</td><td></td></tr></tbody></table>
### **Design Submission Guidelines**
* Send the design files to: <support@letsgetdigital.com>
* We either need 4 PDF files; or 4 AI files
* If you deliver them as PDF; make sure to include a 3mm bleed in your design files while exporting.
* You must submit your final design at least 10 days before the event.
* Each panel should be submitted separately in Illustrator (.AI) format orr as a PDF preview.<br>
### Supporting files
{% file src="/files/8QBO28dihB9F2N5OnQya" %}
{% file src="/files/JSJXpsKHmlz6G6lX0sK6" %}
{% file src="/files/f45E6sdA4vsPuZ17IEet" %}
{% file src="/files/pRmORCv9NnRcAVOlqwQX" %}
{% file src="/files/JQzkdj33A0dZX09cBjNI" %}
{% file src="/files/otrGAzGe81v6eYnZsB1h" %}
{% file src="/files/b8Vh7SOrjuIi3vdnktcL" %}
{% file src="/files/ZhhHHXBJSZx6nTyRC8iG" %}
# Setting up your own printer
If you purchased/rented your own Epson TM-C3500, Epson Colorworks C4000e, Brother QL-1100c or Zebra ZD42 printer you can use this article as a guide to setting up your printer for the very first time.
## Steps in setting up your printer (in 4 steps)
1. Open your dedicated **Windows** laptop for the printer you are about to set up.
2. Turn on the printer and connect to the Windows laptop
3. Download and install the correct driver by selecting the link that corresponds to your printer:
| Printer | Driver (Software) |
| ---------------- | ----------------------------------------------------------------------------------------------------------------------------------------------------------- |
| Epson TM-C3500 | [**TM-C3500 Printer Driver (64bit) Ver.2.6.0.2**](https://support.epson.net/setupnavi/?PINF=swlist\&OSC=WS\&LG2=NL\&MKN=TM-C3500) |
| Epson C4000-E | [**CW-C4000e Printer Driver (64bit)**](https://support.epson.net/setupnavi/?PINF=swlist\\\&OSC=WS\\\&LG2=NL\\\&MKN=TM-C350) |
| Brother QL-1100C | Should go automatically, but in case it doesn't use [this link](https://support.brother.com/g/b/downloadtop.aspx?c=nl\&lang=nl\&prod=lpql1100euk) |
| Zebra ZD421 | [**ZDesigner Printer Driver**](https://www.zebra.com/gb/en/support-downloads/printers/printer-drivers.html?downloadId=4fd677df-5ae1-4e2f-89ce-f33134dc1e70) |
4. Download and start the Let's Get Digital Badge printing software.
The (latest) version of the software can be downloaded via the following link:\
<https://live.letsgetdigital.com/misc/badgeprinting/software/download>
{% hint style="warning" %}
Don't forgot to select the right Badge Type in the event software!
{% endhint %}
## Trouble shooting & setting-up
Use the following two documents to start scanning & for troubleshooting. We advice you to print them both.
{% file src="/files/xUuV670sVrhz6fNmFhQk" %}
{% file src="/files/icJYP1mA75tTa7Xjvazt" %}
# Leasing Hardware
This page describes how to configure the lease package in case you've picked the option to lease printers.
Getting Started
{% hint style="warning" %}
The Surface Pro & iPhone are delivered locked. For security reasons we cannot share the code upfront. Ask your Delivery Consultant for the code upon receiving the hardware package.
{% endhint %}
<div data-with-frame="true"><figure><img src="https://772941315-files.gitbook.io/~/files/v0/b/gitbook-x-prod.appspot.com/o/spaces%2F-M5LNCGpK5lyymcFZU4V%2Fuploads%2FtqO59lj9ioc31Kh2yNHG%2Fimage4.jpeg?alt=media&token=82ec25c7-ffb6-4bf8-8e4f-01bb6fe55803" alt="" width="563"><figcaption><p>Peli™ Case containing labelled Badge Printing hardware</p></figcaption></figure></div>
#### **Badge Printing Case**
When opening a badge printing case, it will appear as shown above. Each case contains one of the following items:
* Epson ColorWorks C4000e printer
* Microsoft Surface Pro
* Apple iPhone SE
* Printer Power Supply (A)
* USB-C to USB-B cable (B)
* Microsoft Surface Power Supply (C)
* USB-C to Lightning Cable (D)
Additionally you will receive your branded printer housing along with either sticker or paper badges, depending on your requirements.
<div data-with-frame="true"><figure><img src="https://772941315-files.gitbook.io/~/files/v0/b/gitbook-x-prod.appspot.com/o/spaces%2F-M5LNCGpK5lyymcFZU4V%2Fuploads%2F4psSWGoVXzzd8sMgG8AL%2Funknown.jpeg?alt=media&token=35b518aa-e7bf-41cf-bb27-9ca3d914c24b" alt="" width="563"><figcaption><p>Branded Printer housing complete with customisable panels and tablet enclosure</p></figcaption></figure></div>
### Printer setup
{% stepper %}
{% step %}
### Connect the printer
#### **Connect printer**
1. Carefully place the printer face-down to access the rear cable compartment.
2. Insert the Printer Power Supply (A) into the 42V port.
3. Insert the USB-B end of cable (B) into the square USB port.
4. Flip the printer upright again.
<div data-with-frame="true"><figure><img src="https://772941315-files.gitbook.io/~/files/v0/b/gitbook-x-prod.appspot.com/o/spaces%2F-M5LNCGpK5lyymcFZU4V%2Fuploads%2FHYkiFsegAYorL7kfy2Pu%2Funknown.jpeg?alt=media&token=861de0eb-d7fb-4793-bc22-f2fef1c51ac8" alt="" width="563"><figcaption><p>Rear-side view of Epson ColorWorks C4000e printer</p></figcaption></figure></div>
{% endstep %}
{% step %}
### **Load badges**
1. Pull the dark grey lid on the front cover slightly towards you.
2. Insert the badges into the rear slit.
3. Check the badge line:
* T180 or T180S badges (with black bar): black bar facing down and towards the printer front.
* 260T or 260TS badges (sticker-type): sticker side up (rough surface and lanyard cutouts visible).
* If the badge is neither T180, T180S, 260T nor 260TS → call Smart2B at +31 (0)318 590 212.
<div data-with-frame="true"><figure><img src="https://772941315-files.gitbook.io/~/files/v0/b/gitbook-x-prod.appspot.com/o/spaces%2F-M5LNCGpK5lyymcFZU4V%2Fuploads%2FbtaYGGDadcPrVSi5h9iT%2FIMG_3220.JPG?alt=media&token=b4ca8672-8701-421f-a4f7-c578cfecf601" alt="" width="563"><figcaption><p>Front side of Epson ColorWorks C4000e printer. The grey lever on the left side opens the front cover.</p></figcaption></figure></div>
#### Badge line reference images
<details>
<summary>T180 Badge</summary>
<div data-with-frame="true"><figure><img src="https://772941315-files.gitbook.io/~/files/v0/b/gitbook-x-prod.appspot.com/o/spaces%2F-M5LNCGpK5lyymcFZU4V%2Fuploads%2F4elm9h1wOSywJnk7C4WJ%2Fimage.png?alt=media&token=6ec2109c-522d-4439-9c60-e5a2ce44b66e" alt="" width="563"><figcaption><p>Correct orientation: black bar facing down</p></figcaption></figure></div>
</details>
<details>
<summary>260T Badge</summary>
<div data-with-frame="true"><figure><img src="https://772941315-files.gitbook.io/~/files/v0/b/gitbook-x-prod.appspot.com/o/spaces%2F-M5LNCGpK5lyymcFZU4V%2Fuploads%2FKivdfXrdRBgBiOV9gcFq%2Fimage.png?alt=media&token=a8d9c1d7-f642-4c38-9d25-9e068edfcaae" alt="" width="563"><figcaption><p>Correct orientation: sticker-side up (rough surface and lanyard cutouts visible)</p></figcaption></figure></div>
</details>
{% endstep %}
{% step %}
### Place cover over printer
Place the branded printer cover over the printer and badges.
{% endstep %}
{% step %}
### Set up Surface Pro tablet
#### Mount Surface Pro
* Place the tablet on the triangle holder on top of the printer cover.
* Insert the USB-C end of cable (**B**) into the tablet slot marked **B** (through the top opening).
* Insert the rounded magnetic connector of cable (**C**).
* Ensure the white light on the connector is on.
* Insert cable (**D**): USB-C end into the tablet, Lightning end into the iPhone.
<div data-with-frame="true"><figure><img src="https://772941315-files.gitbook.io/~/files/v0/b/gitbook-x-prod.appspot.com/o/spaces%2F-M5LNCGpK5lyymcFZU4V%2Fuploads%2FMREXHWdOi13by0Ejl5RN%2Fbadge_printing_hardware_plugged_in.jpg?alt=media&token=6c4bcd36-8676-4648-9009-34050db87b82" alt=""><figcaption><p>Surface Pro correctly connected to printer and supplied iPhone used for ticket scanning</p></figcaption></figure></div>
{% endstep %}
{% step %}
### Power everything on
* Connect printer and Surface Pro to mains power.
* Power on the printer, Surface Pro, and iPhone (hold the power buttons for \~5–10 seconds).
<div><figure><img src="https://772941315-files.gitbook.io/~/files/v0/b/gitbook-x-prod.appspot.com/o/spaces%2F-M5LNCGpK5lyymcFZU4V%2Fuploads%2FKTIMkV8kSnPtJPpZBSia%2Fimage2.jpg?alt=media&token=44bd64b7-0e17-4aeb-82a5-75c187f50fed" alt=""><figcaption><p>Complete hardware package</p></figcaption></figure> <figure><img src="https://772941315-files.gitbook.io/~/files/v0/b/gitbook-x-prod.appspot.com/o/spaces%2F-M5LNCGpK5lyymcFZU4V%2Fuploads%2FrUYFyh2vVK8Hga58Zq6q%2Fimage5.jpg?alt=media&token=dbf5efa8-266f-47e6-b863-f0e2fc04832d" alt=""><figcaption><p>Side door open keeps badges and printer always in reach </p></figcaption></figure></div>
{% endstep %}
{% step %}
### Log into Badge Printing software
#### **Open the software**
* Connect both the tablet and the iPhone to the internet
* On the Surface: open “LGD Badge Printing”.
* On the iPhone: open “Let’s Get Digital”.
#### **Log in**
* On the iPhone:
* Tap the QR icon.
* Scan your personal QR code from the Admin Panel or email.
* In the app: go to Menu → Organiser Tools → Connect Badge Printer.
* Scan the QR code shown on the Microsoft Surface to pair the devices.
{% endstep %}
{% endstepper %}
### Shipping info
{% hint style="info" %}
#### Note to organisers
Always confirm final shipment details in advance if hardware is forwarded or transported internationally.
For logistics questions or confirmation of shipment specifications, please contact Smart2B.
{% endhint %}
All hardware lease packages are comprised of the same set of equipment, but are packaged differently depending on your particular needs.
The inventory of goods for the hardware packages is as follows:
{% columns %}
{% column %}
#### **Flight case**
* Printer
* Microsoft Surface Pro tablet
* iPhone SE
* Cables
{% endcolumn %}
{% column %}
#### Frame
* Printer cover
* Tablet holder
{% endcolumn %}
{% endcolumns %}
#### Packaging Dimensions
<details>
<summary>Standard Shipment (packed by Smart2B)</summary>
When shipped by Smart2B, the hardware lease package is delivered in **two separate boxes**.
#### **Flight case**
| Dimension | Measurement |
| --------- | ----------- |
| Width | 55 cm |
| Height | 40 cm |
| Depth | 70 cm |
| Weight | 29.5 kg |
#### Frame (includes tablet holder)
| Dimension | Measurement |
| --------- | ----------- |
| Width | 60 cm |
| Height | 50 cm |
| Depth | 84 cm |
| Weight | 17.1 kg |
{% hint style="info" %}
**Note:** When shipped by Smart2B, the flight case is always delivered boxed.
{% endhint %}
</details>
<details>
<summary>Unboxed variants (for storage or onward transport)</summary>
{% hint style="info" %}
#### Note to organisers
This information is intended for customers arranging their own onward transport (for example, air freight or local couriers).
{% endhint %}
The dimensions below apply when the hardware is stored, transferred, or forwarded after delivery, without the outer cardboard box.
#### **Flight case**
| Dimension | Measurement |
| --------- | ----------- |
| Width | 52 cm |
| Height | 38 cm |
| Depth | 67 cm |
| Weight | 26.9 kg |
#### **Frame (includes tablet holder)**
| Dimension | Measurement |
| --------- | ----------- |
| Width | 44 cm |
| Height | 34 cm |
| Depth | 81 cm |
| Weight | 11.4 kg |
</details>
#### Flight case transport
For storage, transfer, or onward transport, the flight case itself does **not require an additional protective cover**.\
When shipped by Smart2B, the flight case is always delivered boxed.
# Setting up a Zebra printer
This article explains how to install and configure a Zebra ZD421 printer with dispenser so it can print badges correctly.
{% stepper %}
{% step %}
### Install the Zebra printer driver
* Open your computer’s Settings.
* Go to Printers & Scanners
If the Zebra printer does not appear in your list of available printers, you will first need to install the printer driver.
<details>
<summary>Your printer is not listed</summary>
If the Zebra printer is not listed, [download](https://www.zebra.com/gb/en/support-downloads/printers/printer-drivers.html?downloadId=4fd677df-5ae1-4e2f-89ce-f33134dc1e70) the Zebra Windows Printer Driver (v10).
1. Run the installer and follow the setup instructions.
2. When prompted to select a printer model, select **ZDesigner ZD421-203dpi ZPL**
<div data-with-frame="true"><figure><img src="https://772941315-files.gitbook.io/~/files/v0/b/gitbook-x-prod.appspot.com/o/spaces%2F-M5LNCGpK5lyymcFZU4V%2Fuploads%2FgUJfhfyIvrxrJkP7ID6x%2FZebra_setup_utilities.jpg?alt=media&token=27bfe7d3-5a06-48af-a58a-bc1b287e9218" alt=""><figcaption><p>Zebra Windows Printer Driver showing any installed printers</p></figcaption></figure></div>
Once installed, the printer should appear in your Printers & Scanners list.
</details>
{% endstep %}
{% step %}
### Open the Zebra printer configuration panel
Once the printer drivers are installed and the device is detected, the printer must be configured to accept the badge labels and behave appropriately.
1. Go to <kbd>Settings</kbd> > <kbd>Printers & Scanners</kbd>. Open up Select your Printing Preferences.
2. Select your Zebra printer.
3. Open <kbd>Printing Preferences</kbd>.
<div data-with-frame="true"><figure><img src="https://772941315-files.gitbook.io/~/files/v0/b/gitbook-x-prod.appspot.com/o/spaces%2F-M5LNCGpK5lyymcFZU4V%2Fuploads%2FeW4rm3G6u8pzsIYV05wO%2FZebra_printer_settings_overview.jpeg?alt=media&token=2d9eaca3-7e69-4229-aafc-d8eda10f475f" alt="" width="563"><figcaption><p>Printer settings hub showing the printer preferences higlighted in red</p></figcaption></figure></div>
{% endstep %}
{% step %}
### Set the label size
{% hint style="warning" %}
Ensure sure the selected size matches the label roll loaded in the printer.
{% endhint %}
In the Options tab, configure the label size depending on the badge format used for your event.
| Badge type | Width (mm) | Height (mm) |
| ---------- | ---------- | ----------- |
| Large | 90 | 65 |
| Small | 90 | 40 |
<div data-with-frame="true"><figure><img src="https://772941315-files.gitbook.io/~/files/v0/b/gitbook-x-prod.appspot.com/o/spaces%2F-M5LNCGpK5lyymcFZU4V%2Fuploads%2FjekVvdnFVU4pVyAAYGTP%2FZebra_printing_prefs_1.jpeg?alt=media&token=be98f604-93e7-4b27-8fe2-52f9954a525b" alt="" width="563"><figcaption><p>Zebra printing preferences for Let's Get Digital badges</p></figcaption></figure></div>
{% endstep %}
{% step %}
### Configure advanced settings
Open the Advanced Setup section and apply the required configuration for badge printing.
These settings ensure the printer works correctly with the dispenser (peel-off function) and aligns the labels properly.
<div data-with-frame="true"><figure><img src="https://772941315-files.gitbook.io/~/files/v0/b/gitbook-x-prod.appspot.com/o/spaces%2F-M5LNCGpK5lyymcFZU4V%2Fuploads%2Faok9lAutMXEAWZwhGJ9B%2FZebra_printing_prefs_2.jpeg?alt=media&token=fe795804-48ab-4be4-8359-4dae05f76d6f" alt="" width="563"><figcaption><p>Advanced printing preferences of Zebra printer</p></figcaption></figure></div>
| Setting | Value |
| -------------- | -------------- |
| Operation Mode | Peel Off |
| Mode Type | Thermal Direct |
| Tracking Mode | Web Sensing |
| Adjustment Top | 0.00 mm |
| Tear Off | 10.00 mm |
| Left Position | 0.00 mm |
| | |
| {% endstep %} | |
{% step %}
### Download the Let's Get Digital Badge printing software
The (latest) version of the software can be downloaded via the following link: <https://live.letsgetdigital.com/misc/badgeprinting/software/download>
**Login to the software:**
1. To login, open the software and a QR code will appear.
2. Login to the event app with your organiser account
3. In the app go to Organiser tools ->Connect badge printer
4. Scan the QR code shown on the badge printing softare.
{% endstep %}
{% endstepper %}
### Troubleshooting
<details>
<summary> <strong>Printer not applying new settings</strong></summary>
Sometimes after changing the printer's settings, the printer doesn't apply them. To force it to accept the new settings, press the **Pause** and **Cross** buttons simultaneously for 2 seconds. A few test prints will come out, after which the printer should recognise the settings.
</details>
# Exhibitor Portal
The **Exhibitor Portal** is a dedicated self-service portal that allows exhibitors to manage their company's participation before, during, and after an event. Instead of contacting the organiser for every change, exhibitors can update their own information, manage their team, view leads, and access event-related tools from a single place.
**Only users assigned the *****Exhibitor Manager***** role can access the Exhibitor Portal.** Once signed in, an Exhibitor Manager can manage the company and, where applicable, grant portal access and permissions to other members of their exhibitor team. The features available within the portal depend on what the organiser has enabled for the event.
{% hint style="info" %}
**Availability**
The Exhibitor Portal is available for **In-person events** on the **Extensive package**. It must be enabled by the organiser for each event individually.
{% endhint %}
### What can exhibitor managers do?
Depending on the event configuration, exhibitors may be able to:
* **Manage their team** by adding staff members and assigning portal permissions.
* **View leads and connections** collected during the event and export them for use in their own CRM.
* **Edit their company profile** to keep the information shown to attendees up to date.
* **Upload files** such as brochures, product sheets, and other downloadable resources.
* **Access registration links** provided by the organiser to invite customers, guests, or colleagues.
* **Manage session registrations** by viewing attendees, accepting or rejecting pending registrations, and monitoring attendance when session access control is enabled.
* **View appointments** involving members of their team through a read-only overview.
* **Manage side events**, if this feature has been enabled by the organiser.
### Access to the Exhibitor Portal
Only users assigned as **Exhibitor Managers** can access the Exhibitor Portal.
**Exhibitor Managers** can access the portal and use the enabled features for their company.
**Exhibitor Crew** members are linked to the exhibitor company but do **not** have access to the Exhibitor Portal.
## How to access the Exhibitor Portal
Depending on whether you are an Admin (Event manager) or Exhibitor, there are different ways in which you can access the Exhibitor portal. Please choose from the relevant option below:
{% tabs %}
{% tab title="Admin" %}
**Admin Access**
As an Admin you can quickly access the Exhibitor Portal via the Admin Panel by completing the following steps:
1. Log into your Admin panel
2. Click on your name in the top right corner of the screen
3. Click on Go to the Exhibitor Portal
4. Success! You have now accessed the Exhibitor portal
<figure><img src="https://772941315-files.gitbook.io/~/files/v0/b/gitbook-x-prod.appspot.com/o/spaces%2F-M5LNCGpK5lyymcFZU4V%2Fuploads%2FAU0RpHOgZcOJGzcmsd0Q%2FScreenshot%202024-01-19%20093431.png?alt=media&token=e53b8783-d6ea-4db0-a3b7-7279cefd8e44" alt=""><figcaption></figcaption></figure>
{% endtab %}
{% tab title="Exhibitor Manager" %}
**Lead Exhibitor access**
1. If not already created, create a [new company](https://knowledge-base.letsgetdigital.com/the-admin-panel/content/application-1/companies#creating-a-new-company) and a [new user](broken://spaces/zWBtm9CauVxL2YuKJDNQ/pages/fd0iIOM8xZ4hF6EEaLoh) who will be connected to the company as an Exhibitor Manager
2. Connect the right user to the company as an Exhibitor Manager (either via the company or the user profile)
3. Send the Exhibitor Manager an invite to the Exhibitor Portal using the Exhibitor Portal Invite email template
4. The Exhibitor Manager will receive an invite including a personal link to the portal
5. The Exhibitor Manager will set up a new password and then can log into their portal
{% endtab %}
{% endtabs %}
{% hint style="warning" %}
**Note:** Users with the tag 'Exhibitor Crew' can not access the Exhibitor Portal
{% endhint %}
### How to use the Exhibitor Portal
Once logged into the Exhibitor Portal, the Exhibitor Manager can directly manage their company's page in the portal.
#### Dashboard
The Dashboard provides a detailed overview of the live activity being made during an event, including; the number of scanned leads, questions created, employees and the number of incomplete profiles of the employees. Additionally, it is possible to see statistics per employee on the number of leads they have scanned and the ability to manage their profiles.
<figure><img src="https://772941315-files.gitbook.io/~/files/v0/b/gitbook-x-prod.appspot.com/o/spaces%2F-M5LNCGpK5lyymcFZU4V%2Fuploads%2Fggz9dMVW9AMjgKj5Kk9f%2FScreenshot%202024-01-19%20091914.png?alt=media&token=17d9121c-3331-4e63-bbcc-0d4a04adb73b" alt=""><figcaption></figcaption></figure>
## Different Exhibitor Portal features
| Feature | Description |
| -------------------------------------------------------------- | -------------------------------------------------------------------------------------------------------------------------------------------------------------------------------------------------------------------------------------------------------------------------------------------------------------------------------------------------------------------------------------------------------------------------------------------------------------------------------------- |
| **Home (Dashboard)** | This dashboard shows an overview of their progress in terms of lead scanning, lead questions, employees, incomplete profiles and registrations. It also gives a short explanation of the features in the Exhibitor Portal. |
| **Connections & lead overview** | Here, Exhibitor Managers can view all the leads (scanned leads, automatic matches, etc.). An export can also be made on this page. |
| **Scan Management** | Here, Exhibitor Managers can find an overview of scanned leads and make an export of these. You can also create lead questions. A lead question will appear on your screen after you as an exhibitor have scanned a lead badge. You can create a (set of) custom lead question(s) in the Exhibitor Portal and fill in the answers in the app during or immediately after a conversation with a lead. This way, you can collect consistent and relevant data about your leads. |
| **Appointment overview** | This page includes an overview of appointments that have been made with your company’s booth or exhibitors. The app can be used to book appointments. This overview can be exported. |
| **Company Profile** | Here, Exhibitor Managers can edit the company’s profile that’s shown in the app. Company name, logo, description, contact information and social media links can be modified. |
| **Team overview** | This overview gives you an overview of the employees connected to your company's booth and the option to edit them. This overview can be exported as well. |
| [**Files**](/event-contributor-portals/exhibitor-portal/files) | Files, videos and photos can be added here. They will show in the company’s profile in the app so users are able to download/view these. |
| **Invitations** | If you have enabled to share registration links with exhibitors, Exhibitor Managers can view here their unique registration links for the event and can share this with their network. |
| \* **Floorplan** | With this setting enabled, Exhibitor Managers can select an available booth from the floorplan before the event starts, to choose their spot at the event. The admin can set availability times in the company’s profile in the admin panel. The system automatically notifies exhibitors as they can select a booth from the floorplan. The yellow booth shows the booth you have selected, the green booths show the booths that are still available for you to choose or change to. |
| \* **Side events** | Exhibitor Managers can create sub-events directly through the Exhibitor Portal if there are any interesting activities happening at your booth at certain times. The created events will be shown on the company page in the app. The admin can enable or disable this feature and limit the number of sub-events each exhibitor can create for the company. The full list of side events can be exported. |
| **Content requests** | <p>As an organizer, you can request content from Exhibitor Managers through the Exhibitor Portal, for example by asking them to upload a banner.<br><br>Content requests can be created through the admin panel via Moderation > Exhibitor Content Requests. Fill in the required information as needed, then save the changes.</p> |
*\* The features called ‘Exhibitors can select their own booth’ & 'Enable sub-events for exhibitors', can be enabled or disabled using the General Settings in the Admin Panel under the 'Exhibitor Portal' section.*
### How to add exhibitors and the Exhibitor Manager
In the Exhibitor Portal under ‘Team overview’, the admin (and later the Exhibitor Manager) can add new exhibitors to the Exhibitor Crew and select the Exhibitor Manager.
To add a new person to your team, you can complete the following steps:
1. Click **‘+ Add new’**
2. Complete their profile with at least their first name, last name and email address
3. If you want this member to be Exhibitor Manager, switch on the toggle button ‘Allowed to manage company’
4. Click **‘Save’**
5. They are now a member of your Exhibitor Crew and the user will automatically receive an invitation to join the company page. In case of an Exhibitor Manager, this user will automatically receive login access to the portal
{% hint style="success" %}
It's smart to only choose one user as the Exhibitor Manager, to keep a clear overview of who has which responsibilities
{% endhint %}
### How to add extra menu tabs in the Exhibitor Portal
When Event Managers want to share information with exhibitors in the Exhibitor Portal, it is only possible to send a welcome text by default. However, when the Exhibitor Portal is active, you can add new pages to the portal with additional information. To create an extra page, follow these steps in the admin panel:
1. Go to Content > Pages
2. Click ‘+ New page’ and add all the information you would like to share with exhibitors
3. Click ‘Save changes'
To add this new page to the Exhibitor Portal, follow the next steps in the admin panel:
1. Hover over Navigation > Navigation Settings
2. Select Exhibitor Portal from the menu at the top
3. Click on ‘Add New Item’
4. Under ‘ Set link related page’ choose Pages, and select the correct page
5. Click ‘Save changes'
## Exhibitor Portal Manual
{% file src="/files/K0OfanB5Tl0YEcbSWX8n" %}
{% file src="/files/lbnuemZ9G2MNBunnuVi6" %}
{% file src="/files/jOGY6U2DNzlvRkRXJrPs" %}
# Files
Upload and manage assets in the Exhibitor Portal to share key materials with booth visitors and potential leads.
Exhibitors can add content to their event presence in Let's Get Digital from the <mark style="background-color:$primary;">Files</mark> section in the Exhibitor Portal.
<figure><img src="https://772941315-files.gitbook.io/~/files/v0/b/gitbook-x-prod.appspot.com/o/spaces%2F-M5LNCGpK5lyymcFZU4V%2Fuploads%2FaomuGvYeCxrawMNFuiQX%2Fexhibitor_portal_files_overview.png?alt=media&token=94e58404-13e8-499f-a409-fba650c82463" alt=""><figcaption></figcaption></figure>
When adding a file, you have the choice of uploading files, images, or videos. Images can be uploaded in bulk. Files that are added will be visibile on an Exhibtor's profile.
#### **Supported file formats**
| Category | Supported Formats |
| ------------------------- | ------------------------------------------------- |
| Documents & Presentations | `.pdf`, `.ppt`, `.pptx`, `.xlsx`, `.zip` |
| Images | `.jpg`, `.jpeg`, `.png`, `.tif`, `.tiff`, `.webp` |
| Design Files | `.ai`, `.svg`, `.psd`, `.indd`, `.eps` |
# Speaker Portal
Give your Speakers agency and lower your own workload
The Speaker Portal is a tool that allows Speakers to update important information about their sessions without the need to contact an event organiser to do it for them. This means that any changes or updates to a session can be done quickly and easily.
<figure><img src="https://772941315-files.gitbook.io/~/files/v0/b/gitbook-x-prod.appspot.com/o/spaces%2F-M5LNCGpK5lyymcFZU4V%2Fuploads%2FmMPU6RvVoVYvwoQxcRVH%2FSpeaker%20Content%20Editing.png?alt=media&token=f211feb6-aba2-4184-8200-dad81b3cd46b" alt=""><figcaption></figcaption></figure>
The Speaker Portal is accessible by enabling the setting <mark style="background-color:blue;">Enable speaker content editing</mark>. This will enable people to access the portal and make edits to the talks they are linked to. It is also possible to set a deadline after which submissions are no longer possible.
<figure><img src="https://772941315-files.gitbook.io/~/files/v0/b/gitbook-x-prod.appspot.com/o/spaces%2F-M5LNCGpK5lyymcFZU4V%2Fuploads%2FFb6vSFfhNsNLxkwxavAb%2Fimage.png?alt=media&token=51c81ed5-b507-4e6f-b9f1-61a0ba5aed07" alt=""><figcaption></figcaption></figure>
Once the portal is active, a new email draft is added to the Mail overview. This mail is set to be sent to Speakers and contains a personalised link to the Speaker Portal. This can be sent as a direct message, or scheduled, as well as being edited prior to being sent.
<figure><img src="https://772941315-files.gitbook.io/~/files/v0/b/gitbook-x-prod.appspot.com/o/spaces%2F-M5LNCGpK5lyymcFZU4V%2Fuploads%2FrmazDYeOWj1mXKq28DkJ%2Fimage.png?alt=media&token=12fdb3e4-ad71-429a-81aa-3edbd97ca3a4" alt=""><figcaption></figcaption></figure>
The Sessions overview shows the list of sessions that a Speaker is connected to. Speakers can see when it takes place and the status of any changes that have been requested.
<figure><img src="https://772941315-files.gitbook.io/~/files/v0/b/gitbook-x-prod.appspot.com/o/spaces%2F-M5LNCGpK5lyymcFZU4V%2Fuploads%2FAzjyy9U4vmrNBgMyaaLw%2Fimage.png?alt=media&token=b909b2d3-5f45-4c33-98cf-8a2e79ff9dbc" alt=""><figcaption></figcaption></figure>
When editing talk it is possible to modify a session's title, description, and image. In addition to this, sessions which have been edited have show their status and if they have been rejected, the reason that changes are required.
<figure><img src="https://772941315-files.gitbook.io/~/files/v0/b/gitbook-x-prod.appspot.com/o/spaces%2F-M5LNCGpK5lyymcFZU4V%2Fuploads%2FznSOTKo9StnGPeoo8VkU%2Fimage.png?alt=media&token=81682d70-8e8f-4ee5-8a2d-dae2cdc63d60" alt=""><figcaption></figcaption></figure>
When a session change is accepted or rejected, the speaker receives an email detailing the decision. For accepted changes, the status changes back to <mark style="background-color:blue;">open</mark> until the deadline passes or another submission is submitted
# Overview
This is dashboard is the first page you see once you have logged into the 'Admin panel'.
When you have logged into the Admin panel you will first land on the 'Overview' page. This is a dashboard that provides quick access to key elements of the Admin panel and important statistics- information for your event.
In the top right corner, next to your profile, you'll find a search bar that allows you to quickly locate settings and menu items. If you're having trouble finding a specific option, using this search function can be a convenient way to navigate through the platform more efficiently. It helps save time by directing you straight to the relevant section without having to browse through multiple menus manually.
<figure><img src="https://772941315-files.gitbook.io/~/files/v0/b/gitbook-x-prod.appspot.com/o/spaces%2F-M5LNCGpK5lyymcFZU4V%2Fuploads%2FKGMBCCq5oKDqxZPBsvlt%2FOverview%20page%20new.png?alt=media&token=0ae5b17e-ac6d-42cd-8ee8-ac412f79f884" alt=""><figcaption></figcaption></figure>
{% tabs %}
{% tab title="Personal support contact info" %}
On the left-hand side, you'll find the contact information for your Consultant should you experience any difficulties.

{% endtab %}
{% tab title="QR-Code" %}
Before your app is ready and published to the app store, you can already have a look and see how your work within the backend is turning out in the front! Just download our Let's Get Digital app to your phone and scan the QR code on the overview page with the integrated QR code scanner!
**We highly recommend using this function so you can see the effects of your work!**

{% endtab %}
{% tab title="Check-in overview" %}
On the right-hand side, you'll see how many of your users, speakers, organisers and more have checked in vs the total number of accounts in the admin panel. This is also expressed as a percentage to the far right.

{% endtab %}
{% endtabs %}
### Bottom of the overview
{% tabs %}
{% tab title="Social wall activity" %}
Further down the overview you can view and manage how active the social wall is with the number of wall posts, replies, and likes.

{% endtab %}
{% tab title="Most active users" %}
Finally, furthest down the page are the most active users and the features those users have used more often. Click on the 'View all' button at the bottom for a comprehensive overview of every user's activity, along with the features everybody is using most often.
{% hint style="info" %}
**Note**: the stats may take an hour to update.
{% endhint %}
Herewith an explanation for each statistic:
* **Rank** - the user with the most activity in the app is ranked highest on the list.
* **Name** - full name of the user and the user type (e.g. user or admin).
* **Points** - a sum of all tallied points for the user.
* **Likes** - a tally of all 'likes' given to the content on the app (e.g. newsfeed/wall posts).
* **Connections** - a tally of all mutual connections (favourites both ways) made during the event.
* **Favourites** - a tally of how many people you have favourited; in the virtual platform 'Add to contacts' and in the app 'Add to connection'.
* **Notes** - how many notes you have created (for users, companies (app only), or sessions (app only). Notes can be found or created when selecting a user's profile in the app or platform.
* **Posts** - the number of posts sent on the social wall by a user in the app.
* **Chats** - number of all chat messages sent in group chats by the user.
* **Replies** - the number of comments made on other users' posts via the newsfeed/wall (in the app) by the user.
* **Ratings** - the number of times a user has given a feedback rating for sessions in the app by the user.
* **Treasure hunt points -** points collected from participation in the treasure hunt by the user.

{% endtab %}
{% endtabs %}
### Personal profile
In the right upper corner you can find your personal profile:
<figure><img src="https://772941315-files.gitbook.io/~/files/v0/b/gitbook-x-prod.appspot.com/o/spaces%2F-M5LNCGpK5lyymcFZU4V%2Fuploads%2FIwBDaeOD0wwCB2spBZE5%2Fimage.png?alt=media&token=6cd132c8-d19a-4b56-a0f0-d0df11ace0e0" alt="" width="162"><figcaption></figcaption></figure>
| Name | Description |
| --------------------------- | -------------------------------------------------------------------------------------------------------------------------------------------------------------------------------- |
| Language | Here you can change in which language you see the admin panel (choose from English, Dutch, German and French) |
| Switch event | If you have multiple environments, you can easily switch between admin panels via this button. Make sure your email address, code and password are the same in all environments. |
| Profile & account | Here you can view and edit your own profile |
| Virtual event | You will be redirected to the virtual platform (if applicable). |
| Exhibitor portal | You will be redirected to the exhibitor portal (if applicable). |
| App download page | You will be redirected to a webpage that shows 2 buttons. Via these buttons, you can easily download the app via the Google play store or the App Store. |
| App download page (with QR) | You will be redirected to the same webpage as the app download page, but with two QR codes that will redirect you to the Google playstore / App store. |
| Logout | When you click here, you will be logged out of the admin panel. |
###
# Users
No event would be complete without users! Here you can discover everything you will need to know about users in the platform.
5 main types of users can be created including:
* **Organizers**
* **Attendees**
* **Exhibitors**
* **Speakers**
* **Moderators**
Creating different user types allows you to manage various aspects of what a user can do in the platform and/or app and how they appear.
{% hint style="info" %}
**Pro-tip:** Check how the app/platform appaears for a specific user? Open the app/platform via the personal QR or person login button for that user in the admin panel user overview.
{% endhint %}
Please read through the different user types and their purpose:
<details>
<summary><mark style="color:blue;">Attendees - Read further</mark></summary>
An attendee is a user who is attending the event (mostly without any special rights in contrast to the other user types, listed here). Attendees are given general access to the platform/app.
Attendees may roam the event platform/app freely or can be [restricted ](https://knowledge-base.letsgetdigital.com/the-admin-panel/content/virtual-platform/programme/personal-programme/user-tag-permissions)from entering specific virtual sessions depending on the configuration of the admin panel. Attendees are spectators in a webinar session (virtual platform) and cannot activate their audio and camera (excluding [breakout rooms](https://knowledge-base.letsgetdigital.com/the-admin-panel/content/virtual-platform/programme/speakers/breakout-rooms)) unless they have[ the permission](https://knowledge-base.letsgetdigital.com/the-admin-panel/content/virtual-platform/programme/speakers/participant-overview#action-buttons) to do so.
</details>
<details>
<summary><mark style="color:blue;">Speakers and Moderators - Read further</mark></summary>
Speakers are users who are connected to a session as a speaker.
When a user is connected to a session he/she will automatically receive the tag ***speaker*** and if applicable and given access, will be able to prepare their personal [**webinar room**](https://knowledge-base.letsgetdigital.com/the-admin-panel/content/virtual-platform/programme/speakers) for example,with a [presentation ](https://knowledge-base.letsgetdigital.com/the-admin-panel/content/virtual-platform/programme/speakers/content-library)and [polls](https://knowledge-base.letsgetdigital.com/the-admin-panel/content/virtual-platform/programme/coming-soon-polls-in-sessions-vp), or to test their audio and video. Additionally, [**moderators** ](https://knowledge-base.letsgetdigital.com/the-admin-panel/users/virtual-platform/untitled-1/speakers#moderators)may be connected to sessions; although they are not classified as a speaker within the platform/app, moderators do obtain the exact same rights as speakers for the session(s) they are connected to!
**The only difference between speakers and moderators lies in the dipiction/presentation on the platform/in the app!**
Speakers/moderators cannot however pre enter sessions they are not speakers at. Within those, other sessions (linked to another speaker), they are being treated as regular attendees without speaker rights.
</details>
<details>
<summary><mark style="color:blue;">Exhibitors - Read further</mark></summary>
Exhibitors are users who are connected to an Exhibitor booth.
When a users is connected to an exhibitor booth they will automatically recieve the tag Exhibitor and will be able to edit the details of their own booth.
**Important:** If the [Exhibitor Portal](https://knowledge-base.letsgetdigital.com/lgd-features/exhibitor-portal) (please read carefully for more info!) is enabled, there are two exhibitor types: 1. exhibitors and 2. users belonging to the exhibitor crew. Both do receive the *Exhibitor* tag.
</details>
<details>
<summary><mark style="color:blue;">Organisers - Read further</mark></summary>
There are two types of organiser that you can set in the Admin panel:\
\
1\) Organisation / **Admin**\
Users who have Admin access to both the Admin panel and platform/app without restriction. \
\
2\) Organisation / **Host** \
Users who do not have acess to the Admin panel but do have Admin rights within the platform/app.
Organizers have all rights applicable to any of the below user types in all sessions, booths or anywhere else on the platform/app. Meaning, they can enter the event platform before it is officially opening, enter webinar rooms earlier, change exhibitor booths, etc.
</details>
#### Creating new users
You can choose from different ways to create a new user in the platform based on your preference. You discover the option that is best for you below
<table data-view="cards"><thead><tr><th align="center"></th><th data-hidden></th><th data-hidden data-card-cover data-type="files"></th><th data-hidden data-card-target data-type="content-ref"></th></tr></thead><tbody><tr><td align="center"><strong>Create a user manually in the Admin panel</strong></td><td></td><td><a href="https://772941315-files.gitbook.io/~/files/v0/b/gitbook-x-prod.appspot.com/o/spaces%2F-M5LNCGpK5lyymcFZU4V%2Fuploads%2FBWMvrbd9ZJp8Mx6f7VaV%2FScreenshot%202022-11-03%20150732.png?alt=media&token=d5906148-2dfc-476a-8909-c07a64fb9a70">Screenshot 2022-11-03 150732.png</a></td><td><a href="/the-admin-panel/users/creating-a-user">Creating a user</a></td></tr><tr><td align="center"><strong>Excel import</strong></td><td></td><td><a href="https://772941315-files.gitbook.io/~/files/v0/b/gitbook-x-prod.appspot.com/o/spaces%2F-M5LNCGpK5lyymcFZU4V%2Fuploads%2FOGpxJpJ2M2B4vd5fpIVc%2FExcel%20import%20image.jpeg?alt=media&token=e994130e-8da3-48f8-8b97-a185406cc834">Excel import image.jpeg</a></td><td><a href="/the-admin-panel/settings/importer">Importer</a></td></tr><tr><td align="center"><strong>Connect an integration</strong></td><td></td><td><a href="https://772941315-files.gitbook.io/~/files/v0/b/gitbook-x-prod.appspot.com/o/spaces%2F-M5LNCGpK5lyymcFZU4V%2Fuploads%2FULmAGfsOmosUrcfIkY99%2FScreenshot%202022-11-03%20133158.png?alt=media&token=82a4c4ec-88e6-4ef0-9d73-7d5167d407ed">Screenshot 2022-11-03 133158.png</a></td><td><a href="/misc/application/integrations-and-api">APIs</a></td></tr><tr><td align="center"><strong>Let's Get Digital Registration form</strong></td><td></td><td><a href="https://772941315-files.gitbook.io/~/files/v0/b/gitbook-x-prod.appspot.com/o/spaces%2F-M5LNCGpK5lyymcFZU4V%2Fuploads%2F61IOAQL0Nto7OzODUOuP%2FAre%20you%20ready.png?alt=media&token=eb724b62-b816-4950-b400-5359bb89e02b">Are you ready.png</a></td><td><a href="/adding-users-and-ticketing/registration-forms">Registration forms</a></td></tr></tbody></table>
####
# User tags
Personalise communication, access, visibility and event experience by using user tags. Here you can read how to create, assign and mange your user tags to label or categorize visitors of your event.
{% hint style="info" %}
Looking for ways to [manage your user tags](https://knowledge-base.letsgetdigital.com/the-admin-panel/users/user-tags/managing-user-tags?q=user+tag)? Or information on how to [create](https://knowledge-base.letsgetdigital.com/the-admin-panel/users/user-tags/creating-user-tags) or [assign](https://knowledge-base.letsgetdigital.com/the-admin-panel/users/user-tags/assigning-user-tags) them?
{% endhint %}
### What is a user tag?
User tags are there to label or categorize the visitors of your event. By adding user tags you get more control over your user's experience with your event as they can be used to group/categorize your users for example; Speaker, Attendee, Exhibitor, VIP. By assigning a tag to a user you can tailor communication, event content, and the access of specific users.
Here below are some examples of actions related to assigned user tags:
* Send communication (e.g. emails and push notifications) to specific groups of users only (and exclude others).
* Filtering of users in the platform
* Permission to access specific sessions
* Provide users access to specific event days
* Access to menu items based on tags
If a user is connected as a speaker to a session or a company booth they will automatically receive the tag 'Speaker and/or 'Exhibitor'
<figure><img src="https://772941315-files.gitbook.io/~/files/v0/b/gitbook-x-prod.appspot.com/o/spaces%2F-M5LNCGpK5lyymcFZU4V%2Fuploads%2FKKPoYMUs35YXwo2ZsNmJ%2Fezgif.com-gif-maker%20(1).gif?alt=media&token=81c863ee-885c-460c-816a-9e567860d836" alt=""><figcaption></figcaption></figure>
# Creating user tags
Here's how you can create a user tag in the system in order to assign a label to or categorize the different type of visitors of your event.
### How to manually create a user tag
You can quickly and easily create a user tag from the admin panel by completing the following steps:
1. Open the Admin panel
2. Go to Users --> All users
3. Select 'User tags' --> +New tag
4. Give the tag a name
5. Select 'Add tag' to Save
<figure><img src="https://772941315-files.gitbook.io/~/files/v0/b/gitbook-x-prod.appspot.com/o/spaces%2F-M5LNCGpK5lyymcFZU4V%2Fuploads%2F1XuylOhv0vb6GGxphXHc%2FScreenshot%202023-04-25%20at%2019.41.37.png?alt=media&token=5c08e914-7e37-4fb6-9fa0-5ae10d399a00" alt=""><figcaption></figcaption></figure>
### The even easier way to create user tags
Although the manual option provides a quick way of creating single user tags in the admin panel there is a much quicker and simpler way of creating multiple user tags at once and assigning them directly to users through the use of an Excel import.
When importing your user into the system with an Excel sheet you can fill in the column named 'User tags' the specific tags you would like to create and assign them to the specific user as shown in the example below:
<figure><img src="https://772941315-files.gitbook.io/~/files/v0/b/gitbook-x-prod.appspot.com/o/spaces%2F-M5LNCGpK5lyymcFZU4V%2Fuploads%2FeuQ3JaXmVf6wslwOa6Xu%2FScreenshot%202023-04-25%20at%2019.35.54.png?alt=media&token=86e120ea-2e43-44ac-bc24-82bb900c0245" alt=""><figcaption></figcaption></figure>
{% hint style="info" %}
Hint: you can even assign multiple tags to a user at once by adding a comma + a space i.e. Exhibitor, VIP, Day One
{% endhint %}
# Assigning user tags
Let's assign some tags to your users so you can label or categorize the visitors of your event.
There are a few ways in which you choose to assign a user tag to your users
### Manually assign a tag to a user
You can manually assign a (pre-created) tag to a user from the admin panel by completing the following steps:
1. Open the admin panel
2. Go to 'Users' --> 'All users'
3. Search for the user you wish to assign a tag to
4. Click on the Edit symbol <img src="https://772941315-files.gitbook.io/~/files/v0/b/gitbook-x-prod.appspot.com/o/spaces%2F-M5LNCGpK5lyymcFZU4V%2Fuploads%2Fxe9einxUdWWVwWkDYLFT%2FScreenshot%202023-04-25%20at%2020.12.37.png?alt=media&token=a41605a8-1755-4402-bb25-780a5b2fc15e" alt="" data-size="line">
5. Scroll down to 'Tags'
6. Search for the relevant tag<br>
<figure><img src="https://772941315-files.gitbook.io/~/files/v0/b/gitbook-x-prod.appspot.com/o/spaces%2F-M5LNCGpK5lyymcFZU4V%2Fuploads%2FQOBgxzmhN4Lj1GiLCrg8%2FScreenshot%202023-04-25%20at%2020.15.47.png?alt=media&token=7ed8ed9c-12e9-4150-9261-9523b49fe1f6" alt=""><figcaption></figcaption></figure>
7. Select 'Add' to connect the tag\
(You can add multiple tags)
8. Make sure you save your changes
### Automatically after completing a registration form
If you are using the Let's Get Digtal registration form you can choose to automatically assign a (pre-created) user tag to the person who has completed the form [(discover how here)](/adding-users-and-ticketing/registration-forms#how-to-create-a-registration-form).
<figure><img src="https://772941315-files.gitbook.io/~/files/v0/b/gitbook-x-prod.appspot.com/o/spaces%2F-M5LNCGpK5lyymcFZU4V%2Fuploads%2Fg0J9AV7vhcoyr6FO7hNj%2FScreenshot%202023-04-25%20at%2020.24.35.png?alt=media&token=a244f780-65c3-47cf-bdb7-5d3f0e352a52" alt=""><figcaption></figcaption></figure>
### Assign your tags through an excel import (*Fastest option* <mark style="color:yellow;">⭐️</mark>)
When importing your user into the system with an excel sheet you can fill in the column named 'User tags' the specific tags you would like to create and assign it to the specific user as shown in the example below:
<figure><img src="https://772941315-files.gitbook.io/~/files/v0/b/gitbook-x-prod.appspot.com/o/spaces%2F-M5LNCGpK5lyymcFZU4V%2Fuploads%2FeuQ3JaXmVf6wslwOa6Xu%2FScreenshot%202023-04-25%20at%2019.35.54.png?alt=media&token=86e120ea-2e43-44ac-bc24-82bb900c0245" alt=""><figcaption></figcaption></figure>
### Bulk assign your users tags from the user overview
You can bulk assign (pre-created) user tags to users from the user overview in the admin panel by completing the following steps:
1. Open the admin panel
2. Go to 'Users' --> 'All users'
3. Click on the check box next to the users you want to add a tag to<br>
<figure><img src="https://772941315-files.gitbook.io/~/files/v0/b/gitbook-x-prod.appspot.com/o/spaces%2F-M5LNCGpK5lyymcFZU4V%2Fuploads%2FskdPNnhE8gOqpbMvKsmI%2FScreenshot%202023-04-25%20at%2020.48.19.png?alt=media&token=5f42e34c-c645-4f72-87dc-d15084d6b23e" alt=""><figcaption></figcaption></figure>
4. Click on the tag symbol<img src="https://772941315-files.gitbook.io/~/files/v0/b/gitbook-x-prod.appspot.com/o/spaces%2F-M5LNCGpK5lyymcFZU4V%2Fuploads%2FaPC845CxwPaDQNe1VtZG%2FScreenshot%202023-04-25%20at%2020.45.29.png?alt=media&token=0faeedc0-57cc-46be-9731-6cf87b3a5a40" alt="" data-size="line">
5. Select the relevant tags you wish to connect the users\
(multiple tags possible)<br>
<figure><img src="https://772941315-files.gitbook.io/~/files/v0/b/gitbook-x-prod.appspot.com/o/spaces%2F-M5LNCGpK5lyymcFZU4V%2Fuploads%2FdUXrwGSHW0eHwReJMQc2%2FScreenshot%202023-04-25%20at%2020.49.54.png?alt=media&token=1a7156bc-ad93-4246-96d9-4c97fc8f34ee" alt=""><figcaption></figcaption></figure>
6. Click 'Save'
# Managing user tags
You can manage the created and assigned user tags easily in the admin panel
Once a user tag has been created you can still edit and delete the tag.
### How to edit a user tag
You can edit your already existing user tag from the admin panel by completing the following steps:
1. Open the admin panel
2. Go to 'Users' --> 'All users'
3. Click on the button 'User tags'
4. Search for the tag you wish to edit
5. Click on the edit symbol <img src="https://772941315-files.gitbook.io/~/files/v0/b/gitbook-x-prod.appspot.com/o/spaces%2F-M5LNCGpK5lyymcFZU4V%2Fuploads%2FURWLQtaIJ3fDCXUTjcTw%2Fimage.png?alt=media&token=8f6f02f9-4a4d-4843-9ef8-5d2b3474d8ce" alt="" data-size="line">
6. You can now make the relevant changes to the tag
### Make a user tag hidden
When editing a user tag you can choose to make it hidden by selecting the option 'Should this tag be hidden?'

This will allow the tag to be used without showing on a user's profile in the App and/ or Virtual event platform.
### Arrange user tags in order
Whilst editing a user tag you can arrange its place in the tag order by placing a number under the section 'Order (lower numbers appear higher in the list)'
For example, the user tag with the order position 1 will be listed at the top of the user tag list.

### Event access (date & time) Virtual event
It is possible to provide users access to specific days of the Virtual event based on their tags. This function can be set up using the following steps:
1. Open the Admin panel
2. Go to Settings --> Virtual event settings --> General
3. Check the box 'Enable access per event day (based on user tag)'
4. Now create a 'New Tag' or edit an existing Tag
5. Enter the 'Start date' that users with the tag can enter the Virtual event.
6. Enter the 'End date' that users with the tag can enter the Virtual event.
7. Click 'Add tag' or 'Save changes'
### Date-based check-in access (App)
This setting allows you to restrict event access based on user tags with specific start and end dates, providing precise control over check-in permissions during defined date ranges.
1. Open the Admin panel
2. Go to Settings -> App settings -> General
3. Click on Extra options (in the bottom left of the screen)
4. Check on the setting -> Enable date-based check-in access control
5. Now create a 'New Tag' or edit an existing Tag
6. Enter the 'Start date' that users with the tag can be checked-in.
7. Enter the 'End date' that users with the tag can be checked-in.
8. Click 'Add tag' or 'Save changes'
### How to delete a user tag
1. Open the admin panel
2. Go to 'Users' --> 'All users'
3. Click on the button 'User tags'
4. Search for the tag you wish to delete
5. Click on the delete symbol <img src="https://772941315-files.gitbook.io/~/files/v0/b/gitbook-x-prod.appspot.com/o/spaces%2F-M5LNCGpK5lyymcFZU4V%2Fuploads%2FWLFSMPTzBGCwMbX0rHYd%2FScreenshot%202023-04-25%20at%2021.38.10.png?alt=media&token=e118fe51-743b-4a5b-9537-1f3932d2e65e" alt="" data-size="line">
6. The tag has now been deleted
{% hint style="warning" %}
Some default system tags are not possible to delete and can be hidden
{% endhint %}
# Limit networking visibility with user tags
During certain events, high-profile attendees (e.g. CEOs) may need limited visibility to avoid unwanted contact from the general audience. Use user tags to restrict who can initiate networking with specific people, helping protect their privacy and reduce unsolicited outreach.
<div data-with-frame="true"><figure><img src="https://772941315-files.gitbook.io/~/files/v0/b/gitbook-x-prod.appspot.com/o/spaces%2F-M5LNCGpK5lyymcFZU4V%2Fuploads%2F3q5OuNghk4aP753smv8p%2Fnetworking_limiter_tag_select.png?alt=media&token=f79dc5af-e996-4775-b73b-d4274ff37061" alt=""><figcaption><p>This person can only be directly networked with by users tagged VIP or CEO.</p></figcaption></figure></div>
### How it works
Create a user tag and specify in the <kbd>Advanced</kbd> tab which tags are permitted to initiate contact. This lets organisers curate the experience for high-profile attendees.
Anyone without a permitted tag cannot initiate networking with a restricted user. However, if a restricted user reaches out first — by sending a message or scheduling an appointment — the recipient can respond. They cannot, however, schedule a follow-up appointment themselves.
If a restricted user accepts a networking request, the other person gains access to all networking options for as long as they remain connected.
Restricted users can network with anyone freely, unless the other person has their own networking limitations in place.
# Creating a user
What is an event without attendees, speakers, exhibitors or any other user type? Here are the options for you to create your users in the system.
{% hint style="info" %}
The easiest/quickest way to **add users in bulk** is to use the [importer tool](https://knowledge-base.letsgetdigital.com/the-admin-panel/settings/bulk-import-data) or to make use of the [registration form](https://knowledge-base.letsgetdigital.com/lgd-features/registration-form) or an [integration](https://knowledge-base.letsgetdigital.com/the-admin-panel/settings/untitled) or API (if applicable).
{% endhint %}
### Manually create a user
Users are created or added to represent people who will use your event app or virtual event platform. You can manually create a user from the admin panel within seconds by using the steps listed below:
1. Open the Admin panel
2. Go to Users --> All users
3. Click on '+ Add new user'
4. You can now fill in the relevant fields (please see the table below)
5. Click 'Add user' to save
{% tabs %}
{% tab title="General" %}
| Field | Description |
| --------------- | ----------------------------------------------------------------------------------------------- |
| Title | Fill the user title i.e. Miss/Mr/Dr |
| First name | Users First name |
| Last name | Users Last name |
| E-mail | E-mail address that will be used to contact the user and they will use to login to the platform |
| Profile picture | Set an image with the dimensions 125 x 125 pixels |
| Tags | Tags of user (tag must be created first) |
| {% endtab %} | |
{% tab title="About" %}
| Field | Description |
| ---------------- | ---------------------------------------------------------------------------------------------------------------------------------------------------- |
| Password | This is the users password to access the platform. *(When left blank this will be automatically generated)* |
| Language | \*Only applicable for Extensive package - If using the muli-event lanaguage this sets the language the platform will appear in for the specific user |
| Birthday | Set the users birthday |
| Phone number | Users phone number |
| About me | Description about user |
| LinkedIn profile | LinkedIn profile of user |
| {% endtab %} | |
{% tab title="Company" %}
| Field | Description |
| ----------------- | ------------------------------------------------------------------------------------------------------------------------------------------------------------------ |
| Company | Company that will appear in the users profile |
| Company position | Users position inside company |
| Exhibitor of | Connect user as (lead) exhibitor to a company booth |
| Exhibitor crew of | Connect user to exhibitor crew of a company (applicable of [Exhibitor Portal](https://knowledge-base.letsgetdigital.com/lgd-features/exhibitor-portal) is enabled) |
| {% endtab %} | |
{% tab title="Progam" %}
| Field | Description |
| ------------------ | --------------------------------------------------------------------------------------------------- |
| Personal programme | Choose from the drop down which programme items that the user will have in their personal programme |
| Speaker for | Connects user as a speaker for a session |
| Moderator for | Connects user as a moderator for a session |
| {% endtab %} | |
{% tab title="Networking" %}
| Matchmaking tags |
| -------------------------------------------------- |
| Select the matchmaking tags of the user (Intrests) |
| {% endtab %} |
{% tab title="Settings" %}
| Field | Description |
| ------------------------------------------------ | ----------------------------------------------------------------------------------------------------------------------------------------------------------------------------------------- |
| Is the code open for registration (for the app)? | |
| External identifier | The External Identifier is a unique code that is given to all users in the system. This code **must be unique**. *(If left blank we will automatically generate the External Identifier)* |
| Privacy settings | Set the privacy level for the user *(If left blank the default option will be set).* |
| Is this user a chat Help Desk? | Makes a user part of the [Help Desk](https://knowledge-base.letsgetdigital.com/lgd-features/help-desk) |
| Type | Choose whether the user is a standard user or should have admin or host access. |
| {% endtab %} | |
{% tab title="Custom fields" %}
| Field | Description |
| --------------------------------------------------------------------------------------------------------------------------------- | ---------------------------------------------------------------- |
| [+ Add additional data field](https://knowledge-base.letsgetdigital.com/the-admin-panel/settings/settings/additional-data-fields) | Allows to create custom data fields to show in the users profile |
| {% endtab %} | |
| {% endtabs %} | |
[**Tip**](#user-content-fn-1)[^1]**:** No field has to be completed when creating a new user, allowing you to create blank users that are ready to be auto-completed when necessary.
### Action buttons <a href="#action-buttons" id="action-buttons"></a>
Each user has five icons to their right (Under actions):
- Edit icon: Click here to make adjustments similar to when creating a user. \
- Delete icon: Click here to remove the user altogether.\ <img src="https://772941315-files.gitbook.io/~/files/v0/b/gitbook-x-prod.appspot.com/o/spaces%2F-M5LNCGpK5lyymcFZU4V%2Fuploads%2FiDBaO1lSqIXw8Jn4Mt77%2FMail%20icon.png?alt=media&token=ad9e0b3b-3b97-482e-a2d4-c603c1bf9afe" alt="" data-size="original">- Mail icon: Click here to see sent e-mails or to send a new mail.\
- Check-in icon: Click here to manage the user's check-in.
## Bulk editing users <a href="#action-buttons" id="action-buttons"></a>
To edit multiple users at once, select the checkboxes on the left-hand side in the user's overview. Several buttons will appear in the top left corner. They allow you to bulk edit the selected users in the following way:
1. Adding tags to the selected users
2. Removing tags from the selected users
3. Sending emails to the selected users
4. Exporting the selected users
5. Deleting the selected users
## Locked users
In the admin panel overview as well as in the user overview, you can see how many users are currently locked out of the platform or app. When a user tries to enter the platform or app and enters a wrong password multiple times, they get locked. By editing their profile, you can unlock them.
[^1]:
# Duplicate user
### Duplicate user management
You can manage duplicate users (emails) by following these steps:
1. Open the admin panel.
2. Navigate to Users → Duplicate users.
3. Manage the duplicate users within your environment.
The system retains data from the leading user, while data from the other user is removed:
* Standard user fields (e.g., first name): If the leading user lacks certain information, it will be inherited from the non-leading user.
* Connections (e.g., tags): Any connections linked to the non-leading user will be transferred to the leading user.
<figure><img src="https://lh7-rt.googleusercontent.com/docsz/AD_4nXfxS9q7Jtmks8zd74GHdDbSt5zZlw-9r1EdOVWLnby9B_Rd8xyeIgP_mVpiMBIwD_n3pCaJogT729IM9MLOgNTtsTzR9TGLTcvPaxGf3TLnWFpEWA838lMfPwG_iSmbq7Yz1xaOfQ?key=4S40qjlA46VF8CAsB-hx4m10" alt=""><figcaption><p>Duplicate users overview</p></figcaption></figure>
<br>
# Export
Take control over the user data that you wish to export from the admin panel.
You can take full control over the user data you want to export from the admin panel. Export the data into a clear Excel file with the specific information you require.
## How to export your user data <a href="#the-home-page" id="the-home-page"></a>
You can export your user data using the following steps:
1. Open the admin panel
2. Go to 'Users' --> 'All users'
3. Click on the blue button 'Actions'
4. Select 'Export'
5. Chose how you want to sort your users.
6. Tick the fields you want to export
7. Click on 'Send'.
An Excel export will now be sent to your email address ready for you to download
# Application (App)
The following page provides more information about users in the application.
# Users (App)
This article describes how you can add/edit/delete users within the admin panel for them to be able to download and use your app, plus all other functions that can be controlled.
{% hint style="success" %}
**Tip:** There are 4 different types of users to know about before you begin to manage them:
* **Attendees** - People who attend the event.
* **Speakers** - The presenter of a talk or session.
* **Organizers** - The people who are arranging the event and are provided access to the admin panel.
* **Exhibitors** - An attendee connected to a company attending the event.
Whilst there is an overall home page for all users, each type also has a dedicated home page to make the management process and functions easier to handle.
{% endhint %}
## The home page <a href="#the-home-page" id="the-home-page"></a>
To find the users feature from within the admin panel, hover over the 'Users' tab and select either 'All users' or the specific type of user you are interested in.

### Understanding the home page <a href="#understanding-the-home-page" id="understanding-the-home-page"></a>
On the home page, there are a variety of quick-view headings for your list of users. These are as follows:
<table><thead><tr><th>Name</th><th>E-mail</th><th width="177">External Identifier</th><th width="166">Password</th><th>Type</th><th>Actions</th></tr></thead><tbody><tr><td>The user's name</td><td>Their e-mail address</td><td>*When given otherwise left blank - Unique code that is given to all users in the system. This code <strong>must be unique</strong>.</td><td>Their registration code</td><td>Any associated tags</td><td>To individually manage the user.</td></tr></tbody></table>

## Management buttons <a href="#management-buttons" id="management-buttons"></a>
Above the headers you can see four buttons , '[Actions](https://knowledge-base.letsgetdigital.com/the-admin-panel/users/application/untitled#actions)', '[User Tags'](/the-admin-panel/users/user-tags), ['Excel'](/the-admin-panel/users/application/untitled/download-all), '[New user](https://knowledge-base.letsgetdigital.com/the-admin-panel/users/application/untitled#creating-a-user)'.
### Actions <a href="#actions" id="actions"></a>
The actions drop-down menu has 3 different options:
* [Check-in manager](/the-admin-panel/users/application/untitled/check-in) - Control and view users who have or haven't checked in to the event.
* [Generate registration codes](/the-admin-panel/users/application/untitled/generate-registration-codes) - Generate in bulk generic registration codes.
* [Export](/the-admin-panel/statistics/statistics-app/user-export-app) - Download the users in the admin panel with more options and control over how.
### User Tags <a href="#managing-users-individually" id="managing-users-individually"></a>
For more information refer to ['User Tags'](/the-admin-panel/users/user-tags)
### Excel <a href="#managing-users-individually" id="managing-users-individually"></a>
To find the download button within the admin panel, select 'Excel' on [the user's home page](https://knowledge-base.letsgetdigital.com/the-admin-panel/users/application/untitled#the-home-page). When you click on the 'Excel' button you aren't directed to any new pages, instead it just starts the download automatically to your PC.
### New user <a href="#managing-users-individually" id="managing-users-individually"></a>
For more information on creating new users and so adding people to the app refer to '[Creating a user](/the-admin-panel/users/user-tags/creating-user-tags)'
## Ready to invite the users to the app <a href="#the-end-result" id="the-end-result"></a>
Once you have filled in the entire app through the Admin Panel and the app is published (always check first with consultant), you can now invite users to the app. Go to '[mails](/the-admin-panel/communication/mails)' for more information.
## **The result of logged in users (in the app)** <a href="#the-end-result" id="the-end-result"></a>
<img src="https://772941315-files.gitbook.io/~/files/v0/b/gitbook-legacy-files/o/assets%2F-M5LNCGpK5lyymcFZU4V%2F-McrxDQXMsKySZUF1cnc%2F-Mcry08M2pt3zFHlNSwR%2Fimage.png?alt=media&token=eb5164d9-4e23-44fc-a1e7-7578b06ae791" alt="" data-size="original"> <img src="https://772941315-files.gitbook.io/~/files/v0/b/gitbook-legacy-files/o/assets%2F-M5LNCGpK5lyymcFZU4V%2F-McrxDQXMsKySZUF1cnc%2F-Mcry5DDjFtjR9pn4BT8%2Fimage.png?alt=media&token=7b8e9236-b306-45dc-b51a-1e6feddb8824" alt="" data-size="original">
# Check-in/out (App)
It is important to know who is at your In-person event right? Learn how you can check-in/ out your attendees and see a clear overview (even in real time!)
## Check-in/out users
The mobile app offers multiple ways for 'Admins' and 'Hosts' to Check-in and out people attending your event.
#### Check-in/out scanner <a href="#the-home-page" id="the-home-page"></a>
The fastest way to check in/ out people at your event is to use the scanning option. Here is how an Admin or host can do this:
1. From the app menu go to 'Check in/out guests'<br>
<figure><img src="https://772941315-files.gitbook.io/~/files/v0/b/gitbook-x-prod.appspot.com/o/spaces%2F-M5LNCGpK5lyymcFZU4V%2Fuploads%2FavKoyDbVvRi5AonYHdd2%2FUntitled%20design%20(1).gif?alt=media&token=9b5a62c2-72c8-40ab-bf44-b8cce13ef939" alt=""><figcaption></figcaption></figure>
2. Select either Check-in or Check-out to open the relevant scanner\ <br>
<figure><img src="https://772941315-files.gitbook.io/~/files/v0/b/gitbook-x-prod.appspot.com/o/spaces%2F-M5LNCGpK5lyymcFZU4V%2Fuploads%2FDDuLQENLYmBykgkC2mxi%2FUntitled%20design%20(3).gif?alt=media&token=ceedd6a2-43e6-475f-bd7d-358623150389" alt=""><figcaption></figcaption></figure>
3. Aim the scanning camera at the user's QR code. \ <mark style="background-color:orange;">If you do not directly receive a warning pop-up you can continue scanning the next person. If receive a warning this means the user has already been checked in/out or is not allowed to enter the event.</mark>
#### Manual check-in (in-app) <a href="#the-home-page" id="the-home-page"></a>
You can manually check in a user from within the event app as an Admin or host by completing the following steps:
1. From the apps menu open 'Admin options'
2. Choose 'Check-in manually'
3. Type the name of the person you wish to check-in
4. Click on the correct person's name
5. Click 'Yes' to complete the check-in
You will receive direct confirmation that the person is checked in
## Check-in status
Within the app, you can see a live overview of who has checked in/ out of your event. The overview gives you insight into specific user groups based on their tags.
To access this you can complete the following steps:
1. From the apps menu go to 'Admin options'
2. Choose 'Event check-in status'
3. See at the top how many users are at the event now
4. See at the bottom how many users have checked-out
5. By clicking on a user group in the list you can see who specifically has checked-in
## Check-in manager
From within the Admin panel, you have an overview of all the check-ins made at your event. This overview details:
1. **Date:** The date and time a user was checked-in
2. **Scanned by:** the host or Admin who checked a user in
3. **User:** who was checked in
4. **Result:** was the check-in successful
5. **Actions:** allows you to remove the check-in of a user
#### How to access the check-in manager
You can access the check-in manager from your Admin panel by completing the following steps:
1. Go to Users --> All users
2. Click on the button 'Actions'
3. Choose Check-in manager
#### Export checked-in/out users
You can make an export of all the Checked-in/out users from [App statistics](/the-admin-panel/statistics/statistics-app) --> User export (excel)
###
## <a href="#the-end-result" id="the-end-result"></a>
# Generate registration codes (App)
This is a method of creating a number of blank users and user codes in bulk rather than adding new blank profiles manually each time. This article describes the process in more detail.
## The home page <a href="#the-home-page" id="the-home-page"></a>
To find the generate registration codes feature within the admin panel, select 'Generate registration codes' from the actions drop-down menu on [the user's home page](https://knowledge-base.letsgetdigital.com/the-admin-panel/users/application/untitled#the-home-page).

## How to generate codes <a href="#how-to-generate-codes" id="how-to-generate-codes"></a>
1. Under 'Generate new codes', enter the number of new codes you need (10 is entered by default but there is no minimum).
2. Click on 'Submit'.\

{% hint style="info" %}
You'll now be able to find your new blank users when you re-load the user's[ home page](https://knowledge-base.letsgetdigital.com/the-admin-panel/users/application/untitled#the-home-page).
{% endhint %}
#### **Old generations of new user codes can also be downloaded in a CSV file.** **To do so:**
1. Open the home page.
2. Under 'Old generations', click on the generation of user codes that you wish to download in a CSV file.

# Export (App)
Find out more in this article about downloading users in the admin panel to an excel spreadsheet.
## The home page <a href="#the-home-page" id="the-home-page"></a>
To find the download button within the admin panel, select 'Download all' from the actions drop-down menu on [the user's home page](https://knowledge-base.letsgetdigital.com/the-admin-panel/users/application/untitled#the-home-page).

## The spreadsheet <a href="#the-spreadsheet" id="the-spreadsheet"></a>
When you click on the 'Download all' button you aren't directed to any new pages, instead it just starts the download automatically to your PC.
# User badges
Badges can be downloaded and printed for users to use during the live event. This article explains how to generate badges (for a specific user group).
## The home page
To find the home page for user badges in the admin panel, select 'User badges' from the actions drop-down menu on [the user's home page](https://knowledge-base.letsgetdigital.com/the-admin-panel/users/application/untitled).

### Understanding the home page
On the home page, there are a variety of quick view headings for the generate badges. These are as follows:
| Time | Sort | Filter checked-in | Status | Actions |
| --------------------------------------- | ----------------------------------------------- | -------------------------------------------------------------------------------------- | ---------------------------------------------------------------------------- | --------------------------------------------------------------------------- |
| Date and time the badges were generated | Badges are sorted by either first- or last name | 'Yes' includes badges of not checked-in users, while 'No' does not include these users | The status of the generated badges, either 'Success', 'Waiting', or 'Failed' | Successfully generated badges may be exported as a PDF-file or re-generated |
## How to generate user badges
1. Open the home page.
2. Click on 'Generate new badges'.
3. Select the sort the badges either by first or last name.
4. Tick the box to only include badges of not checked-in users.
5. Additionally, there is an option to generate badges for a specific group of users with a tag.
6. Click on 'Generate badges'.

{% hint style="info" %}
**Please note:** Generating a badge may take a moment. Please refresh the page to receive an update on the status.
{% endhint %}
# User account deletion
This article describers how users can delete their own accounts in the app
Users can delete their accounts by navigating to their profile on the app and clicking on 'Delete my account'. The data of that user will automatically be anonymized.
{% hint style="info" %}
Note: You (as the organizer) will receive an email, informing you about which user deleted their account.
{% endhint %}
# Virtual platform (Virtual event)
# Virtual event users
People attend meetings to connect with each other. The following article explains how a user can connect with another user in the app and virtual environment.
## In the virtual environment
In the Let's Get Digital platform, users can connect through the 'Attendees' tab.
1. Click on 'Attendees'.
2. Click on a person you want to connect with.
3. Start a chat, request a video chat, request a date, or make a connection.

### Video chat
During a 1-on-1 video chat users have the following options:
<img src="https://772941315-files.gitbook.io/~/files/v0/b/gitbook-legacy-files/o/assets%2F-M5LNCGpK5lyymcFZU4V%2F-MPDt7FSqxkj4_4mhYZm%2F-MPDuj-6hXHAYILww5mN%2FSchermafbeelding%202020-12-23%20om%2010.24.26.png?alt=media&token=9af60c00-9b80-41f2-b99c-16d004dc1aa0" alt="" data-size="original"> Click this icon to make a connection request.
<img src="https://772941315-files.gitbook.io/~/files/v0/b/gitbook-legacy-files/o/assets%2F-M5LNCGpK5lyymcFZU4V%2F-MPDt7FSqxkj4_4mhYZm%2F-MPDusKjVZU1fqg65Aqe%2FSchermafbeelding%202020-12-23%20om%2010.25.57.png?alt=media&token=77983fdb-f200-424f-bac8-aaa351507969" alt="" data-size="original"> Click this icon to request a meeting.
<img src="https://772941315-files.gitbook.io/~/files/v0/b/gitbook-legacy-files/o/assets%2F-M5LNCGpK5lyymcFZU4V%2F-MPDt7FSqxkj4_4mhYZm%2F-MPDux6W6Jw9dtrxEuJf%2FSchermafbeelding%202020-12-23%20om%2010.24.36.png?alt=media&token=eef10b5e-3eda-4e8d-a43d-6c83ea7976d9" alt="" data-size="original"> Click this icon to take a look at the profile of the user.
<img src="https://772941315-files.gitbook.io/~/files/v0/b/gitbook-legacy-files/o/assets%2F-M5LNCGpK5lyymcFZU4V%2F-MPDt7FSqxkj4_4mhYZm%2F-MPDv-4oL0muH1Cue9pf%2FSchermafbeelding%202020-12-23%20om%2010.24.55.png?alt=media&token=c37463eb-8170-4731-8000-29168ab51873" alt="" data-size="original"> Click this icon to make notes.
<img src="https://772941315-files.gitbook.io/~/files/v0/b/gitbook-legacy-files/o/assets%2F-M5LNCGpK5lyymcFZU4V%2F-MPDt7FSqxkj4_4mhYZm%2F-MPDv2PVN8GyQXfjvaAb%2FSchermafbeelding%202020-12-23%20om%2010.24.49.png?alt=media&token=656dbf71-5c17-4950-a053-4bbafe3e70e8" alt="" data-size="original"> Click this icon to add another user to the video chat.
You can export all your notes as an Excel file by navigating to your profile on the platform and clicking on the 'Download notes' button (if the option is enabled in the Admin Panel).
There is also the option to chat with text messages on the right side. This can be enabled and disabled here:
Hover over 'Settings', select 'Virtual event settings', and click on 'Networking bubble'. Make sure the 'Enable chat for one on one and group sessions' is on or off.
# Speakers & Moderators (Virtual event)
What is an event without speakers? Read this article to discover how your speakers and moderators can access the platform and their own sessions.
[This article](https://knowledge-base.letsgetdigital.com/the-admin-panel/users/application/untitled) explains how to make adjustments manually and the options the admin panel has to offer under 'Users'.
## Moderators
A moderator is a user type that has the same rights as a speaker when connected to a programme item. However, (Moderator) is shown behind the user's name to indicate that the user is a moderator. Just like speakers, they have the right to enter a session before the start of the session.
A user can be granted the right to be a moderator in a programme item by:
* [Creating or editing a user profile](https://knowledge-base.letsgetdigital.com/the-admin-panel/users/application/untitled#managing-users-individually) and connecting the user to a programme item(s) in the 'Moderator for' section of the user's profile.
* [Creating or editing a programme item](https://knowledge-base.letsgetdigital.com/the-admin-panel/content/application-1/programmes#managing-programme-items-individually) and connecting user(s) to the programme item in the 'Moderators' section of the programme item.
## The result
Click on the tile called 'Speakers'. A list of speakers will be displayed.

When you click on a speaker, their profile will show. The page includes the talk and/or the company they are connected to.
The options are:
* Select to request a meeting.
* Make a connection.
* Add a personal note.
* Start a chat.

# Registration forms
This page redirects to the main Registration section.
{% content-ref url="/pages/zPyWqQ4o0ECnDNZfJhGX" %}
[Registration forms](/adding-users-and-ticketing/registration-forms)
{% endcontent-ref %}
# Content
Find below how to add content to your app of virtual event platform, also how to manage the content.
# Content (Virtual event)
The following page provides more information about content in the virtual platform.
# Ads (Virtual event)
Advertisements are important for events, and in this article we describe how advertisements can be placed in the virtual platform.
{% hint style="info" %}
Available for: online events; packages: advanced and extensive
{% endhint %}
You have the control to set up advertisements within your virtual event. Advertisements can be linked to a company/sponsor booth or an external URL and accompanied by a logo. When you click on this logo, you are being directed to the intended place.
## Where will my advertisement appear on the virtual platform?
In the virtual platform, you can set your advertisements to appear in multiple places including the Virtual Event Lobby and within the social wall.
#### Advertisement in the Virtual Event Lobby
For your advertisement to appear in the Virtual Event Lobby you can connect one of the [Lobby tiles](https://knowledge-base.letsgetdigital.com/the-admin-panel/navigation/virtual-platform/tiles-customization) to advertisements in the Admin panel.
Please read the following article on how to set up your [Lobby tiles](https://knowledge-base.letsgetdigital.com/the-admin-panel/navigation/virtual-platform/tiles-customization)
<figure><img src="https://772941315-files.gitbook.io/~/files/v0/b/gitbook-x-prod.appspot.com/o/spaces%2F-M5LNCGpK5lyymcFZU4V%2Fuploads%2FiemAUUajf4xKVzzsW6Wr%2Fezgif.com-video-to-gif.gif?alt=media&token=e5081bb9-b22b-4e84-bd17-e0744e196240" alt=""><figcaption></figcaption></figure>
#### Advertisements on the Virtual Event Social wall
If you enable the Social wall within your Virtual Event your advertisements will automatically appear within the [Social wall](/the-admin-panel/communication/social-wall).
<figure><img src="https://772941315-files.gitbook.io/~/files/v0/b/gitbook-x-prod.appspot.com/o/spaces%2F-M5LNCGpK5lyymcFZU4V%2Fuploads%2FNWNSdrZQjrqUKfvNZu8I%2Fimage.png?alt=media&token=4ee839d3-5289-4cfe-b2c1-2859cf3d53f7" alt=""><figcaption></figcaption></figure>
## How to create a Virtual Event Advertisement
Advertisements are quick and easy to set up in the Admin panel. Please follow the steps listed below:
1. Open the Admin panel
2. Go to 'Content' --> Ads
3. Click on '+New ad'
4. Fill in the relevant information\
\
\- If you select a company - the user will be directed to the company booth if clicked\
\- If you place a link - a user will be directed to the intended page if clicked
To change the speed at which the advertisements switch in the lobby tile, navigate to 'Settings' -> 'Virtual event settings' -> 'Layout' -> 'The duration per advertisement in the lobby in seconds'

##
# Call to Action (Virtual event)
Call to action (CTA) can be created for the Virtual event platform. CTA allow exhibitors and speakers to generate new leads and share relevant material with their audience.
{% hint style="info" %}
Available for: online events; packages: core, advanced and extensive
{% endhint %}
A call to action offers exhibitors and speakers another way to generate leads and share information to attendees of an event.
Please choose the article below on how to setup the CTA for the relevant platform.
## Call to action overview page
The call to action overview allows you to see and manage all of the call to actions that have been created in the system. From here you can edit, view CTA activity, download statistics and delete CTA.

{% hint style="info" %}
There are several ways to create a call to action; Manually via the admin panel, excel import, through the virtual event platform or mobile app.
{% endhint %}
## Create a CTA via the Admin panel
1\) Open the admin panel
2\) Click on the drop down menu 'Content' and then choose 'Call to action'
3\) Click on the blue button '+New call to action'

There are two types of call to action:
* CTA lead - Get contact info by asking users to share their profile information.
* CTA link - Provide users with a link to external sources or materials (Brochure, Website, Video).
Fill in the relevant fields from the Table listed below named 'Fill CTA'
**Table Fill CTA**
<table><thead><tr><th width="299">Settings</th><th>Explanation</th></tr></thead><tbody><tr><td>Name</td><td>Name of the CTA as displayed for admins and speakers.</td></tr><tr><td>Type</td><td>CTA type, either lead or link.</td></tr><tr><td>Title</td><td>Title as displayed in the virtual platform.</td></tr><tr><td>Description</td><td>Description of the CTA, which will be displayed on the pop-up in a session.</td></tr><tr><td>Button text</td><td>Text displayed on the button of the CTA pop-up.</td></tr><tr><td>Entity Type</td><td>The CTA can be activated in a session or company.</td></tr><tr><td>Session/ Company</td><td>Select the session or company the CTA should be connected to.</td></tr><tr><td>Open call to action</td><td>When enabled, the CTA pop-up will be opened immediately when send.</td></tr><tr><td>Phone number required?</td><td>When enabled, the user has to fill in their phone number to receive the CTA.</td></tr><tr><td>Send</td><td>Select to send the CTA at a planned time, when send now is pressed in the session or send the CTA directly.</td></tr></tbody></table>
## Create a CTA from within the Virtual event platform
It is possible with the virtual event platform to create a CTA for both a company booth or for a session (please find relevant steps listed below):
### Company call to action
#### Add a company CTA
Admins and exhibitors of the specific company booth can create and edit CTA from within the Virtual event platform:
1\) Open the specific Company booth you would like to create a CTA for
2\) Click the button in the top right corner of the booth named 'CTA's' Company call to action
#### Add a company CTA
Admins and exhibitors of the specific company booth can create and edit CTA from within the Virtual event platform:
1\) Open the specific Company booth you would like to create a CTA for
2\) Click the button in the top right corner of the booth named 'CTA's'

3\) A pop-up will appear; Click 'Add CTA'

4\) Fill the information (you can reference the table above named 'Fill CTA')
#### Managing a company CTA
Once a CTA has been created for a company it is possible to manage the CTA from the company booth.
How to access:
1\) Open the specific company booth
2\) Click CTA (the pop-up shown below will appear)

From this page you can Add, edit, remove and download the company CTA's
### Download CTA Statistics
Export an Excel file including responses to CTA's straight from a company booth. The [setting ](https://knowledge-base.letsgetdigital.com/the-admin-panel/content/virtual-platform/companies#virtual-event-settings)has to be enabled for each individual company.
{% hint style="danger" %}
It is only possible in the Advanced & Extensive packages to download the CTA statistics.
{% endhint %}
#### End result of company CTA
Users will see a button in the company stand to access the newest created CTA.

Other CTA's are located under the 'More' tab.

### Session call to action
It is possible within the Virtual event to create a CTA for a session as an Admin, moderator or speaker.
#### Add a session CTA
1\) Open the specific session you would like to create a CTA for
2\) Click Session tools (found at the bottom of the screen)

3\) Select the tab 'CTA'
4\) Click 'Schedule a new CTA'

{% hint style="info" %}
From this page you can Add, edit, remove and send the CTA
{% endhint %}
5\) Fill the information (you can reference the table above named 'Fill CTA')
#### End result of Session CTA
Depending on how the CTA was setup, it will be displayed either as a pop up or it will be shown as a button in the feedback bar.
<div align="left"><img src="https://772941315-files.gitbook.io/~/files/v0/b/gitbook-legacy-files/o/assets%2F-M5LNCGpK5lyymcFZU4V%2F-MZY6oHGjXDwEDqSWn8C%2F-MZY7LwAdEmebNWalXIn%2Fimage.png?alt=media&token=d4395405-3e6d-4956-95b7-a30de1207cf4" alt="Session CTA as a popup"></div>

# Companies (Virtual event)
This article describes how companies can be represented in the virtual event.
[This ](https://knowledge-base.letsgetdigital.com/the-admin-panel/content/application-1/companies)article describes how companies are added to the admin panel and how they are displayed in the app.
## Upload of Excel sheet templates
One way to insert company data into the admin panel is through Excel sheets. [Here the Excel sheets can be found](https://knowledge-base.letsgetdigital.com/the-admin-panel/settings/bulk-import-data/excel-import), next to some information on how to fill them. Please also make sure to have a look at [this article](https://knowledge-base.letsgetdigital.com/the-admin-panel/settings/bulk-import-data) before starting your import of companies.
## Manual adjustments in the admin panel
The data can always be edited, added, or deleted manually in the admin panel. We recommend making adjustments manually when there are small changes shortly before the start of your event or during the event.
[This](https://knowledge-base.letsgetdigital.com/the-admin-panel/content/application-1/companies/managing-companies-app) article describes how to make adjustments manually and the options the admin panel has to offer under 'companies'. [This ](https://knowledge-base.letsgetdigital.com/the-admin-panel/settings/virtual-event-settings-vp/layout-settings-vp)article describes how to customize the sortation of the tabs in the company stand.
### Order of tabs
The order of the tabs in the company booths may be rearranged in the [virtual event settings](https://knowledge-base.letsgetdigital.com/the-admin-panel/settings/virtual-event-settings-vp/layout-settings-vp#virtual-tab-sorting).
### **Virtual event settings**
Additional settings for companies have been added for LGD 3.0, which can either be adjusted in the admin panel or a company booth by company representatives:
| Setting | Usage |
| -------------------------------------- | --------------------------------------------------------------------------------------------------------------------------------------------------------------------------------------------------------------------------------------------------------- |
| Is premium branding enabled? | Exhibitors can request premium branding settings when editing their company booth in the platform if this settings is currently disable. Premium branding settings allow to upload a custom header, add banner and to remove the Let's Get Digital footer |
| Can people download a brochure? | Enables the option to download a brochure from the company booth. |
| Are appointments enabled? | Enables the option to schedule meetings with company representatives. |
| Only show CTA's in tab | Only shows CTA's in the 'More' tab when enabled. Brochures will not be shown in this tab when enabled. |
| Allow employees to download CTA export | Employees may download an Excel file straight from their company booth including the responses to CTA's. |
| Header image | Add a header image with the dimensions 700px \* 240px. |
| Image footer | Add a footer image with the dimensions 140px \* 56px. |
| Image left | Add an image on the left with the dimensions 120px \* 600px. |
| Image right | Add an image on the right with the dimensions 120px \* 600px. |
| Stand colour | Adjust the colour of the stand. |
| Selected employee 1 | Select a company representative to be displayed on the left side of the company stand landing page. |
| Selected employee 2 | Select a company representative to be displayed on the right side of the company stand landing page. |
## The result
Select 'Companies' from the menu in the top-right corner or by clicking a tile in the lobby. A list of companies will show.

{% hint style="info" %}
In case there aren't any companies added yet to the admin panel, this lobby tile will not be visible
{% endhint %}
When you click on a company their page will show. The page includes:
* Users connected to the company.
* Information about the company.
* A chat box where you can chat with users connected to the company.
* A YouTube/Vimeo live stream or video, or a Twitch/Jet-stream live stream.
* A downloadable brochure.
Click on 'Edit' at the top of the screen to edit the company details.
At the company page, you can choose to connect with a user connected to that company. Several options for getting in touch will be available:
* Make a connection.
* Select to request a meeting.
* Start a chat.
{% hint style="info" %}
**Note:** When someone sends a chat message in the company booth, the users connected to the company will receive this message also in their chats.
{% endhint %}
When a company is connected to a program item, the featured sessiOn will show in the 'Speaks at' tab.

The premium branding images will be displayed as follows:

# Company tags (Virtual event)
Tags can be created to group companies into categories and/or streamline the virtual event.
## The home page
To find the company tags home page, select 'Company tags' from the Actions button on [the company home page](https://knowledge-base.letsgetdigital.com/the-admin-panel/content/application-1/companies#the-home-page).

## Managing tags
### Creating a tag
1. Open [the home page](https://knowledge-base.letsgetdigital.com/the-admin-panel/content/application-1/companies#the-home-page).
2. Click on 'New tag'.<br>
<div align="left"><img src="https://772941315-files.gitbook.io/~/files/v0/b/gitbook-legacy-files/o/assets%2F-M5LNCGpK5lyymcFZU4V%2F-MClBhiiS-BBT6eRvD8I%2F-MClDT_rLbMpLfiwhQUg%2FNew%20tag%20button.gif?alt=media&token=dd13411d-b900-4560-b994-d4dbbae09cae" alt=""></div>
3\. Type a name for the tag.\
4\. Click on the 'Add tag' button.

### Editing and deleting tags
Like companies themselves, each tag has two icons to their right (Under actions):
<img src="https://772941315-files.gitbook.io/~/files/v0/b/gitbook-legacy-files/o/assets%2F-M5LNCGpK5lyymcFZU4V%2F-MClBhiiS-BBT6eRvD8I%2F-MClDjivzitwu3FhFGRU%2FEdit%20icon.png?alt=media&token=7c4db770-92b5-4597-8884-8ce3f6f05b73" alt="" data-size="original"> - Edit icon: Click here to make adjustments similar to when first creating a tag.\
<img src="https://772941315-files.gitbook.io/~/files/v0/b/gitbook-legacy-files/o/assets%2F-M5LNCGpK5lyymcFZU4V%2F-MClBhiiS-BBT6eRvD8I%2F-MClDocVYbO9D1TQ8Mue%2FDelete%20icon.png?alt=media&token=646b062a-b101-41d6-acb4-522b4fbbcf68" alt="" data-size="original"> - Delete icon: Click here to remove the tag altogether.
{% hint style="info" %}
Company tags will only be displayed in the platform when fifteen or more companies have been added to the admin panel.
{% endhint %}
## The result

### Self-select company tags
Companies can select which business tags they find relevant to them and add these to their profile. This can be done by editing the company profile in the app, virtual event or exhibitor portal.
# Extra exposure (Virtual event)
Sponsors are important for events, and in this article, we describe how the app and virtual platform supports the sponsors of an event.
## Manual adjustments in the admin panel
Give certain sponsors more exposure by enabling company sorting in the admin panel.
In the admin panel click on 'Settings' and select 'Virtual event settings'.
<div align="center"><img src="https://772941315-files.gitbook.io/~/files/v0/b/gitbook-legacy-files/o/assets%2F-M5LNCGpK5lyymcFZU4V%2F-McJf_nkCMrqwNRAxW43%2F-McJzsFW7TtmKf2rd8qy%2F2021-06-15_16-12-08.gif?alt=media&token=32f77378-6cec-4128-9d82-2a8c53e22a8f" alt=""></div>
Select 'Layout'.
<div align="left"><img src="https://772941315-files.gitbook.io/~/files/v0/b/gitbook-legacy-files/o/assets%2F-M5LNCGpK5lyymcFZU4V%2F-McJf_nkCMrqwNRAxW43%2F-McK-Dn84cFrXDqnfJrG%2F2021-06-16_15-26-50.gif?alt=media&token=b5fbec54-135e-452d-bef6-3f1b19fb627a" alt=""></div>
At the tab 'Enable company sorting' tick the box to enable the setting and click 'Save changes' at the bottom of the page.
<div align="left"><img src="https://772941315-files.gitbook.io/~/files/v0/b/gitbook-legacy-files/o/assets%2F-M5LNCGpK5lyymcFZU4V%2F-McJf_nkCMrqwNRAxW43%2F-McK0997VQXPbzL8Uct4%2F2021-06-16_15-30-52.gif?alt=media&token=c8728f5a-6ecc-4be0-b129-95f91051a236" alt=""></div>
In the admin panel, you click on 'Content' and select 'Companies'. Select or create a company. Scroll down to the 'Extra company options' and select the order number for the company.

{% hint style="info" %}
Companies with the lowest numbers appear higher in the list (e.g. the company with the number 1 will appear as the first company in the list).
{% endhint %}
# Certificates (Virtual event)
Do you wish to send a certificate of participation to your attendees? The following article will guide you through this:
### How to create a certificate
You can create a certificate from the Admin panel using the following steps:
1. Go to 'Content' --> 'Certificates'
2. Click on '+ New certificate'
3. Fill in the relevant details ([<mark style="color:blue;">please see the table below for reference</mark>](#table-of-reference-+-new-certificate))
4. Make sure you Save changes
5. You will now see the certificate in the Certificates overview
#### Table of reference (+ New certificate)
| Field name | Description |
| ---------------------- | ------------------------------------------------------------------------ |
| Certificate name\* | Name of the certificate |
| Main text | Main text displayed on the certificate |
| Date on certificate | Date that will appear on the certificate (usually the date of the event) |
| **Person 1 (details)** | |
| Name of person 1 | First-person who will sign the certificate |
| Signature of person 1 | Image of signature (400x400 pixels) |
| **Person 2 (details)** | |
| Name of person 2 | Second-person who will sign the certificate |
| Signature of person 2 | Image of signature (400x400 pixels) |
***
### How to edit a certificate
You can edit your certificates from the certificates overview found at 'Content' --> certificates
### How to preview a certificate
Once you have created a certificate you can preview it by clicking on the eye symbol from the certificates overview page.
***
### How to send a certificate
{% hint style="info" %}
**Note:** you can edit the email template named certificate\_code.md to customize the email accompanying the certificate. Read more about [email templates](/the-admin-panel/communication/mails/mail-editor).
{% endhint %}
You can send a certificate by email using the following steps:
1. Go to the certificates overview (Content --> Certificates)
2. Click the email icon next to the certificate you wish to send
3. Using the blue buttons you can select a group of users to send the certificate to <br>
<figure><img src="https://772941315-files.gitbook.io/~/files/v0/b/gitbook-x-prod.appspot.com/o/spaces%2F-M5LNCGpK5lyymcFZU4V%2Fuploads%2F1ZZ32WQ98kxr1oWknUtt%2Fimage.png?alt=media&token=3d80cd34-506d-43c0-a854-4a65533e1f8a" alt=""><figcaption></figcaption></figure>
4. You can choose specific users to send the certificate by selecting the user(s) <br>
<figure><img src="https://772941315-files.gitbook.io/~/files/v0/b/gitbook-x-prod.appspot.com/o/spaces%2F-M5LNCGpK5lyymcFZU4V%2Fuploads%2F2iroOt6pDGP6Fykk3HI7%2Fimage.png?alt=media&token=b8d53f19-ae4e-457b-9085-7fff9833af4c" alt=""><figcaption></figcaption></figure>
5. When ready to send, you can click on the button 'Send e-mails'<br>
<figure><img src="https://772941315-files.gitbook.io/~/files/v0/b/gitbook-x-prod.appspot.com/o/spaces%2F-M5LNCGpK5lyymcFZU4V%2Fuploads%2FOygUowb48AVfsik8qPDs%2Fimage.png?alt=media&token=ebede5c5-57f5-469c-925b-dd69666fd640" alt=""><figcaption></figcaption></figure>
***
## Certificate settings
There are some additional settings you should check before you send your certificate. You can find out more using the following article:
<table data-view="cards"><thead><tr><th align="center"></th><th data-hidden data-card-cover data-type="files"></th><th data-hidden data-card-target data-type="content-ref"></th></tr></thead><tbody><tr><td align="center"><strong>Read more</strong></td><td><a href="https://772941315-files.gitbook.io/~/files/v0/b/gitbook-x-prod.appspot.com/o/spaces%2F-M5LNCGpK5lyymcFZU4V%2Fuploads%2FtYcjZga4O1qj5o0ZjuUN%2FSettings.png?alt=media&token=ba7b705c-4a12-41eb-95fa-940bd4805a6a">Settings.png</a></td><td><a href="/the-admin-panel/settings/general-settings-app-+-vp-1/certificate-settings-app-+-vp#general-certificate-settings">Certificate settings</a></td></tr></tbody></table>
# Locations (Virtual event)
Locations can be names for e.g. rooms or stages within the platform. This comes in handy to organize the programme - especially if there are more than one session happening at the same time.
{% hint style="info" %}
Available for: online events; packages: core, advanced, and extensive
{% endhint %}
{% hint style="success" %}
Although during a virtual event, the users might not be in-person, you might use this to distinguish between rooms within the program of your event.
{% endhint %}
## The home page
To find the locations feature within the admin panel, hover over the content tab and select 'Locations'.

## Managing locations
### Creating a location
1. Open the home page.
2. Click on 'New location'.
3. Complete the fields as described.
4. Click on 'Add location'.

### Editing and deleting locations
Each location has two icons to its right:
<img src="https://772941315-files.gitbook.io/~/files/v0/b/gitbook-legacy-files/o/assets%2F-M5LNCGpK5lyymcFZU4V%2F-MWZbUin8Usi-jM4jN7H%2F-MWZf-tXMzp6KbSMS-4X%2FEdit%20icon.png?alt=media&token=77b578d3-c158-4807-a305-d98deb5f4561" alt="" data-size="original"> - Edit icon: Click here to make adjustments similar to when first creating a location.\
<img src="https://772941315-files.gitbook.io/~/files/v0/b/gitbook-legacy-files/o/assets%2F-M5LNCGpK5lyymcFZU4V%2F-MWZbUin8Usi-jM4jN7H%2F-MWZf5N_274nur8XTLGm%2Fimage.png?alt=media&token=63160d61-f7a0-41a0-aa7d-d38e63c9f4c6" alt="" data-size="original"> - Delete icon: Click here to remove the location altogether.
## Order
The option to manually sort the locations is enabled by default, so the order of the locations in the programme overview can be adjusted. Here below you can find an explanation of where to find the setting in case you would like to enable or disable it and an explanation of how to create an order.
### Where to find the setting
In the admin panel hover over the 'Settings' tab and select 'App settings'.
<div align="left"><img src="https://772941315-files.gitbook.io/~/files/v0/b/gitbook-legacy-files/o/assets%2F-M5LNCGpK5lyymcFZU4V%2F-MWZbUin8Usi-jM4jN7H%2F-MWZgC2wzjrSmFwxMEge%2F2021-03-24_15-43-24.gif?alt=media&token=31adbaa4-a247-4584-9ef4-3c3395518b63" alt=""></div>
Select 'Program' in the menu on the left side.
<div align="left"><img src="https://772941315-files.gitbook.io/~/files/v0/b/gitbook-legacy-files/o/assets%2F-M5LNCGpK5lyymcFZU4V%2F-McK2ec41x8qa6OgdlUD%2F-McK9BpRFsKo7EVRsrUu%2F2021-06-16_16-10-17.gif?alt=media&token=1f5ebb69-5fe5-4279-baa2-1708d10f1957" alt=""></div>
Scroll all the way down and tick the box for 'Location sorting' and click 'Save changes'.

### Creating an order
1. Open the [locations home page](https://knowledge-base.letsgetdigital.com/the-admin-panel/content/virtual-platform/locations#the-home-page).
2. Click on 'Edit location'.
3. Scroll down to 'Order'.
4. Order the location by assigning a number. Lower-numbered locations will appear first on the programme overview.
5. Click on 'Save changes'.
# Pages (Virtual event)
Three pages can be added to the virtual event platform to provide additional information. The frequently asked questions tab shows questions and answers which could be of use during the virtual event.
## Manual adjustments in the admin panel
To find the navigation menu settings/home page within the admin panel, hover over the content tab and select 'Page' from the drop down menu.
<div align="center"><img src="https://772941315-files.gitbook.io/~/files/v0/b/gitbook-legacy-files/o/assets%2F-M5LNCGpK5lyymcFZU4V%2F-MPEczQ460NoNlTp6-Jb%2F-MPEg-gyZiDqF54_O4MV%2F2020-12-23_14-00-36.gif?alt=media&token=7ffb5b6e-4635-44a7-9deb-b42ff1682bcd" alt=""></div>
## The overview
The page overview shows three pages by default. These pages can be customised and displayed on the virtual event platform. The purpose of these pages will be explained in more detail below.

### The pages
{% tabs %}
{% tab title="Everything about our platform" %}
{% hint style="info" %}
Our default text will be displayed on the landing page when not adjusted.
{% endhint %}
Name the page. In the main text box add information about the platform.

Click on 'Save changes'.
<div align="left"><img src="https://772941315-files.gitbook.io/~/files/v0/b/gitbook-legacy-files/o/assets%2F-M5LNCGpK5lyymcFZU4V%2F-MPEczQ460NoNlTp6-Jb%2F-MPEl-fRhM1X6PGSsiL8%2F2020-04-21_16-54-51%20(2)%20(1)%20(1)%20(1)%20(2)%20(1).gif?alt=media&token=d2926e62-4645-499c-9891-d5cfec95334a" alt=""></div>
The page is now visible on the landing page:

{% endtab %}
{% tab title="FAQ" %}
{% hint style="info" %}
Our default FAQ is displayed for events with a core [package](https://knowledge-base.letsgetdigital.com/pricing-and-packaging/service-packages).
{% endhint %}
In the main text box, add the FAQ answers and questions. It is advised to write down the questions in **bold** to make a distinction between questions and answers.

Consult our [Frequently Asked Questions](https://eventinsight-consultants.gitbook.io/let-s-get-digital/faqs-for-the-lgd-website) article to see some frequently asked questions which could be of use for the FAQ page.
Click on 'Save changes'.
<div align="left"><img src="https://772941315-files.gitbook.io/~/files/v0/b/gitbook-legacy-files/o/assets%2F-M5LNCGpK5lyymcFZU4V%2F-MPEczQ460NoNlTp6-Jb%2F-MPEl-fRhM1X6PGSsiL8%2F2020-04-21_16-54-51%20(2)%20(1)%20(1)%20(1)%20(2)%20(1).gif?alt=media&token=d2926e62-4645-499c-9891-d5cfec95334a" alt=""></div>
The page is now visible on the event page:

The FAQ page can also be set up by using the questions and answers function:

The page is now visible on the event page:

#### Changing the order of the FAQ questions:
In the admin panel, hover over 'Content' and choose 'Page', and then click on the edit button next to 'FAQ'. Here, you will find a drag-and-drop menu to change the order of the questions:

{% endtab %}
{% tab title="Prepare yourself" %}
{% hint style="info" %}
Our default text will be displayed on the landing page when not adjusted.
{% endhint %}
Name the page. In the main text box add information about the platform.

Click on 'Save changes'.
<div align="left"><img src="https://772941315-files.gitbook.io/~/files/v0/b/gitbook-legacy-files/o/assets%2F-M5LNCGpK5lyymcFZU4V%2F-MPEczQ460NoNlTp6-Jb%2F-MPEl-fRhM1X6PGSsiL8%2F2020-04-21_16-54-51%20(2)%20(1)%20(1)%20(1)%20(2)%20(1).gif?alt=media&token=d2926e62-4645-499c-9891-d5cfec95334a" alt=""></div>
To edit the text displayed after the arrows, click on the question mark under actions for the 'Prepare yourself' page.

A page will be displayed where you can edit the header and the text under the header by clicking the edit button under 'Actions':

The page is now visible on the landing page:

{% endtab %}
{% endtabs %}
## Registration & Pre-event page
The registration & pre-event page can be edited in the general settings. More information on how to set up the pre-event page can be found in [this article](https://knowledge-base.letsgetdigital.com/the-admin-panel/settings/general-settings-app-+-vp-1/registration-and-pre-event-page).
---
[Next Page](/llms-full.txt/1)


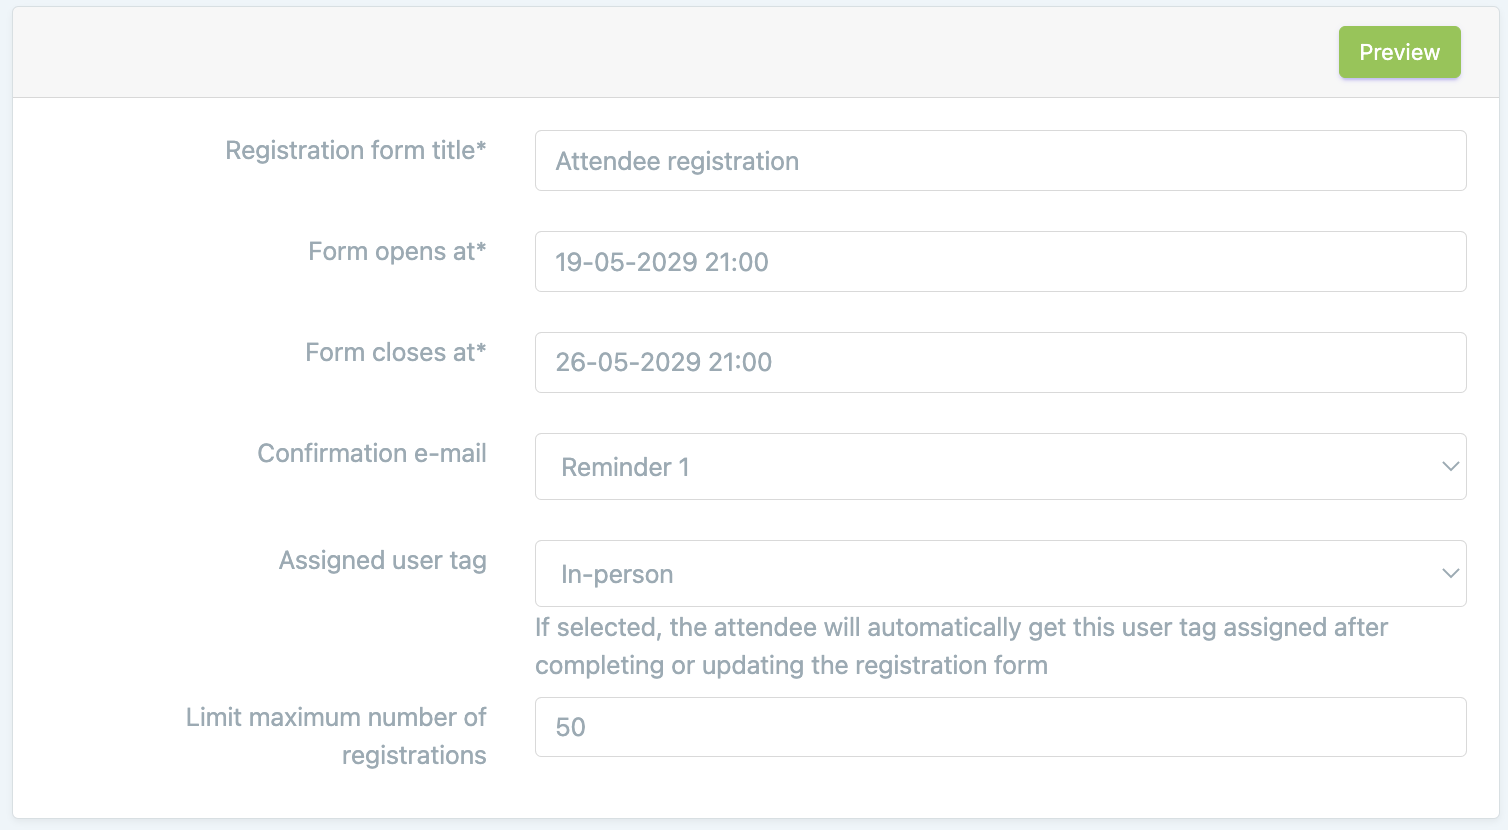

 .
2. Select 'Group Form Elements' from the dropdown.
.
2. Select 'Group Form Elements' from the dropdown.


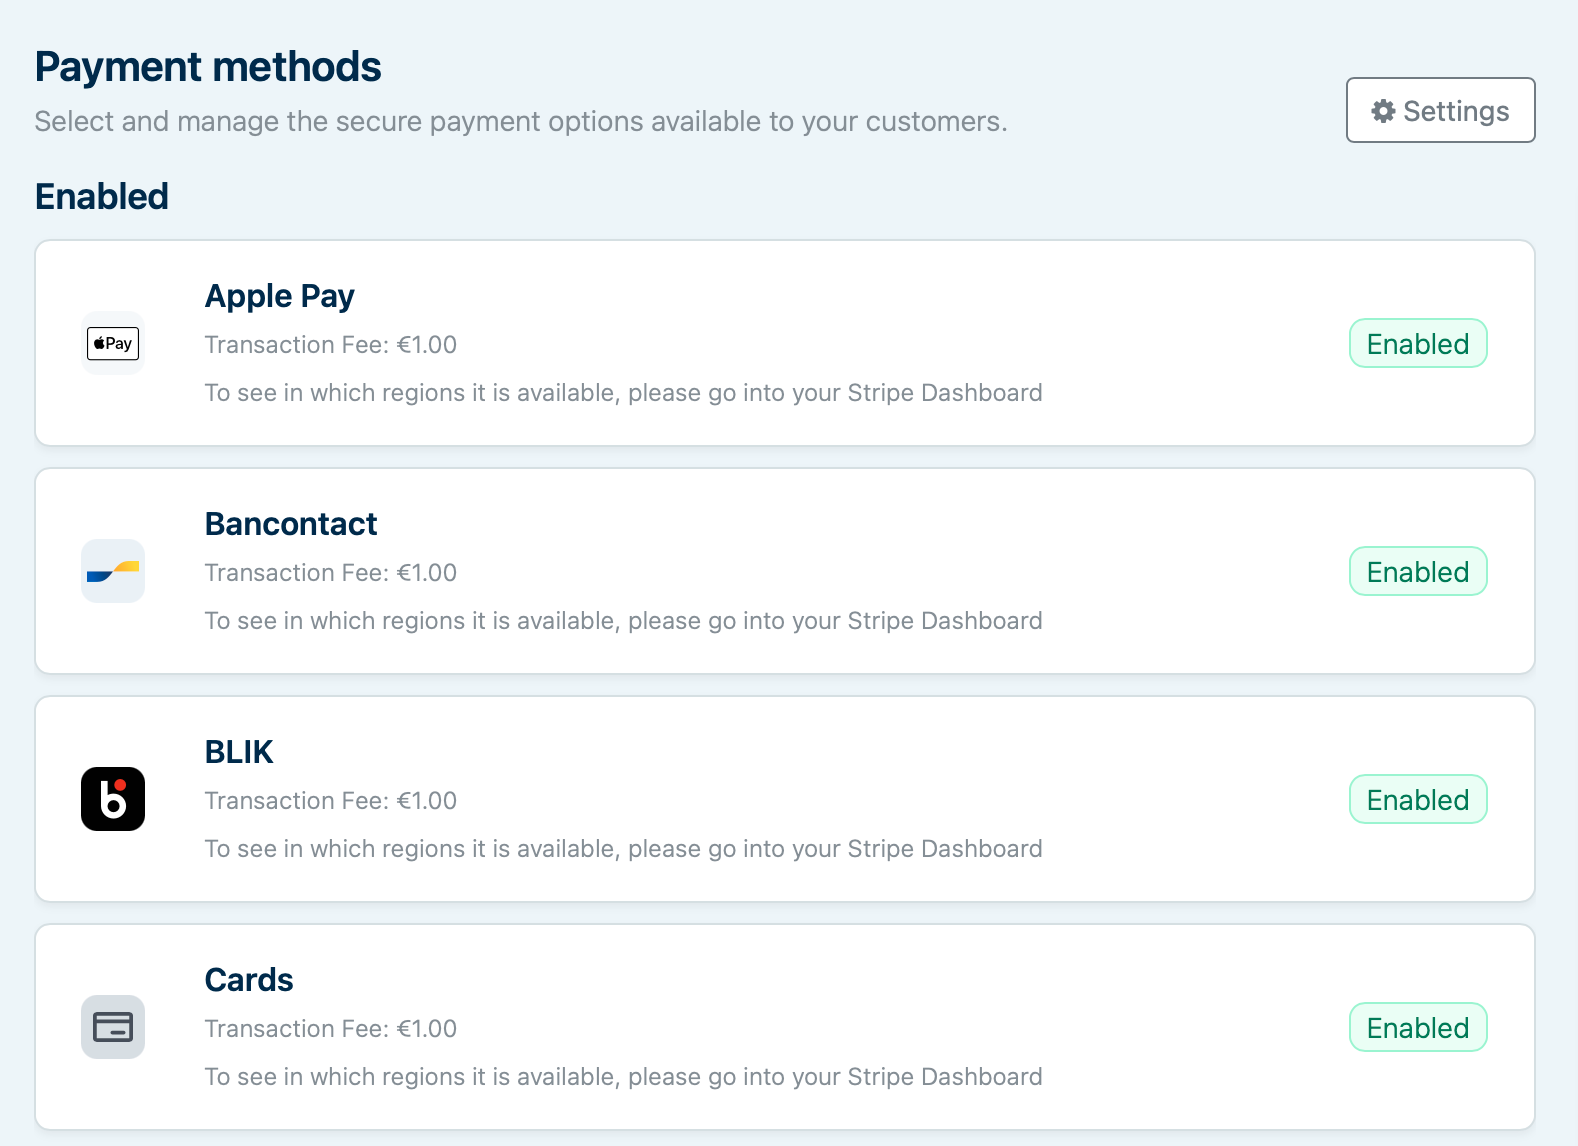

 You can integrate your Aanmelder.nl registration form into Let's Get Digital.
This allows you to automatically sync users who have registered via the Aanmelder.nl form into your event environment. \
\
The user data that can be synced is as follows:
* Users Name
* Users Company name
* Users Company role
* User E-mail
* Users Phone number
* Users personal program
* Users personal QR-code
* Users login codes
### Setting up the integration
To integrate your Aanmelder.nl registration form into Let's Get Digital please follow the steps below carefully:
You can integrate your Aanmelder.nl registration form into Let's Get Digital.
This allows you to automatically sync users who have registered via the Aanmelder.nl form into your event environment. \
\
The user data that can be synced is as follows:
* Users Name
* Users Company name
* Users Company role
* User E-mail
* Users Phone number
* Users personal program
* Users personal QR-code
* Users login codes
### Setting up the integration
To integrate your Aanmelder.nl registration form into Let's Get Digital please follow the steps below carefully: 


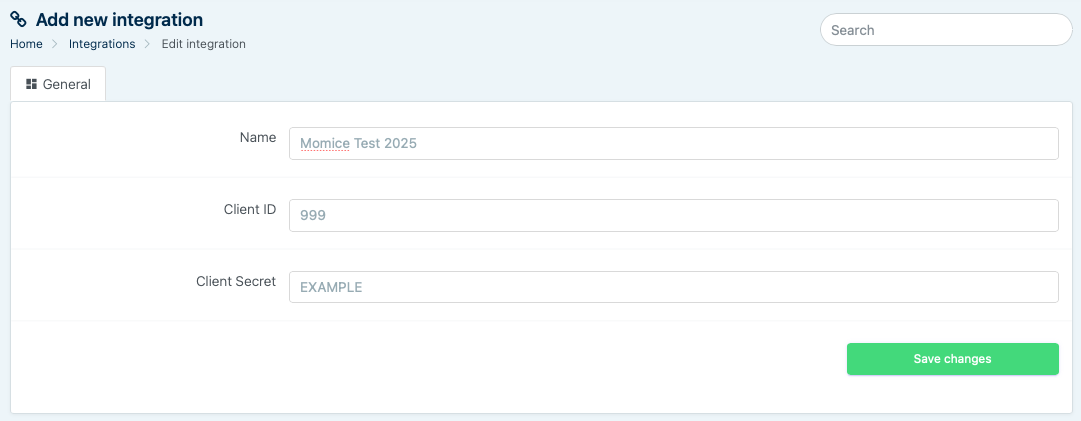
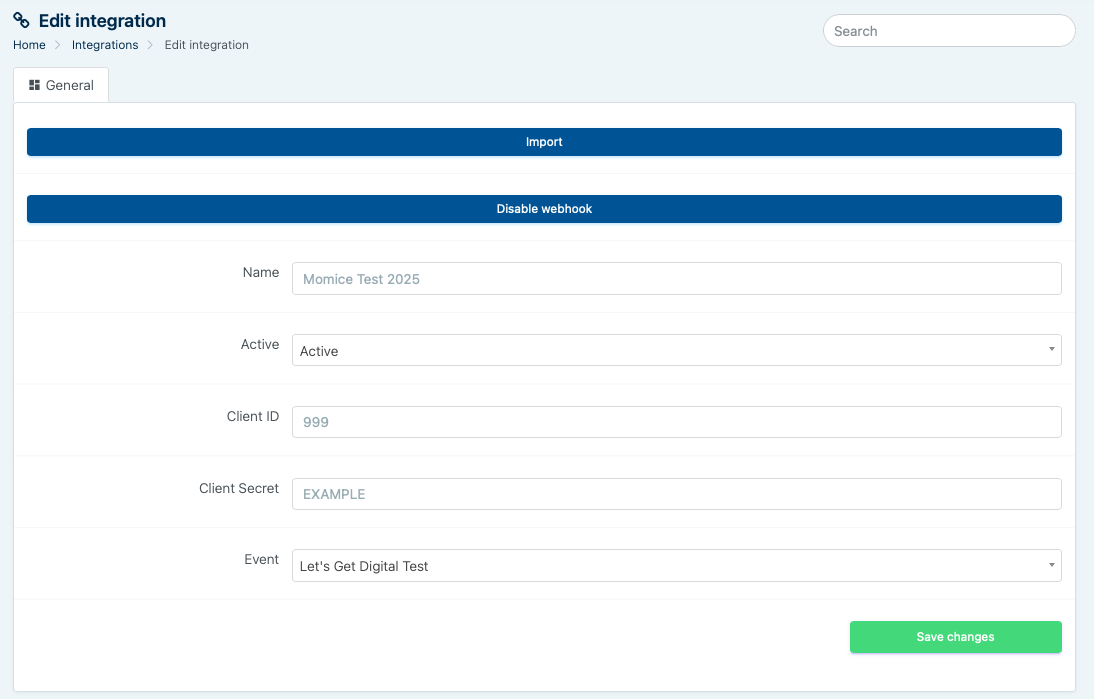

.png?alt=media&token=2496d6ae-a33a-40ca-bf8c-b04757336ab6)
.png?alt=media&token=e54d24df-2b3d-455e-bcb7-81fb7e29601f)

.png?alt=media&token=ceef779b-ac0b-42eb-9700-9223a767ca7a)


